Week 4 Student Blog Challenge
WEEK 4: CATCH UP OR FREE CHOICE
Phew! The first three weeks of the Student Blogging Challenge are the hardest. There’s a lot to learn and set up!
You’ve been working hard and now it’s time to catch your breath.
This week you’ll have some space to catch up on the first three tasks or write a free choice post. I’ve got some more ideas for you below.
Week Three Recap
 There were many great posts submitted again by classes and students.
You can find them all here (or click on the week three box on the sidebar).
Let’s take a look at just some of the fantastic work we spotted last week:
- Josiah wrote a great story that included some tips for taking perfect photos. He’d love to hear from you!
- Mrs. Yollis ran a powerful lesson for her students to learn how it feels when your work is stolen. Read about it here and check out her sidebar for some excellent student blog posts.
- Mrs. Wermager proved you don’t need fancy tools to make a fun interactive blog post. Can you guess her hand-drawn sentence?
- The students from “Ready, Set, Blog” in Melbourne, Australia would love you to click on the links on the sidebar of their blog to try guessing their sentences.
- A student in Mrs. Matveyeva’s Class in Kazahkstan shared their top 5 hip-hop artists using free images. If you’re a music fan, be sure to leave a comment!
- Rachel made a video to explain how to avoid copyright infringement when getting images off the web.
- You can view more great work on our 2019 Student Blogging Challenge Flipboard.
Two Mid-Week Posts
During the week I published two posts that I invite you to check out:
- 11 year old Lauren made a great tutorial about random header images. I’d love to publish some more student tutorials so let me know if you write one.
- I wrote a post to explain how to make sure your Google Doc/Form/Slide is public if you’re using them in your blog posts.
Reminders
Here are a few important reminders:
- Please keep approving comments quickly. Some students don’t realise they have comments waiting to be approved in their dashboard.
- Do your posts have images? Images make posts much more shareable and they stand out a lot more on our Flipboard magazine. Remember, as we discussed in week 3, you can’t just use any image you find on the web, however, there are lots of options available to you.
- Posts that are proofread and written in short paragraphs are much easier to read! Need help with proofreading? Try a free tool like Grammarly. Note: Grammarly is 18+ but if you’re aged between 13-17, you can use it with permission.
- Are you writing in a language other than English? Please add a Google Translate widget to your blog by following these instructions.
Quick Tutorial
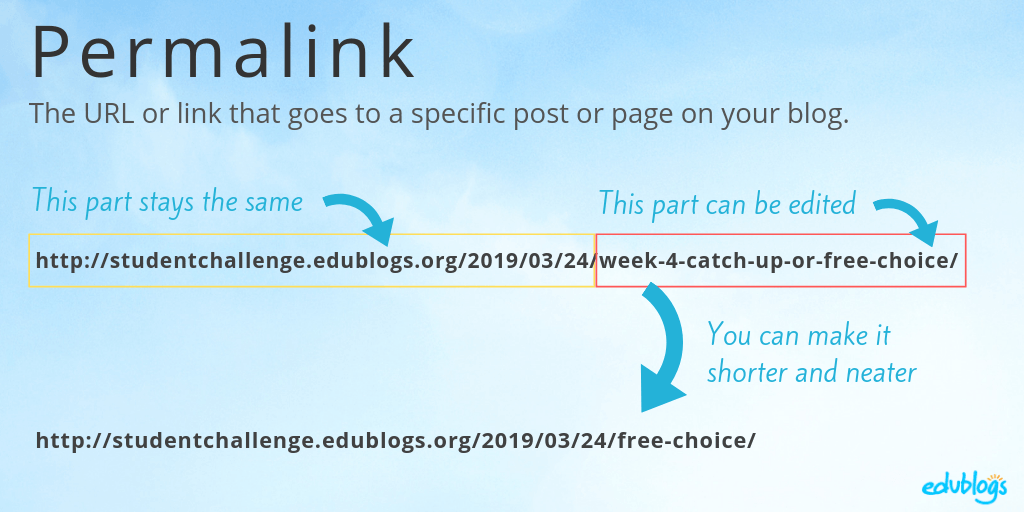
Did you know you can edit the permalink or URL of your post before you publish it? This can make your URL neater and easier to share.
This quick video explains how to edit your permalink if you’re using Edublogs or CampusPress.
Remember never to edit your permalink after you publish a post or people will no longer be able to access the post with the original URL you shared.
Now it’s time for this week’s task…
Week Four Tasks
This week’s tasks are simple but I’ve offered a little elaboration below the summary graphic.

Task 1: Catch Up
You might not have had the chance to complete a task for week 1-3. Or you might like to complete an additional task from the choices on offer. Go for it.
Here are the links (you’ll also find them on the sidebar of the challenge blog).
Note about Google Forms:
- The Google Form for week one tasks is closed.
- If you’re catching up on a week one task, you can add it to the Google Form at the bottom of this week four post.
- If you complete a week two or three task, please go to the correct Google Form as these are still open.
Task 2: Free Choice

What’s something that interests you? Write about it!
Stuck for ideas?
- Check out these 100 blogging prompts for students.
- Here are 50 more blogging prompts for students.
- Saturday 30th March is Earth Hour. Read about this important event and write a post about it.
- This week’s post on TheEdublogger.com which will be published Monday/Tuesday (depending on where you live) has 15 poetry activity ideas.
- One of our great commenters, Sheri Edwards, created a tutorial showing how to make a character out of Google Drawings. Why not make a character and blog about it?
If you write a free choice post this week, submit it in the Google Form at the bottom of this post.
Task 3: Visit
You might have a bit of extra time this week so it could be a good opportunity to visit at least one other blog and leave a quality comment.
Remember to ask a question and check back to see if they replied to you (most platforms have a box to tick so you can get an email when there is a follow-up comment).
Task 4: Kahoot!
Have you ever played Kahoot? Get some friends together and test your blogging knowledge with our 15 question quiz!
How Kahoot! works:
- The multiple-choice questions appear on the screen in the classroom and students submit their responses in real time using their computer, tablet, or mobile device.
- Students can work in teams and can work for points (most correct answers and quickest responses).
Our Introduction To Blogging Kahoot goes over some of the key terms, vocabulary, and uses of blogs.
How To Play Our Blogging Kahoot!
- To access the Kahoot, click on this link.
- You don’t need an account to play, however; you will need to log in if you want to edit the quiz (teachers can adapt it for your own students if necessary).
- You also need to be signed in to save results.
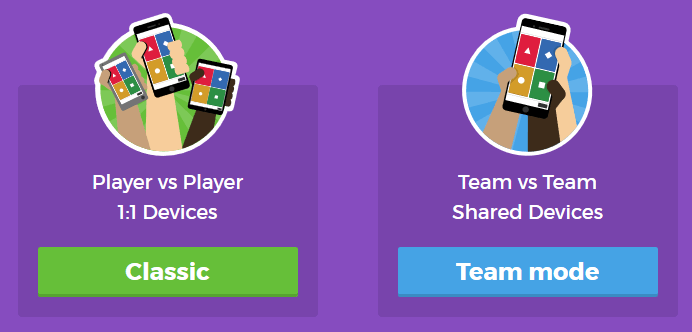
- You’ll have the option for your students to play against each other individually (classic mode) or in teams.
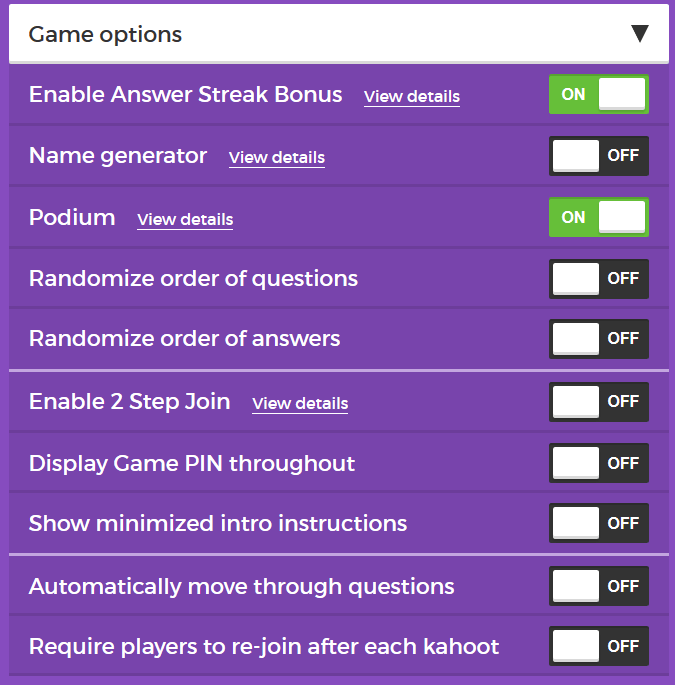
You’ll also have a variety of game options you can play around with (see below).
Once you finalize your selections, a game pin number will show up. Students will go to the Kahoot app on their device, or to https://kahoot.it/ and enter the pin number to begin!
Feel free to leave a comment on this post and tell us if you tried the Kahoot!
Submit Your Post URL ⬇
If you write a free choice post and would like a commenter and others to visit, fill in the form below.
Do you have a post on your class blog and student blogs? Awesome! Feel free to submit the class blog post and student blog posts.
You need to submit the URL of your post. You can submit the URL of a page if this is what you’re working on but make sure comments are enabled.
This video shows you how to find your URL…
Note, this isn’t a real class blog. Just one I used for testing 😉
Remember:
- Click on the title of your post/page and then copy the URL from your address bar.
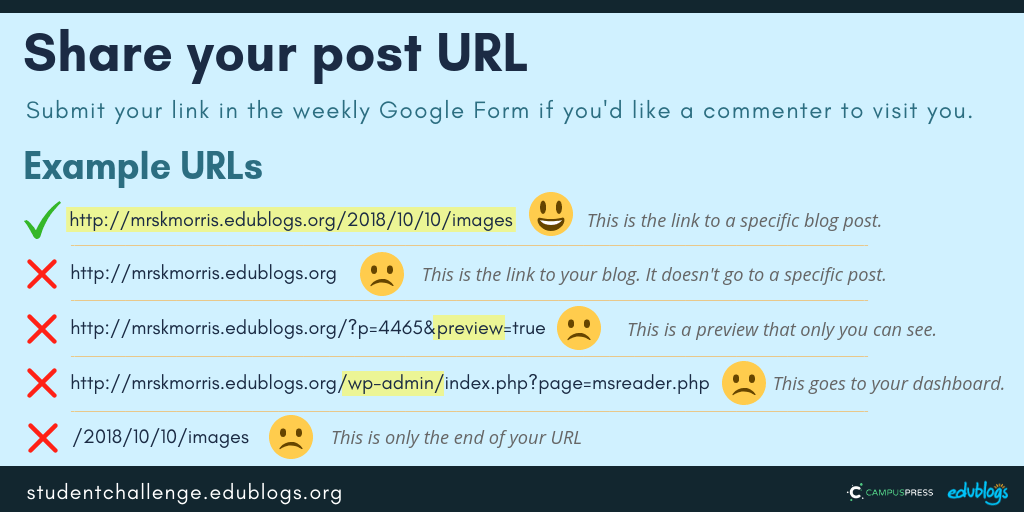
- This graphic below should help you understand what a post URL looks like if you’re using Edublogs/CampusPress/WordPress
 The Google Form
Edit: Enter your details in the form below or click here to open it in a new tab.
Teachers, feel free to put the form URL on your class blog if it’s easier for your students to access.
https://goo.gl/forms/gdOIFHmKm3xQv46i1
Next week’s topic: School Around The World!
REMINDER: USING GOOGLE DOCS AND SLIDES
Many students and classes are enjoying publishing their tasks as a Google Doc or Google Slides presentation. This is fantastic!
However, there is one recurring problem.
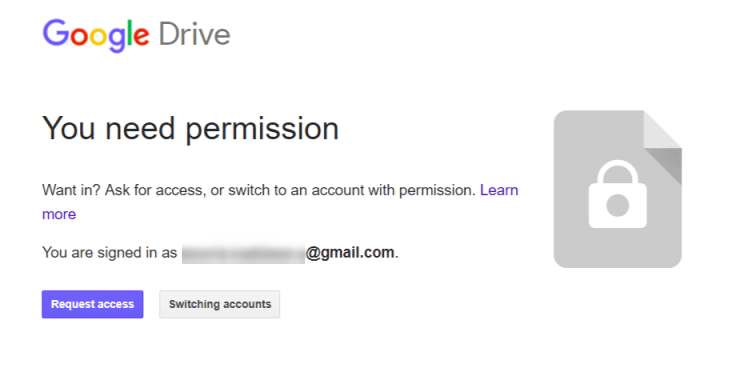
Those using a Google Doc/Form/Slide presentation are often not changing their privacy settings so anyone can view it.
Viewers are told they don’t have permission to see the work.
How To Make Your Google Docs And Slides Public
- At the top of your Google Doc, Sheet, or Slides, click File and then Publish to the web.
- You’ll be prompted to choose a publishing option. E.g. With a Google Slides presentation you can choose how quickly to advance the slides.
- Click Publish.
- Check whether others can view your work by opening your blog post in Google Incognito or another browser you’re not logged in to.
- These instructions show you how to embed your Google work in an Edublogs or CampusPress blog.
Also, if you’re including the link to a Google Slides presentation on our weekly Form, please make sure the setting is allowing for comments. The best approach is to add the presentation to a blog post and share the blog post URL. That way, people can comment on your post.
All this is part of the learning how and when to share work to a public audience. Such an important skill for teachers and students!
Need help? Just leave a comment and I’ll get back to you.
STUDENT TUTORIAL: ADD AND RANDOMISE CUSTOM HEADERS
I was recently visiting the blog of 11 year old Lauren from Adelaide, South Australia.
I noticed she had some cool headers showing up on her blog and they change as you navigate the blog.
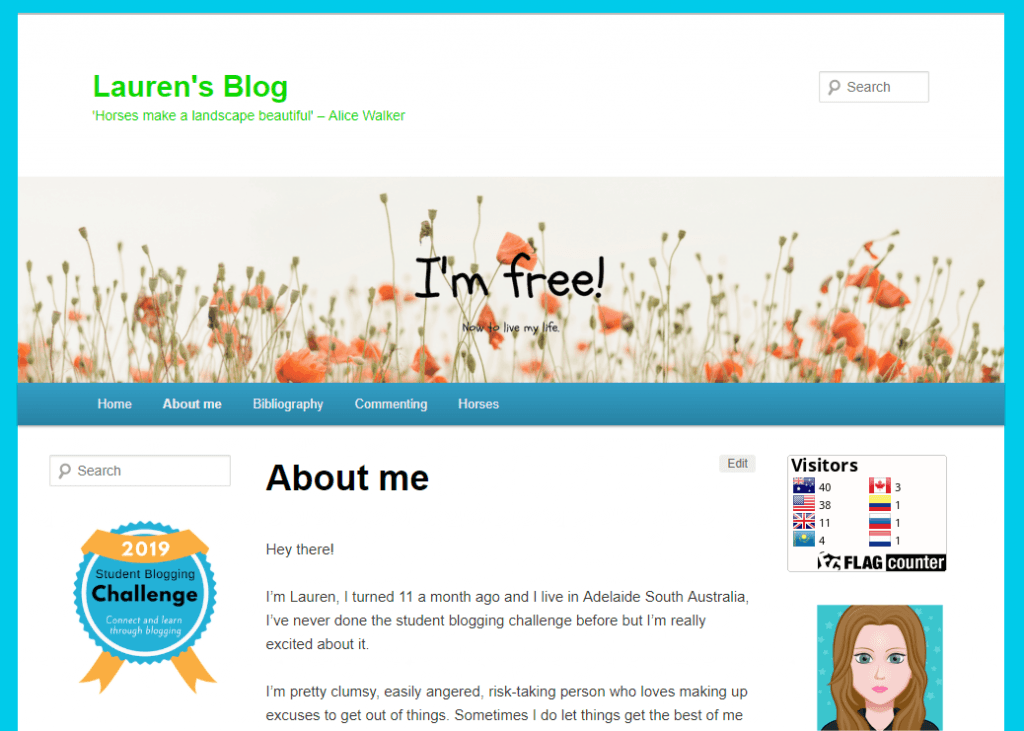
I asked Lauren how she did this and she put together a quick video to share with you all!
She made her images using Canva and her blog is with Edublogs.
Any feedback for Lauren?
Lauren is happy to hear any feedback or answer any questions. You can leave a comment on this post or head to the original post on her blog and leave a comment there.
Do you want to make a student tutorial?
I’d love to publish some more student tutorials here on the STUBC site.
If you’ve figured out how to do something on your blog (or on a web tool that you can add to your blog), feel free to make a tutorial, either with text/images, a slideshow, or a video.
Share it with me via a blog comment, an email, or Twitter and I’ll see if we can include it on the site!