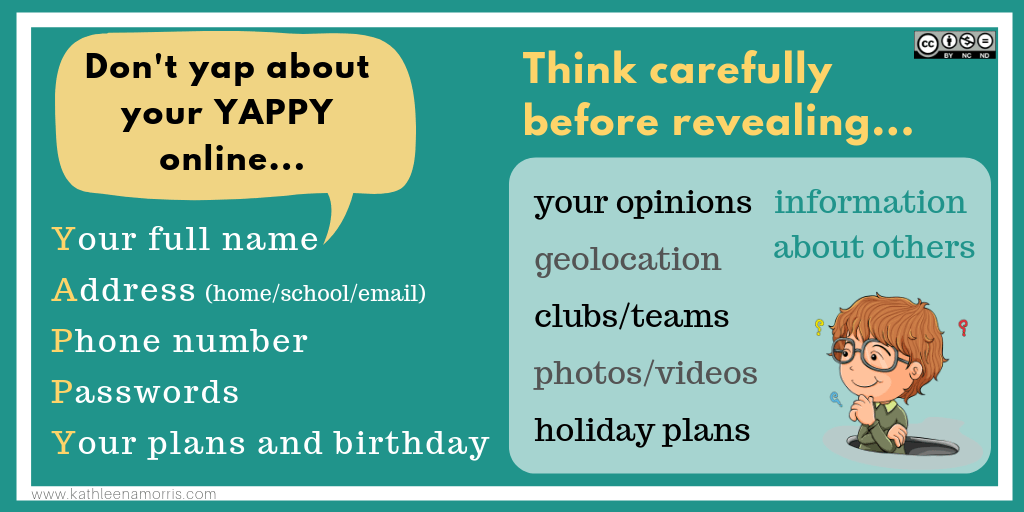
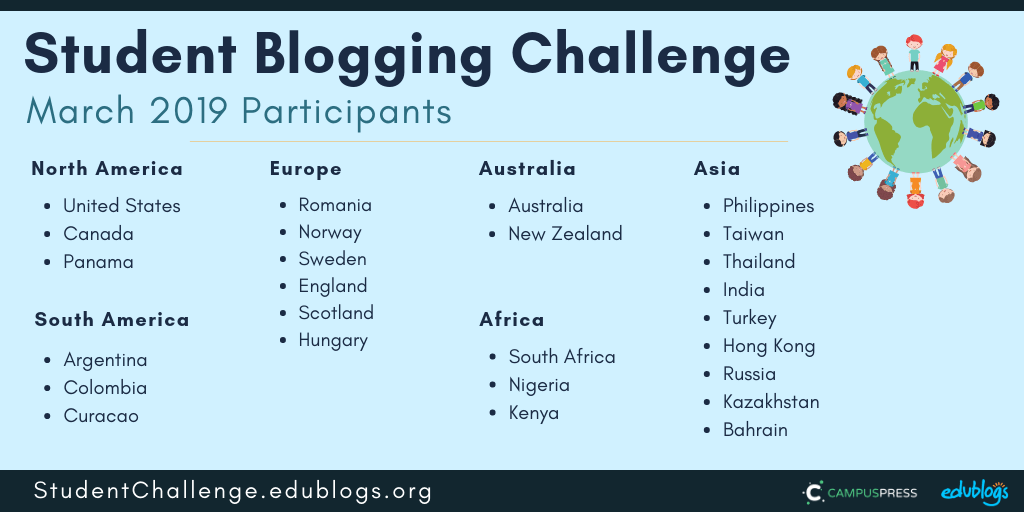
Week 3 Student Blog Challenge
WEEK 3: FUN WITH PHOTOS
This week’s topic is an important and useful one to know about. We’re going to have fun using photos while learning how use images easily, legally, and safely.
- Some people find this topic confusing but don’t worry. I’ll break it down for you in this week’s post!
- This post is long as there’s lots for you to learn. Remember to use the menu on the right hand side if you’re on a computer.
Next week we will be having a catch up/free choice week so you can catch your breath!
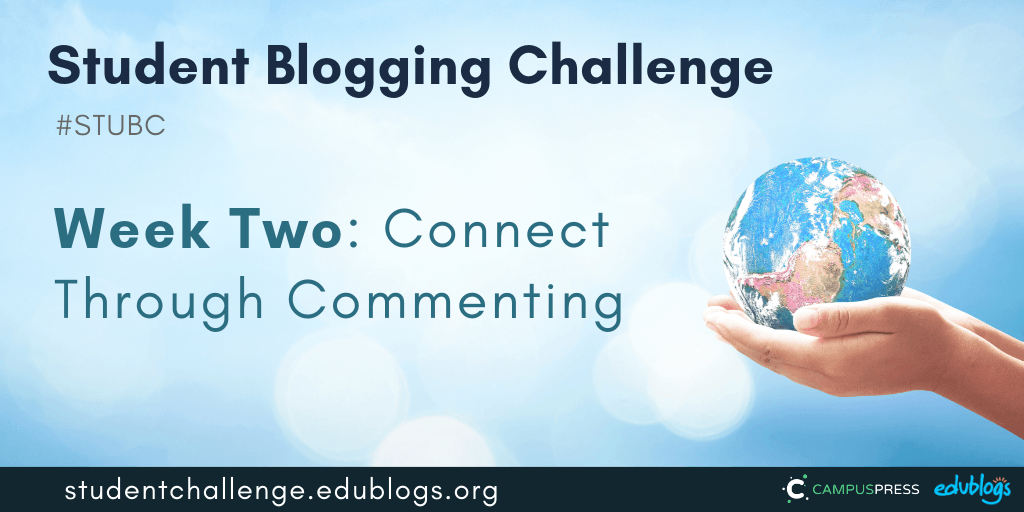
Week Two Recap
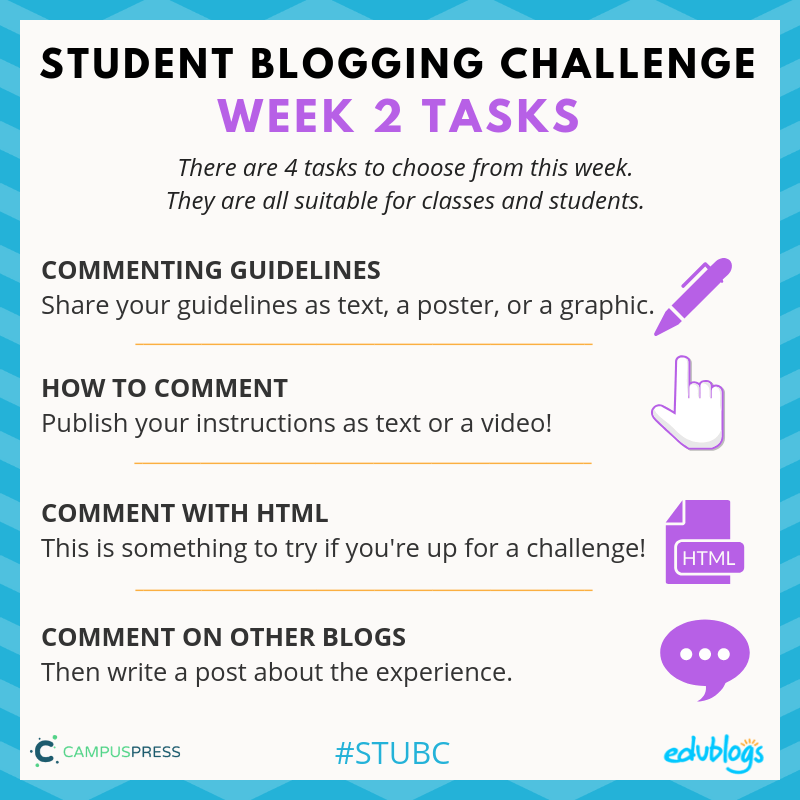
 There were so many great posts submitted by classes and students.
You can find the participants’ week two posts by click on the purple link on the sidebar.
Many students have also submitted a week one task late. Check these out by clicking on the green link on the sidebar.
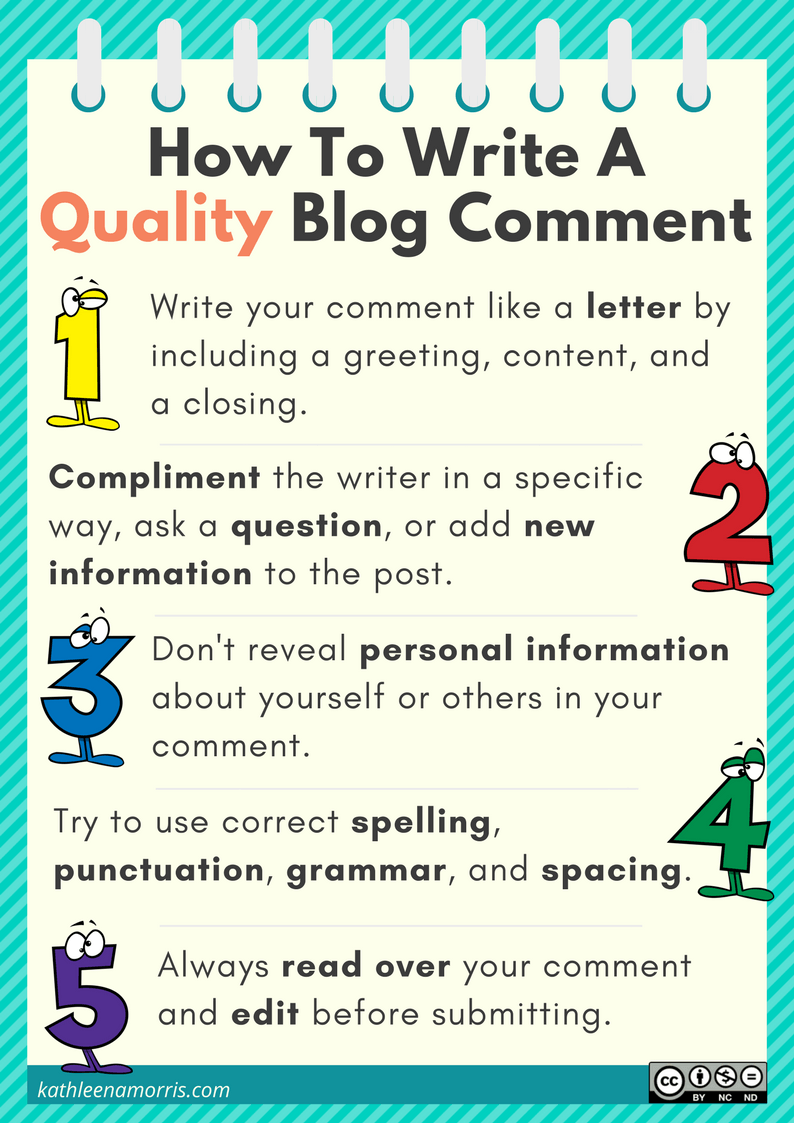
Let’s take a look at just some of the fantastic work we spotted for week two:
- Mrs. D from Arizona had her 6th graders vote on their commenting guidelines which they then put into a fabulous poster. Check it out here.
- Noe is an experienced student blogger who shared his views on how to leave the perfect blog comment.
- Jerry from Taiwan shared some tips about quality commenting. Using bold words to make certain things stand out was a good idea!
- Miaomiao from Australia included a cute comic where a dolphin and turtle learn about quality commenting. Her classmate Lauren made her own respectful commenting graphic which she put on a page. If you’d like to leave Lauren a comment, you can do so on this post.
- Manav from Mr. Balak’s class in the US got creative with Scratch and made a game. You can find the link to the game here.
- Mrs. Yollis made a wonderful infographic using Canva and Bitmoji to share her expectation for quality comments. Also, check the creative work of her students “Dr. Hagle” and “Sarah Gold” who used Puppet Pals to explain quality commenting using a Fairy BLOGmother!
If you ever come across any outstanding work in your class or another class I’d love to know about it so I can share it with others. Email me, leave a comment on a STUBC post, or tweet me!
Click here to view the new 2019 Student Blogging Challenge Flipboard for more notable posts.
Flipboard is a digital magazine that brings together stories and articles from the web.
You can use Flipboard on your computer, or via the app on your phone or tablet.
Reminders
A few days ago our commenting team leader, Sue Wyatt, published a post with suggestions for adding a visitor tracking widget to your site. Read that post here.
Here are a few more challenge reminders:
- Are you on our mailing list? Sign up here and make sure you add support@edublogs.org to your email contacts so it doesn’t end up in junk/spam. I send an email every Sunday.
- Please keep approving comments quickly. Some students don’t realise they have comments waiting to be approved in their dashboard. Remember, it’s good etiquette to reply to comments.
- You don’t need to request access to view/edit the spreadsheets with participants’ posts that are linked on the sidebar. They are ‘view only’ and open to everyone. Please let students know.
- Edublogs/CampusPress users with student blogs — If all the students in your class have blogs and your teacher uses ‘My Class’, you should have a widget called ‘Class blogs’. Make sure this is on your sidebar. This video shows you how.
- Some people have put a link to a Google Doc/Form/Slide presentation in their post BUT it can’t be viewed without logging in. This resource shows you how to make your Google Docs, Sheets, Slides, and Forms public.
- Haven’t caught up on week one and two? Don’t worry! You can complete your tasks late, or skip some tasks. Please submit your task in the correct form (e.g. if you complete a task from week one, go back to the week one post and add it to the form). The forms are closed 3 weeks after each post is published.
Let’s Learn About Images
A blog without images would be pretty boring, wouldn’t it?
Images can really jazz up our posts, pages, headers, and widgets. Students and teachers also need images when they’re making a presentation, video, or other digital creations.
But where do we get those images?
Can’t we just use Google Images?
Do you know how to find pictures using Google? It’s so easy. You just type in the word you want, find the image you like, and save it to your computer.

But stop right there!
Should we be doing this? Should we be getting any image we like from Google and using it in our own work?
The answer is no.
As Ronnie Burt’s cat has told our community before…
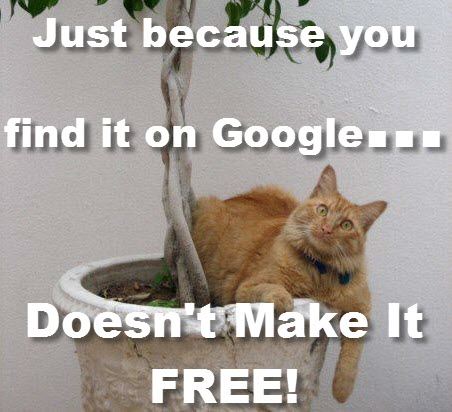
Most images on Google are protected by copyright. This means, they are not free to use and you can get into trouble if you do use them without permission.
You can use Google Images advanced search filter to find images that you are allowed to use but this isn’t as simple as it seems. You need to know what the usage rights mean and how to attribute correctly.
We have some easier options to share with you this week.
Including the source is not enough…
A situation we commonly see on blogs is where someone uses an image they found online and then include a link to the site they got it from.
For example,
Just because you link to the source of an image, does not mean you can use it. You would need to ask the image creator for permission.
Unless stated otherwise, everything on the web is protected by copyright.
Let’s take a look at some options for finding images…
Where Can You Find Images?
I have a post on my own blog that goes through the 5 main ways to find images for blog posts or other digital work.
Here is a summary. Feel free to use this poster on your blog or in your classroom if it’s helpful.
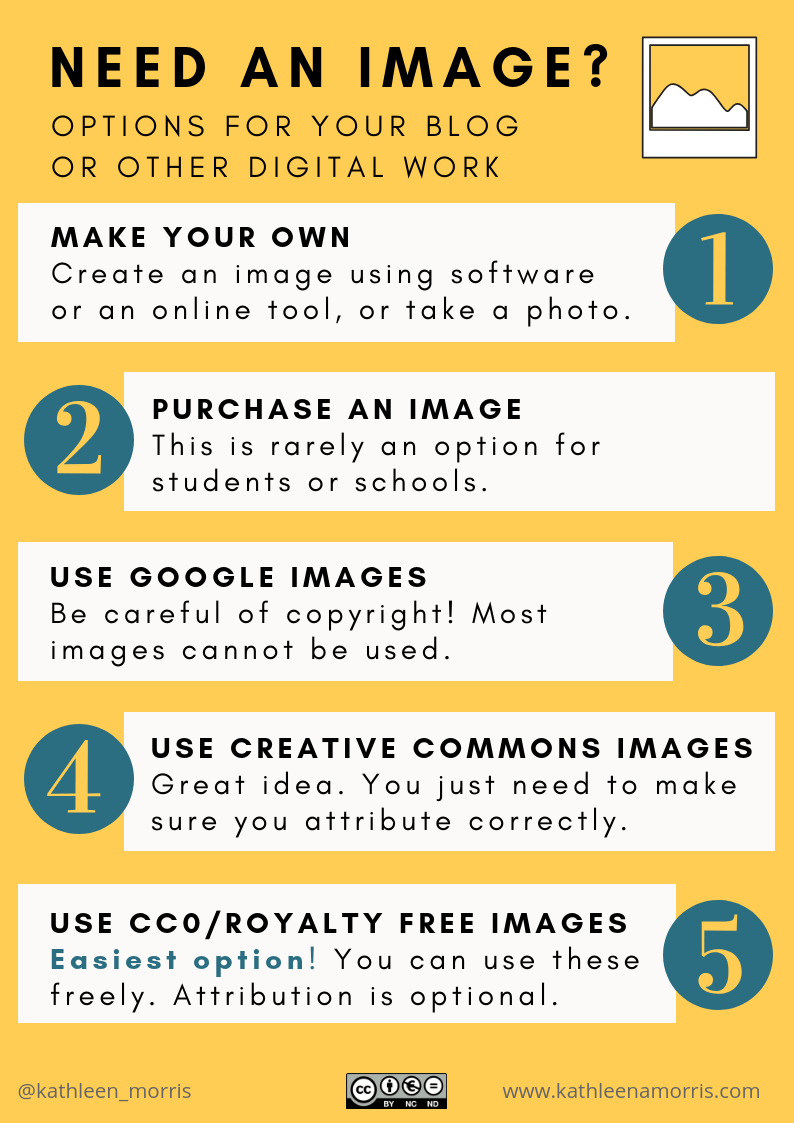
Let’s take a closer look at each option:
1) Making your own images is an excellent option
This can be done either by drawing, taking your own photos, using computer software, or using online tools.
Just be mindful of two things:
- This can take a long time and leave you with less time for your writing or other work.
- Many online tools have age restrictions (often over 13).
2) Many businesses purchase stock photography
We often do this for our posts on The Edublogger.
We pay a hairdresser when we get a haircut, pay a baker for a loaf of bread, so why not pay a photographer for their work?
This is good to know about as an option but isn’t something schools or students would usually do.
3) Using Google Images is not usually a good idea
We talked about this above.
Most images that you find on Google are protected by copyright. Find out more about copyright by watching this short video.
4) Creative Commons is worth knowing about!
Everyone’s work is protected by copyright unless stated otherwise.
Many people are happy for others to use their work (as long as they give them credit etc.). They give their work a Creative Commons license to tell everyone what they can or cannot do with their image (or text, videos, music etc).
- Copyright means the person who took the photo (or created the work) does not allow anyone to use it.
- Creative Commons means the person who took the photo (or created the work) does allow people to use it IF they follow certain rules.
- Usually, these rules mean saying who created the image/work and where it’s from.
- Sometimes the rules state that you can use the image/work only if you don’t change it or don’t use it as part of something you’re selling.
- These rules are called licenses.
- There are a number of Creative Commons licenses creators can choose from.
- No matter what license is used, you must always attribute the creator of the image/work (unless it’s a Creative Commons Zero license — see point 5). Attributing means crediting the author. In a blog post, this usually means putting the attribution under an image as I’ve done below.
Here’s a short video by Nancy Minicozzi that explains Creative Commons.
- Learn more about Creative Commons licenses.
- How to attribute Creative Commons images.
- Find Creative Commons images with this search engine.
A plugin to make attribution easy
The trickiest part of using Creative Commons images is often the attribution (crediting the creator: saying who the creator is, where it’s from, what the license is etc).
If you’re using Edublogs or CampusPress, there’s a plugin you can use to find and insert Creative Commons images without worrying about attribution. It’s called Pixabay.
- Find out how to use the Pixabay plugin in this guide.
Important notes about the plugins:
- While the Pixabay plugin provides safe filtered options, nothing is foolproof. Younger students should be supervised or use Photos For Class for the safest option.
- If you’re familiar with the old Compfight plugin, this is no longer available as it doesn’t work properly with the latest versions of WordPress.
5) Creative Commons Zero or royalty free images are the easiest choices
If your mind is spinning with all that talk of Creative Commons licenses and attribution, don’t worry!
Creative Commons Zero (CC0) or royalty free images are easy to use.
These are the least restrictive licenses so anyone can use the images freely and attribution is optional.
There are an increasing number of sites where you can find CC0 or royalty free images but remember:
- Many sites contain inappropriate content if you search for it
- Many sites have age restrictions
I made this comparison chart to show you some of the best options to find images that you can use freely without attributing.
You can read a detailed description of each one in my blog post if you’re interested.

In the activity section below, you’ll also find some task cards to help you easily source images.
Help With Images
Adding an image to a post or page on your blog is quite straightforward.
If you haven’t figured out how to do this yet, check out these help guides:
- If you’re using Edublogs or CampusPress, check out this step-by-step guide. Or, I show you how to do it in this video.
- If you’re using Blogger, check out these instructions.
- If you’re using Kidblog, you’ll see where to add an image in this guide.
- If you’re using Weebly, these instructions will help.
Week Three Tasks
This week there are five tasks to choose from to help you learn more about using images. The third task links with doing either task four or five.
Here is a summary. I will explain each task in more detail below with some examples and ideas for how classes can approach each task.

Task 1: Educate Others
Many teachers and students around the world know very little about using images legally, Creative Commons, attributing Creative Commons images etc. You can help them learn while learning more about this topic yourself.
Do some more research into any of the topics discussed this week and make a blog post, poster, video, slideshow etc.
If you’re working as a class on this activity, perhaps students could work in small groups to create a poster or video to share in a post (or a series of posts). Or, all the students could make a slide for a slideshow.
Example:
This video is the reaction of students in Mrs. Yollis’ class when she mislabelled their artwork. It helps people learn about the importance of correct attribution.
Coincidentally, one of Mrs. Yollis’ students “Jodie Bloom” wrote a blog post about this activityyesterday.
More examples:
- Georgia summarized the places you can find images and included a slideshow.
- Chris explains why you can’t take images off Google.
- Izzy wrote a fabulous post about not using copyright materials.
Task 2: Make An Image
Creating your own images for your blog posts is a great idea! You don’t have to worry about copyright and Creative Commons.
You can:
- Draw something and take a photo of it.
- Take a photo of something in your surroundings (don’t use photos of other people without permission and remember not to include personal details like the front of your house).
- Use an app on your iPad or tablet. Here are some recommended apps for different ages from Common Sense Media.
- Use an online tool to make an image like Canva, Adobe Spark, Google Drawings, Pablo (good for making quotes), Wordclouds.com (for word clouds), Toondoo or MakeBeliefsComix (both good for making comics), Piktochart (good for making infographics).
Remember, some online tools have age restrictions.
Leave a comment on this post if you know any other good tools for making your own images.
Add your image(s) to a blog post and tell us a bit about the images and how you made them. If you used an online tool, include the link so others can try it.
If you’re working as a class on this activity, all the students could make their own image and the teacher could compile them into a Google Slide presentation or simply add them to a blog post (or series of posts).
Example:
- Alicia used MakeBelifsComix to share a message about the environment.
- Jena made a word cloud.
- Wesley shared an original photo he took for a photography class.
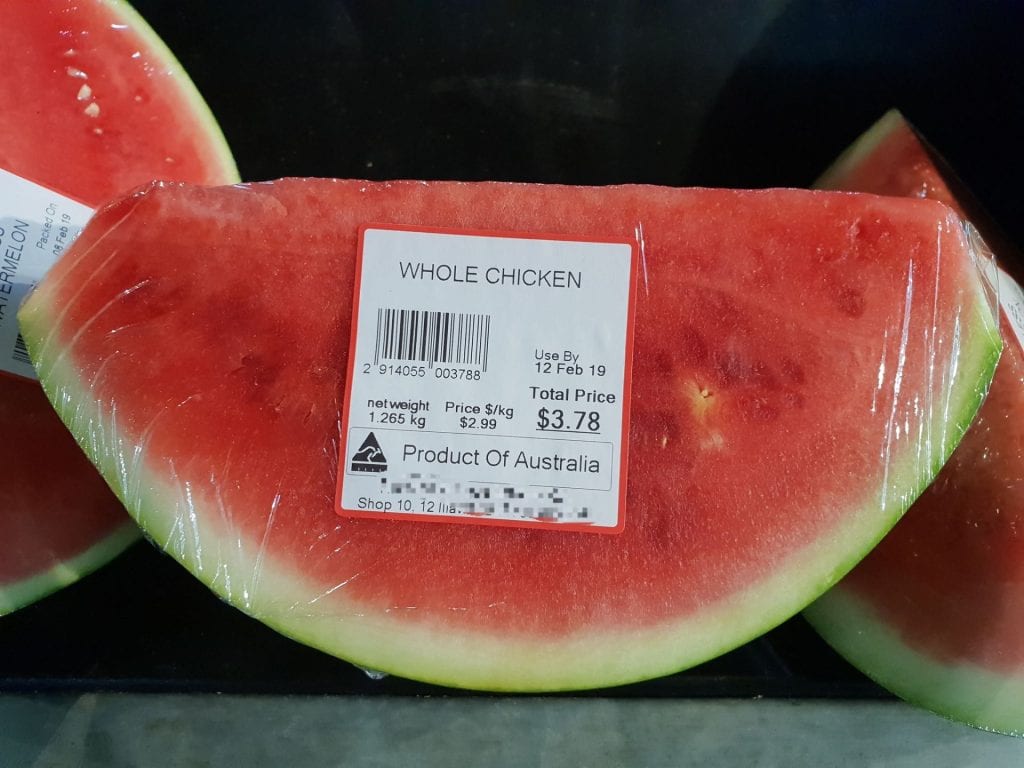
- Sue Waters from Edublogs took this funny photo of something odd she spotted at the supermarket. What can you find in your surroundings that makes you feel surprised, happy, amused, frustrated etc?
Task 3: Image Task Cards
This connects with task 4 and 5.
In the blog post I wrote about images for teachers and students, I prepared two task cards.
Depending on your age, use one of these task cards to find an image or a series of images to add to your post.
You could add a slideshow with some of your favourite images you found and write about why you like them. Or, you could use your images to complete task 4 or 5 below.
Tip: If you’re using Edublogs Pro or CampusPress, you can use the slider feature in the Live Shortcodes plugin to quickly add a slideshow to a post, page, or sidebar. Instructions are here. (Another option is the Metaslider Plugin) Find the instructions here.
Examples:
- Check out Brooke’s slideshow about her interests. She used a video program.
- Here’s Emmitt’s slideshow he created with Google Slides. Not sure how to add a Google Slides presentation to your blog? Here is a tutorial from Mrs. Vazquez.
- Here’s a simple slideshow I made with some images I liked on Unsplash. I used the slider in the Live Shortcodes plugin.
 We love going to the beach.


Task card for under 13s
Task card for over 13s
You’re welcome to print these task cards, or add them to your blog. To do this, you’ll need to click on the download button under the task card. Find out how to add a PDF file to your blog using Edublogs or CampusPress here.
If you’re working as a class on this activity, perhaps all students could use the task card to find an image. They could create a story, poem, or description for the image and these could be placed in a blog post (or series of blog posts). Or, the teacher could add some images to a post and ask the students to write an imaginative response in a comment.
Task 4: Write A Poem
Find an image using one of the task cards above. Or you can try the Pixabay plugin if you’re an Edublogs/CampusPress user.
Now write a poem about your image.
Need some inspiration or advice? Check out Ken Nesbitt’s site which has lots of poetry resources.
If you’re working as a class on this activity, you could write a poem as a class, or have students write their own poetry and publish them as a series of posts. Alternatively, the teacher could publish a photo and have the students write a poem in a comment.
Examples:
- Amelia wrote a poem about rain.
- ‘Frog’ farewelled summer in this poem.
- Naho wrote a poem called Because Of What We All Have Done.
- Sarah was inspired by a purple flower.
- Madison wrote a poem about eyes.
- Class example — I once made haiku poems with students and collated them in a Google slide presentation. I used the instructions from Erintegration to combine multiple slides into one large slideshow.
Task 5: Picture Prompts
First, find an image or series of images using one of the task cards above. Or you can try the Pixabay plugin if you’re an Edublogs/CampusPress user.
Next, you have two choices:
1) Add an image and write the start of a story. Ask your readers to complete the story.
Examples:
- Eshaan invited readers to complete the story of when dolls come alive!
- Christian’s story was called A Flight Throughout The Night
- Seo Yeon’s story included a dog
2) Or, make a sentence guessing game. Come up with a sentence and find a series of images to illustrate your sentence. Ask your readers to tell you what the sentence is in a comment.
Examples:
- Emily asks you to guess her sentence.
- Keylee asks you to guess her favourite food.
- Lily included a great introduction for her post.
Tip: You might need to visit some other bloggers and invite them to look at your post and complete your story or guess your word. Remember to leave the URL of your post for them to click on.
If you’re working as a class on this activity, you could publish a series of posts with the students’ picture prompts. Perhaps students could work in small groups. Or the teacher could publish the picture prompts and invite the students to respond in a comment.
Final Tips
Beware of advertisements
Remember, some of the free image sites have advertisements for paid image sites. We don’t want to click on those ads.
For example, on Pixabay, I typed ‘dolphin’ into the search box. The top row of results has a Shutterstock watermark on it. Clicking on this takes me to the Shutterstock website which is a site where you can pay for images.

Note: You won’t see advertisements when using the Pixabay plugin.
Do you need to go back and fix images in old posts?
Have you been using images from Google on your blog so far? Whoops. You might want to go back and fix these up when you have time. Remove the image or replace with a Creative Commons image.
Have you tried using categories, tags, or labels yet?
Categories, tags, or labels are all ways to organise your posts. It’s a good idea to set up a category (or label in Blogger) called Student Blogging Challenge or STUBC. You can assign this category to all the posts you write for the challenge.
- If you use Edublogs or CampusPress, maybe you need to start using categories? You can also use tags once you get the hang of it.
- If you use Blogger, try using labels.
- Weebly blogs use categories.
- Kidblog blogs also use categories and tags.
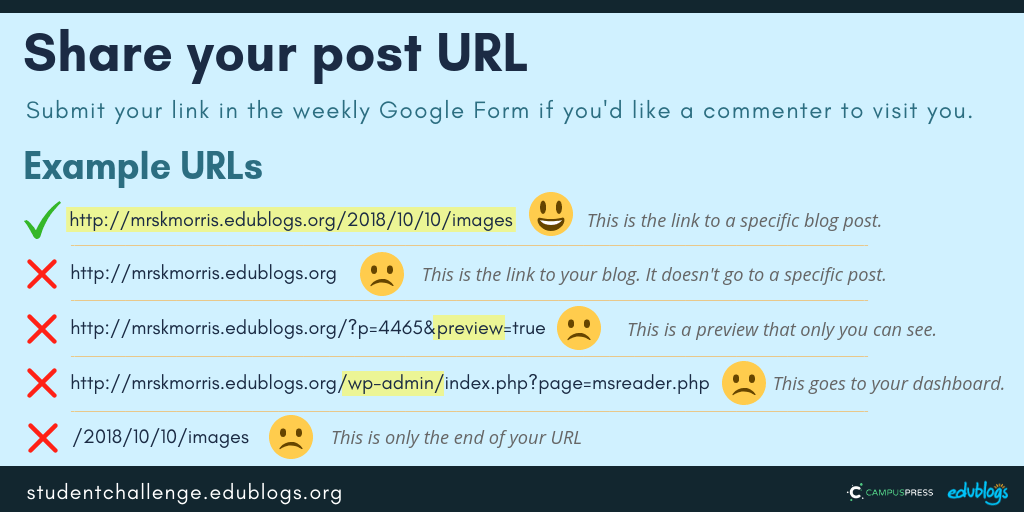
Submit Your Post URL ⬇
If you want a commenter and other participants to visit your blog, remember to fill in the form below for your week 3 post.
Do you have a post on your class blog and student blogs? Awesome! Feel free to submit the class blog post and student blog posts.
You need to submit the URL of your post. You can submit the URL of a page if this is what you’re working on but make sure comments are enabled.
This video shows you how to find your URL…
Note, this isn’t a real class blog. Just one I used for testing 😉
Remember:
- Click on the title of your post/page and then copy the URL from your address bar.
- This graphic below should help you understand what a post URL looks like if you’re using Edublogs/CampusPress/WordPress
 The Google Form
Edit: Enter your details in the form below or click here to open it in a new tab.
Teachers, feel free to put the form URL on your class blog if it’s easier for your students to access.
https://goo.gl/forms/XJqLKRv5ZV7ISfOW2
Next week’s topic: Free choice/catch up!


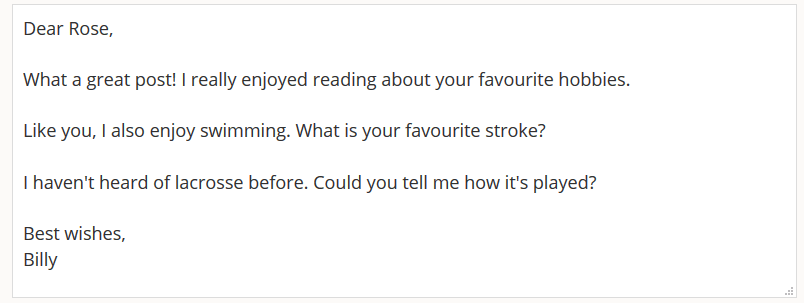
 Comment two