April 7

Week 3 Blog Challenge from Edublogs

Let’s Learn About Images

A blog without images would be pretty boring, wouldn’t it?

Images can really jazz up our posts, pages, headers, and widgets. Students and teachers also need images when they’re making a presentation, video, or other digital creations.

But where do we get those images?

Can’t we just use Google Images?

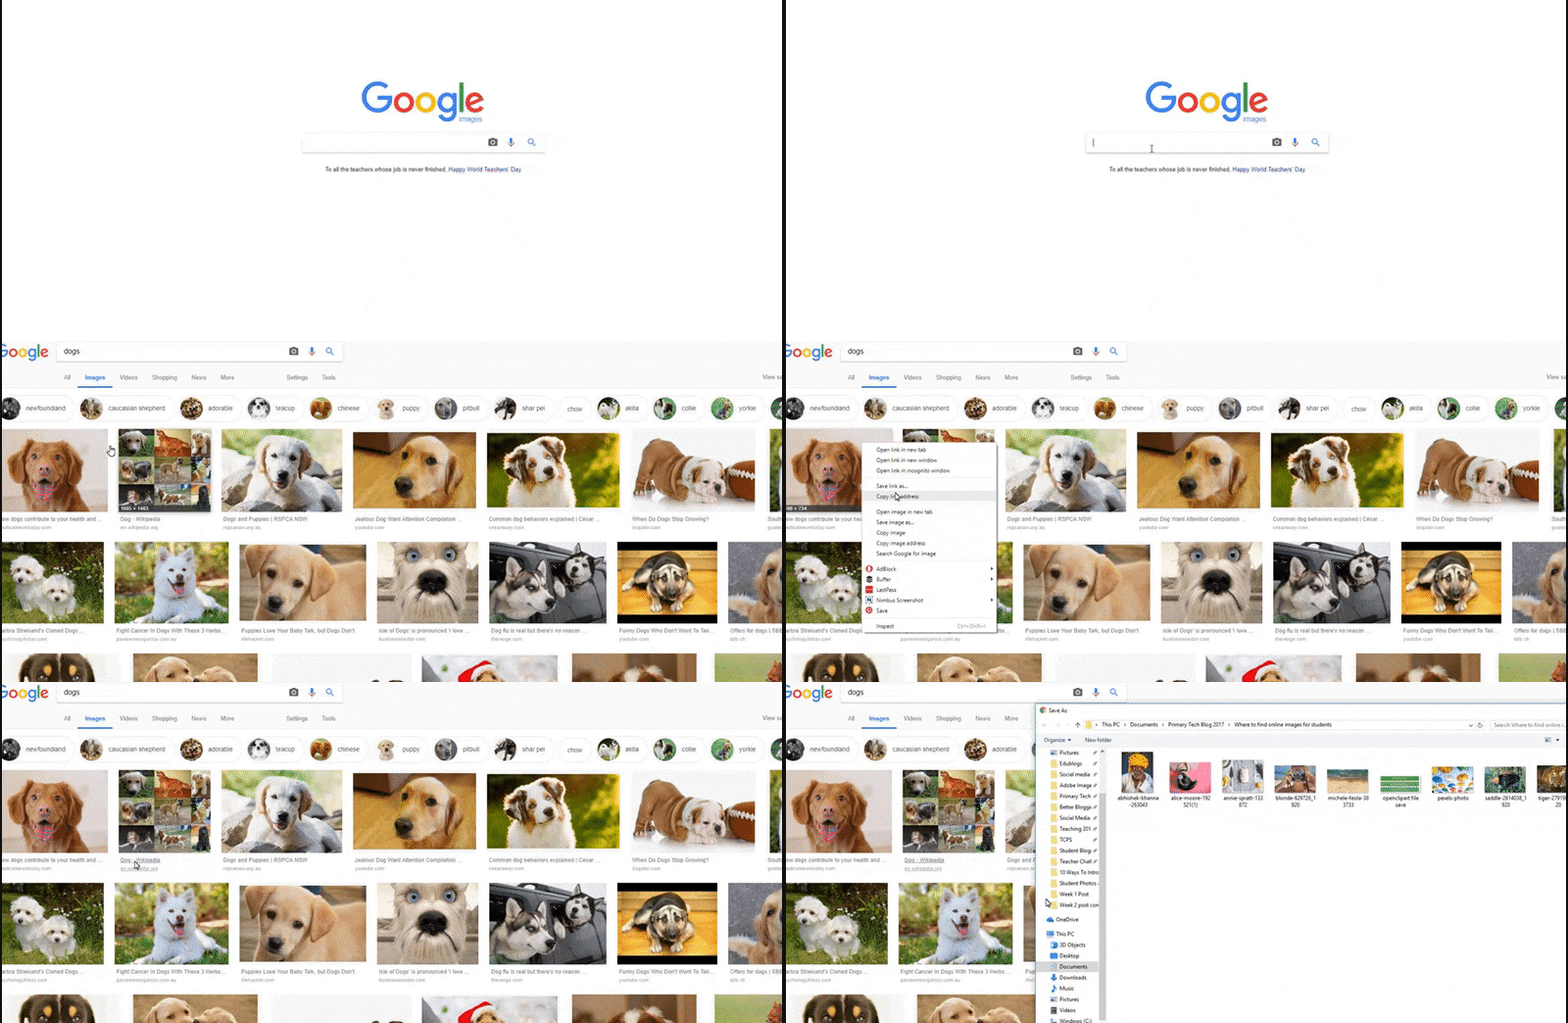
Do you know how to find pictures using Google? It’s so easy. You just type in the word you want, find the image you like, and save it to your computer.

But stop right there!

Should we be doing this? Should we be getting any image we like from Google and using it in our own work?

The answer is no.

As Ronnie Burt’s cat has told our community before…
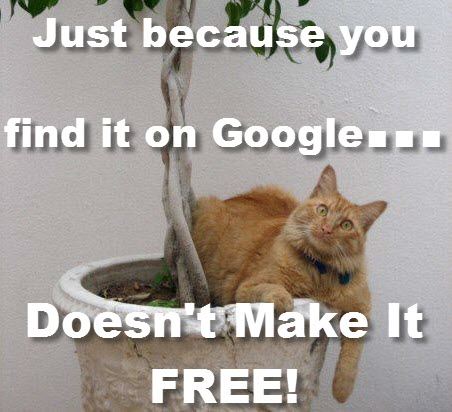
Just because you find it on Google doesn't make it free
Photo by Ronnie Burt used with permission

Most images on Google are protected by copyright. This means, they are not free to use and you can get into trouble if you do use them without permission.

You can use the advanced search filter on Google Images to find images that you are allowed to use but this isn’t as simple as it seems. You need to know what the usage rights mean and how to attribute correctly.

We have some easier options to share with you this week.

Including the source is not enough…

A situation we commonly see on blogs is where someone uses an image they found online and then includes a link to the site they got it from.

For example,
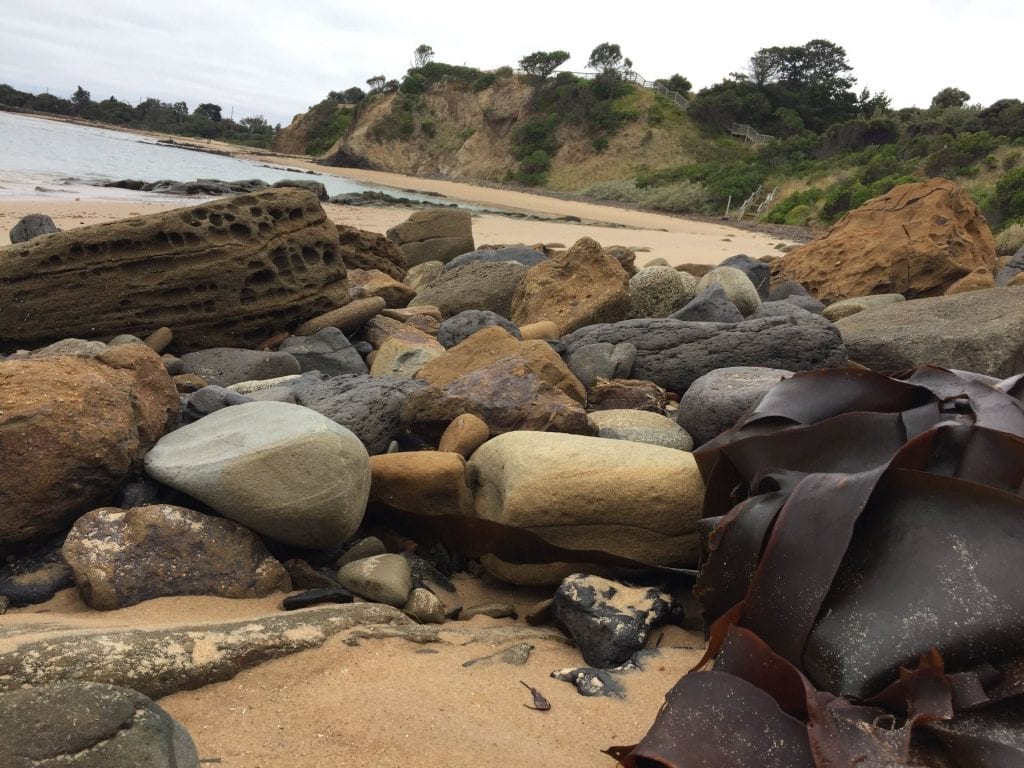
Image from Kathleen Morris www.kathleenamorris.com

Just because you link to the source of an image, does not mean you can use it. You would need to ask the image creator for permission.

Unless stated otherwise, everything on the web is protected by copyright.

Let’s take a look at some options for finding images…

Where Can You Find Images?

I have a post on my own blog that goes through the 5 main ways to find images for blog posts or other digital work.

Here is a summary. Feel free to use this poster on your blog or in your classroom if it’s helpful.
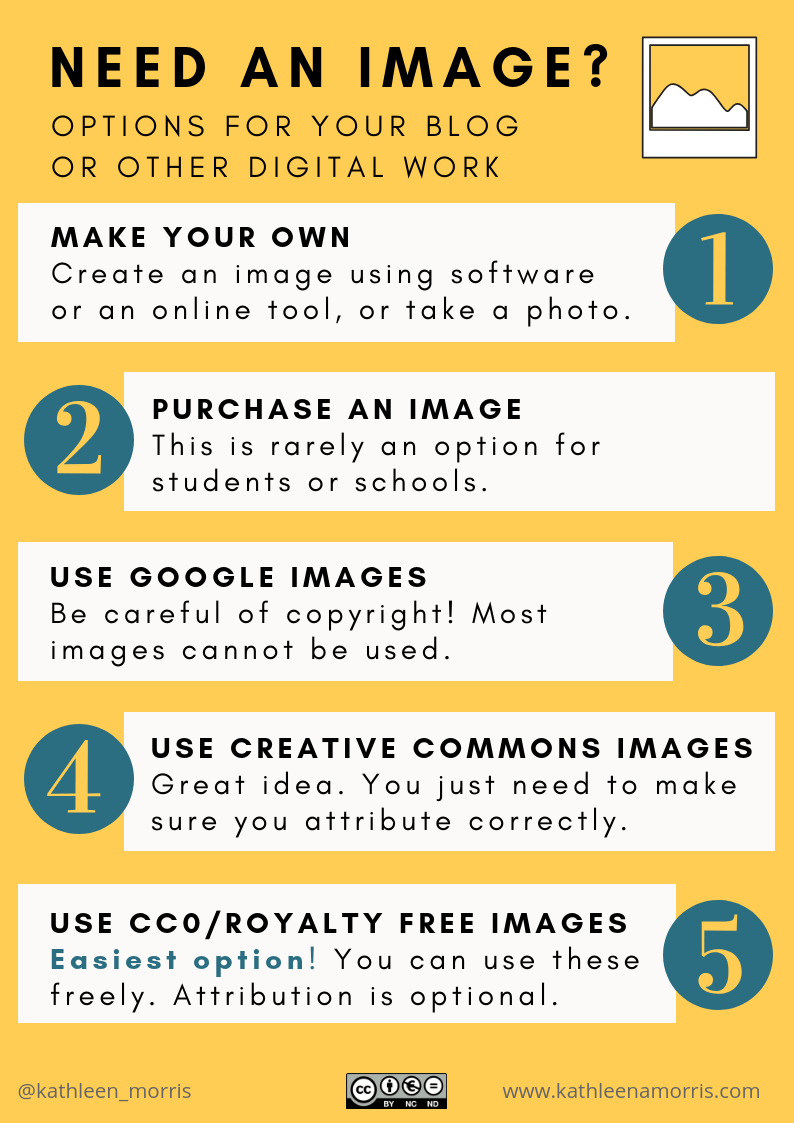
5 options for finding images Kathleen Morris

Let’s take a closer look at each option:

1) Making your own images is an excellent option

This can be done either by drawing, taking your own photos, using computer software, or using online tools.

Just be mindful of two things:

  • This can take a long time and leave you with less time for your writing or other work.
  • Some online tools have age restrictions (often over 13).

2) Many businesses purchase stock photography

We often do this for our posts on The Edublogger.

We pay a hairdresser when we get a haircut, pay a baker for a loaf of bread, so why not pay a photographer for their work?

This is good to know about as an option but isn’t something schools or students would usually do.

3) Using Google Images is not usually a good idea

We talked about this above.

Most images that you find on Google are protected by copyright. Find out more about copyright by watching this short video.

4) Creative Commons is worth knowing about!

Everyone’s work is protected by copyright unless stated otherwise.

Many people are happy for others to use their work (as long as they give them credit etc.). They give their work a Creative Commons license to tell everyone what they can or cannot do with their image (or text, videos, music etc).

  • Copyright means the person who created the work does not allow anyone to use it — or, they get to choose how it’s used.
  • Creative Commons means the person who took the photo (or created the work) does allow people to use it IF they follow certain rules.
    • Usually, these rules mean saying who created the image/work and where it’s from.
    • Sometimes the rules state that you can use the image/work only if you don’t change it or sell it.
    • These rules are called licenses.
    • There are a number of Creative Commons licenses creators can choose from.
    • No matter what license is used, you must always attribute the creator of the image/work (unless it’s a Creative Commons Zero license — see point 5). “Attributing” means crediting the author. In a blog post, this usually means putting the attribution under an image as I’ve done below.
Cute koala image
By Erik Veland [CC BY-SA 3.0 (https://creativecommons.org/licenses/by-sa/3.0)], from Wikimedia Commons

Here’s a short video by Nancy Minicozzi that explains Creative Commons.

I have a detailed blog post to help you learn more about Creative Commons. There are a few simple posters like the one below in the post. You’re welcome to use them.
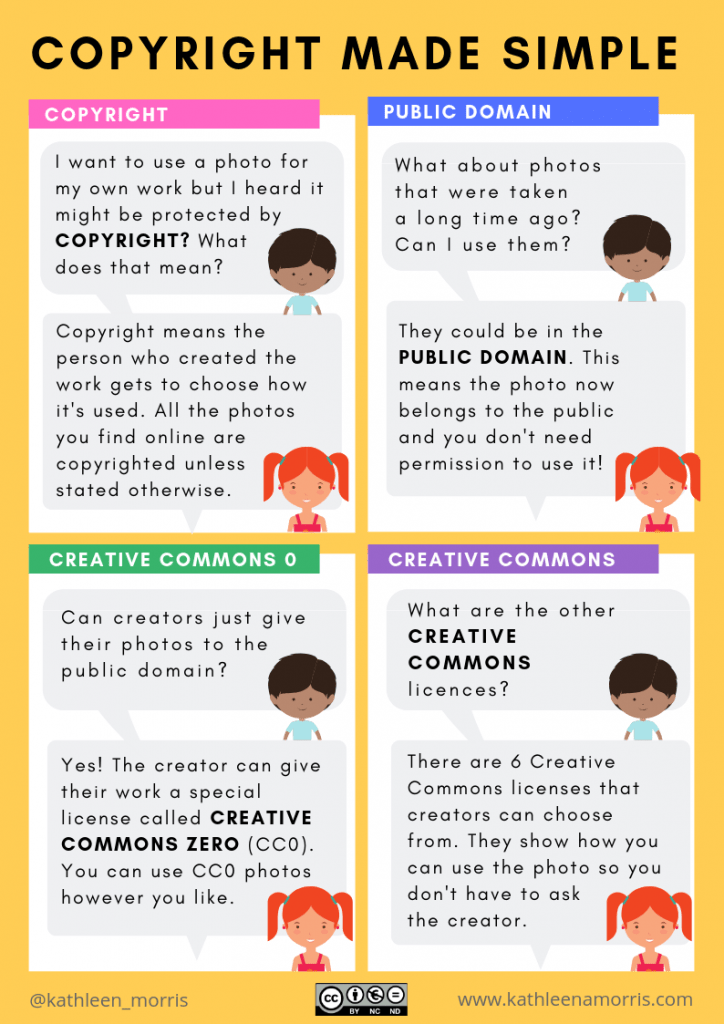
Poster explaining copyright and Creative Commons

A plugin to make attribution easy

The trickiest part of using Creative Commons images is often the attribution (crediting the creator: saying who the creator is, where it’s from, what the license is etc).

If you’re using Edublogs or CampusPress, there’s a plugin you can use to find and insert Creative Commons images without worrying about attribution. It’s called Pixabay.

Important notes about the plugin:

  • While the Pixabay plugin provides safe filtered options, nothing is foolproof. Younger students should be supervised or use Photos For Class for the safest option.
  • If you’re familiar with the old Compfight plugin, this is no longer available as it doesn’t work properly with the latest version of WordPress.

5) Creative Commons Zero or royalty free images are the easiest choices

If your mind is spinning with all that talk of Creative Commons licenses and attribution, don’t worry!

Creative Commons Zero (CC0) or royalty free images are easy to use.

These are the least restrictive licenses so anyone can use the images freely and attribution is optional.

There are now many sites where you can find CC0 or royalty free images but remember:

  • Many sites contain inappropriate content if you search for it
  • Many sites have age restrictions

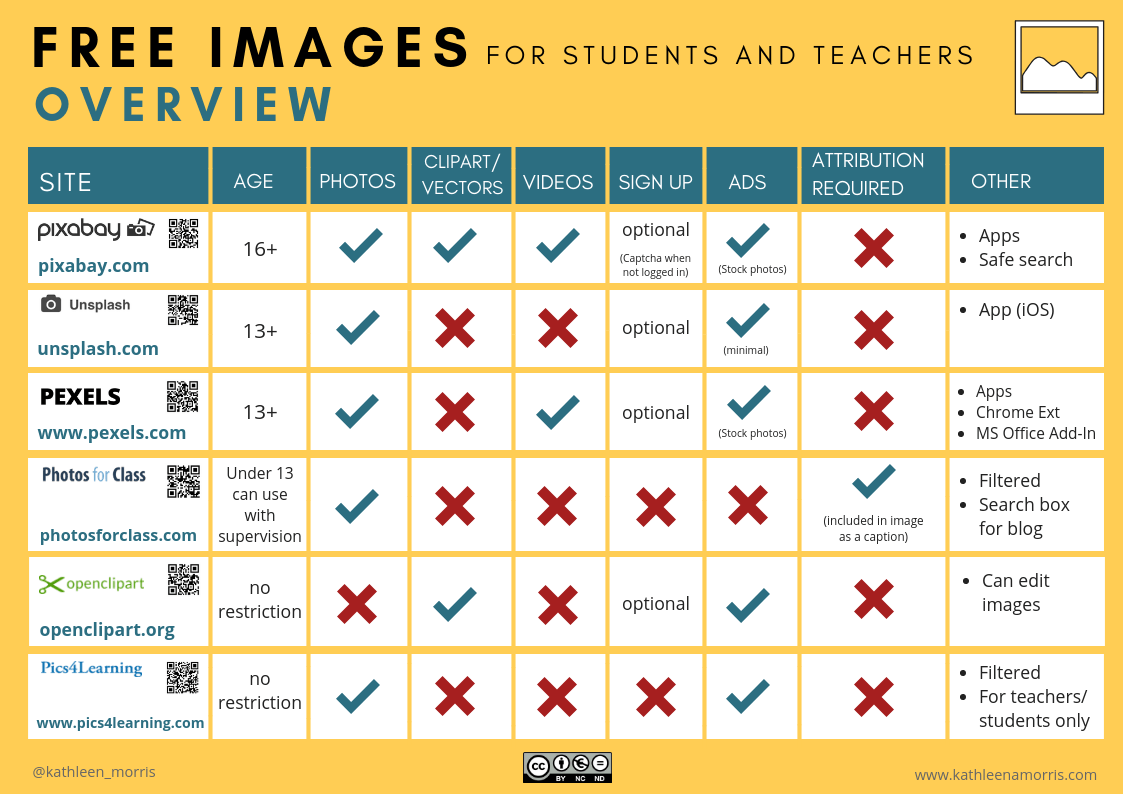
I made this comparison chart to show you some of the best options to find images that you can use freely without attributing.

You can read a detailed description of each one in my blog post if you’re interested.

Comparison chart of free images teachers students Pixabay Unsplash Pexels Photos For Class Openclipart Pics4Learning

In the activity section below, you’ll also find some task cards to help you easily source images.

Help With Images

Adding an image to a post or page on your blog is quite straightforward.

If you haven’t figured out how to do this yet, check out these help guides:

Week Three Tasks

This week there are five tasks to choose from to help you learn more about using images. The third task links with doing either task four or five.

Here is a summary. I will explain each task in more detail below with some examples and ideas for how classes can approach each task.

STUBC week 3 tasks summary

Task 1: Educate Others

Many teachers and students around the world know very little about using images legally, Creative Commons, attributing Creative Commons images etc. You can help them learn while learning more about this topic yourself.

Do some more research into any of the topics discussed this week and make a blog post, poster, video, slideshow etc.

If you’re working as a class on this activity, students could create a poster or video to share in a post (or a series of posts). Or, all the students could make a slide for a slideshow. 

Example:

This video is the reaction of students in Mrs. Yollis’ class when she mislabelled their artwork. It helps people learn about the importance of correct attribution.

Read more in the post on Mrs. Yollis’ class blog.

More examples:

  • Rachel made a video to explain how to avoid copyright infringement when getting images off the web.
  • Acadia used a SCAM acronym to explain copyright.
  • Georgia summarized the places you can find images and included a slideshow.
  • Izzy wrote a fabulous post about not using copyright materials.

Task 2: Make An Image

Creating your own images for your blog posts is a great idea! You don’t have to worry about copyright and Creative Commons.

You can:

I published a guide to Google Drawings on The Edublogger a few months back that you might find helpful.

A Guide To Google Drawings For Teachers, Students, And Bloggers

Remember, some online tools have age restrictions.

Leave a comment on this post if you know any other good tools for making your own images.

Add your image(s) to a blog post and tell us a bit about the images and how you made them. If you used an online tool, include the link so others can try it.

If you’re working as a class on this activity, all the students could make their own image and the teacher could compile them into a Google Slide presentation or simply add them to a blog post (or series of posts). 

Example:

  • Alicia used MakeBelifsComix to share a message about the environment.
  • Jena made a word cloud.
  • Wesley shared an original photo he took for a photography class.
  • Sue Waters from Edublogs took this funny photo of something odd she spotted at the supermarket. What can you find in your surroundings that makes you feel surprised, happy, amused, or frustrated?
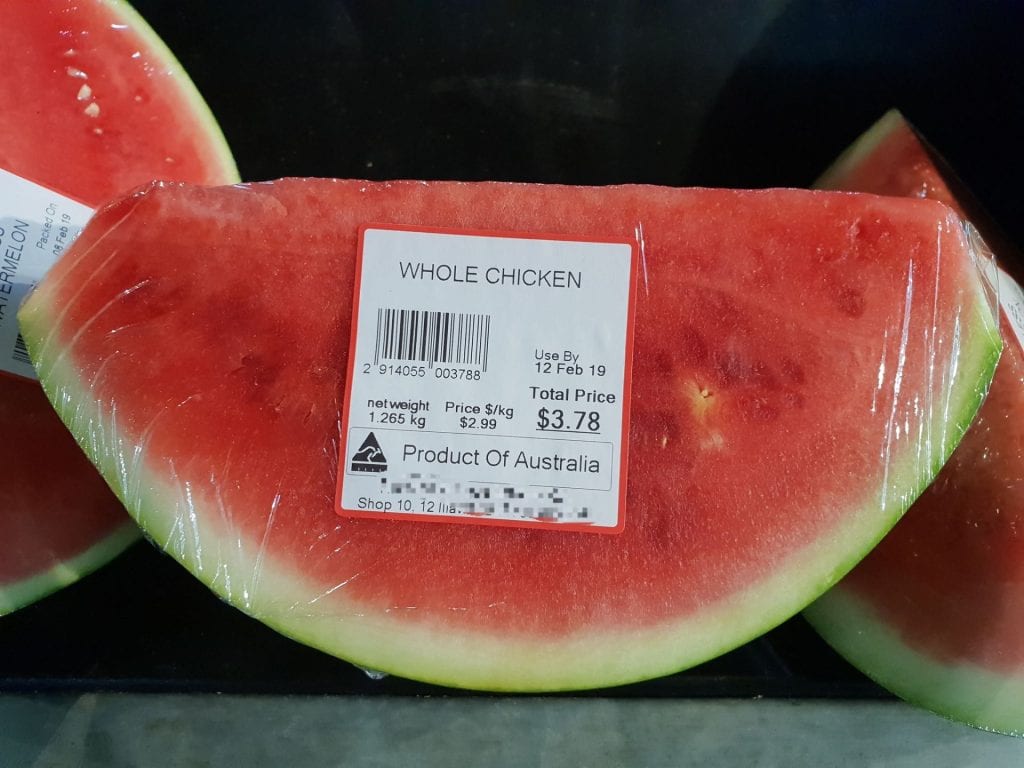
Photo of watermelon with a label that says chicken

Task 3: Image Task Cards

This connects with task 4 and 5. 

In the blog post I wrote about images for teachers and students, I prepared two task cards.

Depending on your age, use one of these task cards to find an image or a series of images to add to your post.

You could add a slideshow with some of your favourite images you found and write about why you like them. Or, you could use your images to complete task 4 or 5 below.

Tip: If you’re using Edublogs Pro or CampusPress, you can use the slider feature in the Live Shortcodes plugin to quickly add a slideshow to a post, page, or sidebar. Instructions are here. (Another option is the Metaslider Plugin) Find the instructions here.

Examples:

Task card for under 13s

Task card for over 13s

You’re welcome to print these task cards, or add them to your blog. To do this, you’ll need to click on the download button under the task card. Find out how to add a PDF file to your blog using Edublogs or CampusPress here.

If you’re working as a class on this activity, perhaps all students could use the task card to find an image. They could create a story, poem, or description for the image and these could be placed in a blog post (or series of blog posts). Or, the teacher could add some images to a post and ask the students to write an imaginative response in a comment. 

Task 4: Write A Poem

Find an image using one of the task cards above. Or you can try the Pixabay plugin if you’re an Edublogs/CampusPress user.

Now write a poem about your image.

Need some inspiration or advice? Check out Ken Nesbitt’s site which has lots of poetry resources.

If you’re working as a class on this activity, you could have students write their own poems and publish them as a series of posts. Alternatively, the teacher could publish a photo and have the students write a poem in a comment. 

Examples:

Task 5: Picture Prompts

First, find an image or series of images using one of the task cards above. Or you can try the Pixabay plugin if you’re an Edublogs/CampusPress user.

Next, you have two choices:

1) Add an image and write the start of a story. Ask your readers to complete the story.

Examples:

2) Or, make a sentence guessing game. Come up with a sentence and find a series of images to illustrate your sentence. Ask your readers to tell you what the sentence is in a comment.

Examples:

  • Emily asks you to guess her sentence.
  • Keylee asks you to guess her favourite food.
  • Lily included a great introduction for her post.

Tip: You might need to visit some other bloggers and invite them to look at your post and complete your story or guess your word. Remember to leave the URL of your post for them to click on.

If you’re working as a class on this activity, you could publish a series of posts with the students’ picture prompts. Or the teacher could publish the picture prompts and invite the students to respond in a comment. 

Final Tips

Beware of advertisements

Remember, some of the free image sites have advertisements for paid image sites. We don’t want to click on those ads.

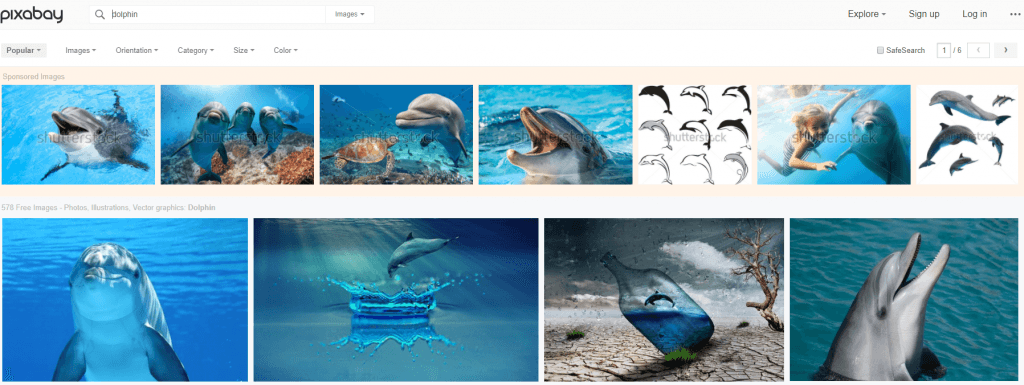
For example, on Pixabay, I typed “dolphin” into the search box. The top row of results has a Shutterstock watermark on it. Clicking on this takes me to the Shutterstock website which is a site where you can pay for images.

Pixabay ad example

Note: You won’t see advertisements when using the Pixabay plugin.

Do you need to go back and fix images in old posts?

Have you been using images from Google on your blog so far? Whoops. You might want to go back and fix these up when you have time. Remove the image or replace it with a Creative Commons image.

Have you tried using categories, tags, or labels yet?

Categories, tags, or labels are all ways to organise your posts. It’s a good idea to set up a category (or label in Blogger) called Student Blogging Challenge or STUBC. You can assign this category to all the posts you write for the challenge.

Submit Your Post URL ⬇

If you want a commenter and other participants to visit your blog, remember to fill in the Google Form below for your week 3 post.

Do you have a post on your class blog and student blogs? Awesome! Feel free to submit the class blog post and student blog posts.

This video shows you how to find your URL…

Note, this isn’t a real class blog. Just one I used for testing 😉

Remember:

  • Click on the title of your post/page and then copy the URL from your address bar.
  • This graphic below should help you understand what a post URL looks like if you’re using Edublogs/CampusPress/WordPress
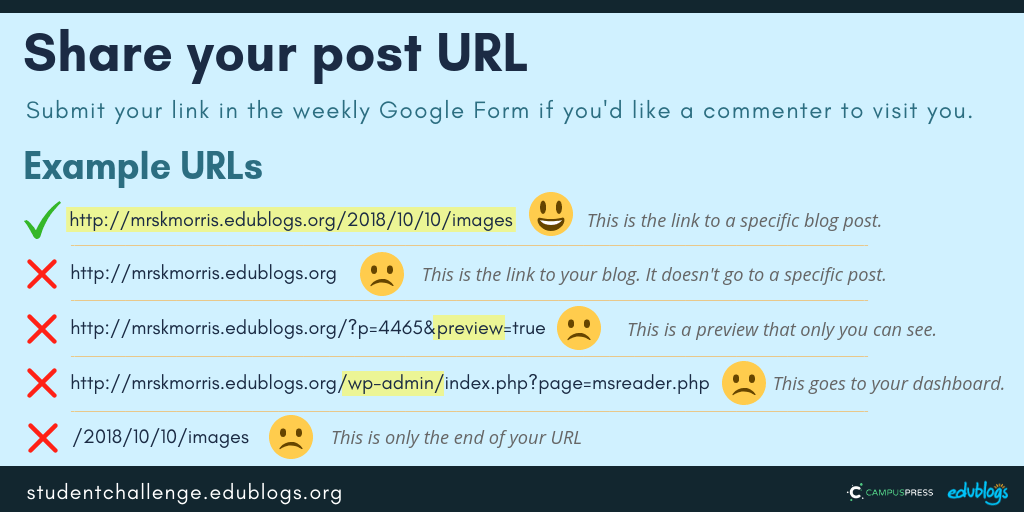
Examples of post URLS for STUBCThe Google Form

Teachers, you’re welcome to put the Google From URL on your own blog or LMS if it makes it easier to share with students.

https://forms.gle/UhfdQsYchs8FcoyL7


Next week’s topic: Free choice/catch up!
March 26

4th Grade Online Learning Update

Hi everyone!

As we begin this new journey into online learning start Monday March 30th, I wanted to give a few quick updates and expectations.

First, the expectation for your child is they will be working about 30 minutes on math and 30 minutes of ELA a day. Similar to 4th grade homework if they don’t complete the assignment in about 30 minutes they can stop and pick up the next day! We as 4th grade teachers will be doing our best to make the assignments familiar to them and with as much built in support as possible, so that responsibility does not fall on you the parent/guardian. With that being said, we will really need your support at home to make sure your child is on a schedule each day to complete their learning time.

Second, the source of all information for your child will be their Google Classroom. All 4th grade teachers have a Google Classroom setup for both their ELA and Math class, and all 4th graders are familiar with how they are used. As I will be telling our learners we will be using a lot of different aspects of our Google Classroom, so it will be important for them to check all parts. I will be hosting office hours Monday and Wednesday from 1:00-2:30 and Tuesday and Thursday from 9:00-10:00. While they may look slightly different each day, that will be the time your child can connect with me directly through chat or video with any questions they have!

Finally, we know this is something new for everyone and we appreciate your support and flexibility. Please do not hesitate to reach out to us with concerns or questions. We will all work together to make this work, and make it time well spent for your children. We as a 4th grade team strive to make it an authenticate learning experience and not just an hour of screen time with busy work each day.

Thank you again for the support!


Mr. Cody Straub

cody_straub@elanco.org

March 24

Update from Dr. Hollister

Below is the letter Dr. Hollister distributed regarding our upcoming online learning:


March 24, 2020


Dear Elanco Families,


By now you have probably heard that Governor Wolf extended the school closure “until at least April 6”.  The purpose of this letter is to explain the upshift in the educational program for all learners in the District.  Officially starting Monday, March 30, the District faculty will be providing guided instruction on fundamental concepts in all curricular areas.  While this certainly will not be the same as the traditional face-to-face learning, we will strive to make it as focused and pertinent as possible.


We fully understand that there are limitations to this form of learning, especially for some of our most special learners and we expect additional limitations will crop-up based on the limits of technology, the personal circumstances of some teachers (many have young children at home too and some, unfortunately, will be directly effected as COVID-19 cases increase here in the County) and the unknowns that we have not anticipated.  We will work each problem as it presents itself and do our best to provide a meaningful educational experience for each learner.  We remain concerned about some of our most isolated families.  The District has devices to assist families that do not have internet service in their homes. Please help us get that word out if you know families in this situation.


If your child’s teacher has not already been in contact, expect that contact to occur soon!  Learning will consist of basic lessons led by teachers.  Depending on the teacher and subject matter, learning activities will be both live in real time (with direct contact with teachers -synchronous) and or indirect off time (asynchronous).  Regardless, we ask for your patience as our teachers warm-up to this form of teaching and learning.


  • Note: Change in Food Distribution: Food distribution will shift to two days a week (Monday and Wednesday) with additional meals provided each of those days.  Any person under age 18 may pick up meals at: New Holland Mennonite Church (18 Western Avenue, New Holland) and Eastern Lancaster County Library (11 Chestnut Drive, New Holland).  Please remember the child or children in a family must be present at the pick-up site to verify legitimacy.  You may contact the Director of Food Service at jami_leisey@elanco.org  for more information.


We are operating based on the latest information from the Governor’s Office and the Pennsylvania Department of Education.  Everything is subject to change with updated directives from the Governor or the President.


Stay well.


Respectfully,


Robert M. Hollister, Ed.D.

Superintendent of Schools


jwj

March 20

Week 1 Blog Challenge from Edublogs

Who Am I?

For those of you who are new to the challenge, let me introduce myself.

My name is Kathleen Morris. I’m a primary school teacher in Geelong, Australia.

I wonder what hemisphere you live in? I live in the Southern Hemisphere so it’s the start of autumn. The weather will begin to cool down soon.

I work with Edublogs to help teachers learn about the wonderful world of blogging.

While teaching has been a big part of my life since 2004, I’m not currently teaching as I am caring for my 6 year old daughter who has a serious illness called leukaemia.

The other two members of my family are my husband (who’s also a teacher) and my 5 year old son.

I began blogging with my students in 2008. I have my own blog for teachers where I write about things like global collaboration, blogging, digital citizenship, and online tools.

When I’m not so busy I also enjoy running, hiking, reading, cooking, and exploring nature with my family.

Collage of emu, kangaroo, and beaches Kathleen Morris

I’m looking forward to getting to know you too.

About Our Commenters

Last week we published a post where our team of commenters could start introducing themselves in a comment.

Please take the time to reply to a comment and make our volunteers feel welcome!

>>Click here to find the post.

A Special Thanks x 2

Two very special volunteers we need to offer a huge thank you to are Sue Wyatt and Marg Grosfield.

Sue founded the Student Blogging Challenge over 10 years ago. She now works behind the scenes to organise our commenting team. She is a vital piece in the Student Blogging Challenge puzzle and a fantastic leader for our commenters.

Marg is a spreadsheet whiz who keeps the big job of organising our registrations under control. This is the second time Marg has helped with the challenge and we couldn’t do it without her!

About Our Participants

So far we have over 880+ individual students and 100 classes registered.

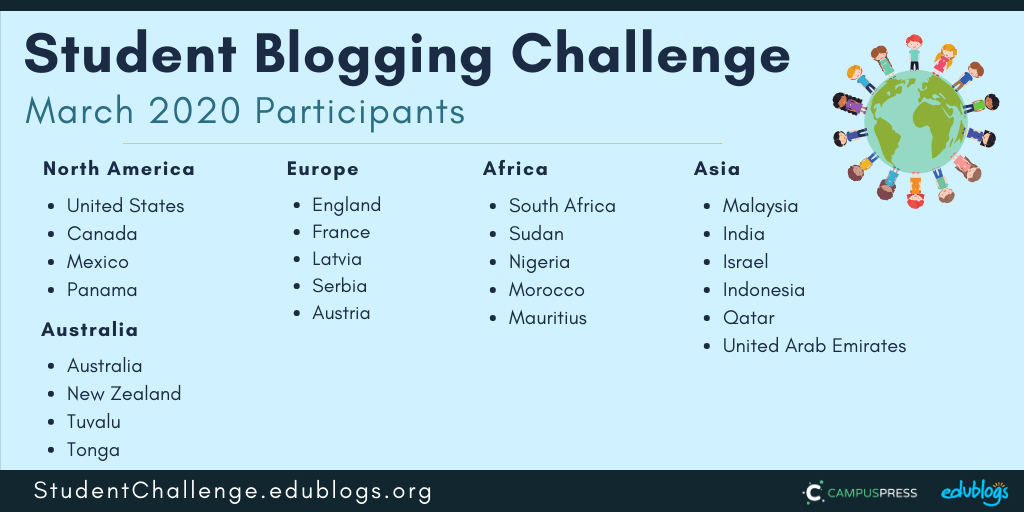
Our participants represent 23 countries and 5 continents.

Can you tell which continents of the world are not represented?

We’ll update this graphic for week two as there will no doubt be more registrations.

Getting To Know Each Other

We usually have a choice of tasks each week, however, this week, we have three important tasks we’d like everyone to try to complete.

📌 Remember, “Week One” runs over two weeks: Sunday March 15 until Sunday March 29.

The tasks involve:

  1. Making an avatar (and there are a few choices for extra avatar activities)
  2. Creating or updating your About page
  3. Making connections with other students

You’ll find more details about these tasks below.

Firstly, we have some additional challenge information and reminders to go through.

The Weekly Process

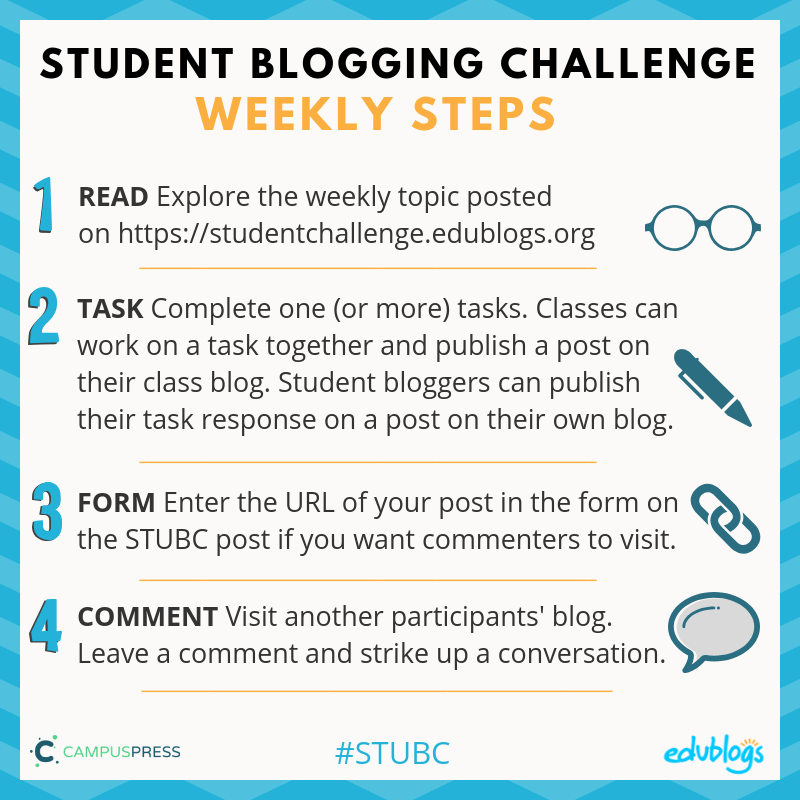
Each week, we’ll follow the same process.

There will be some information on a blog post to read so you can learn more about our topic and then some tasks to choose from. Once you publish your task response on your blog, submit the URL of the post in the Google Form at the bottom of the weekly post. Then, go ahead and connect with others!

Read more about our four step weekly process here or watch the video below.

Here is a summary of the weekly process. Feel free to copy this graphic and display it on your blog.

4 Steps To Participating in STUBC smaller

Week One Tasks

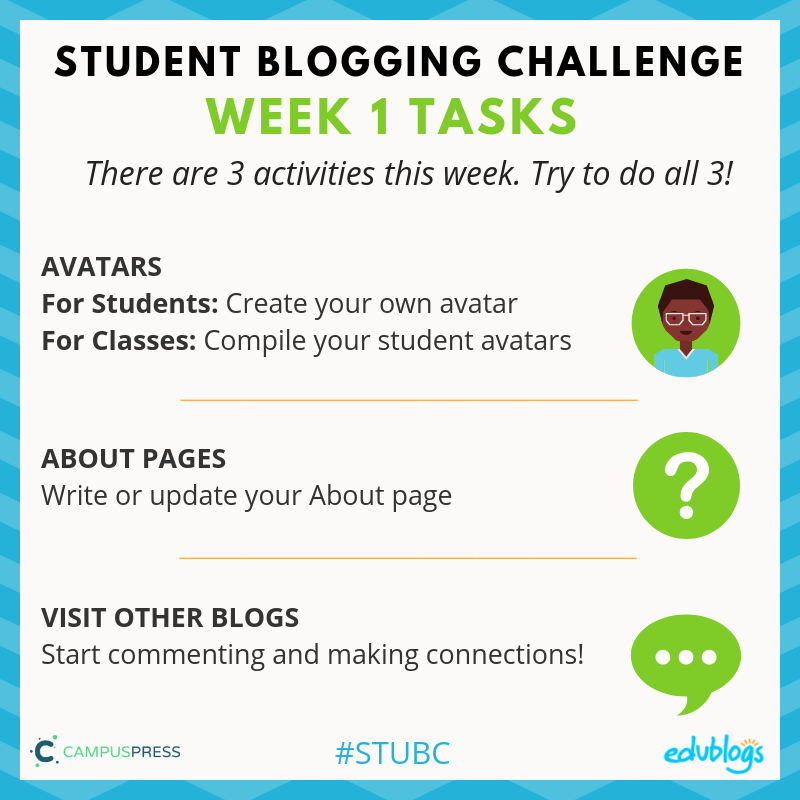
While you don’t have to complete every task each week, this week we encourage you to try to do all three. They’re very important tasks and will get you off to a great start! Plus, remember you have two weeks to work on them.

Here is a summary. I will explain each activity in more detail below with some examples.

Summary of week one tasks STUBC Avatars About Pages and Connecting

Stay Safe Online

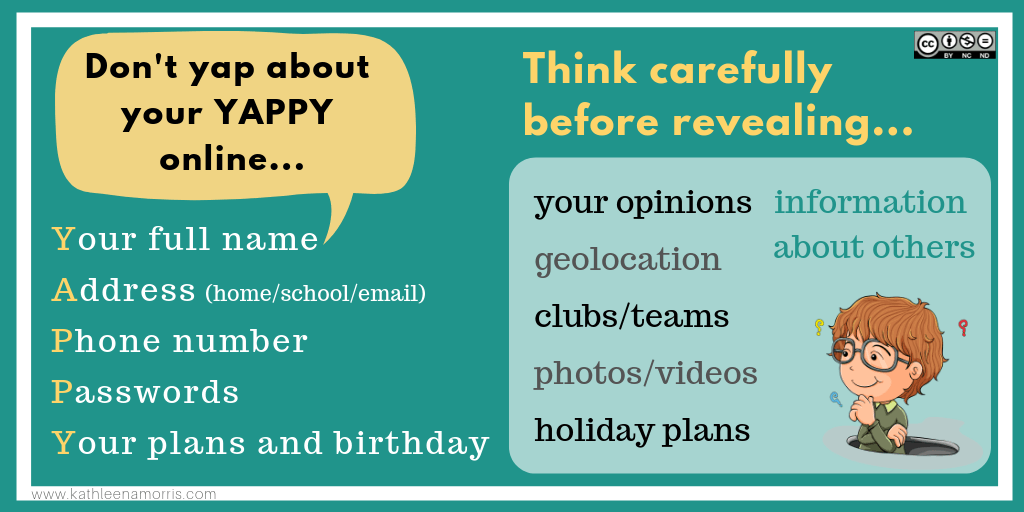
Remember, as we’re sharing information about ourselves, we need to be internet savvy and avoid sharing too much information or personal details.

I like to tell my students to never share their YAPPY online. There is some other information that’s more of a ‘grey area’. These are things you should discuss with your teachers and parents.

Further advice for teachers:

Be internet safe -- don't share your YAPPY

Task 1: Avatars

Do you know what an avatar is? It’s simply an image that you use to represent yourself on the internet. It’s like a character that represents your online identity.

A lot of adults have a real photo as their avatar, like this:

Kathleen Morris image

It can be a better idea for children to use a cartoon representation of themselves (check with your teachers/parents if you’re not sure).

Avatar example Kathleen Morris

Here are four avatar activities to choose from. 

For students: Create your own avatar 

Students can create an avatar to use on their blog.

There are many different avatar creation sites on the web:

  • Some tools allow you to save the avatar to your computer to then upload it to your blog.
  • Others tools require you to take a screenshot of your avatar and save it as an image. Tip: This article shows how to take a screenshot on any device.
  • The Symbaloo below was compiled by Miss W (Sue Wyatt) to share links to sites where you can make an avatar. If you want to embed the Symbaloo on your own blog, click on the share icon at the bottom and copy the embed code.
  • Some of the tools listed require Flash to work. This means they won’t work on mobile devices and you might have to manually allow Flash if you’re using Chrome (instructions here).
  • Know any other avatar creation tools that aren’t on the Symbaloo? Leave a comment on this post.

Once you’ve made your avatar, you need to add it to your blog so it shows up when you comment.

To complete this task, it’s time to write a post 👇

Now write a post about your avatar

Tell us how your avatar represents you. Include a link to the website where you created the avatar. Remember to include your avatar as an image in your post.

Alternatively, you might want to create a custom avatar for each of your family members. Include the avatars in a post and tell us a bit about each family member (remembering not to give away too many personal details).

Tip: when writing a post about your avatar, choose an interesting title not just ‘avatar’ as this could cause an error on your blog.

💡 Examples:

  • Here is an example of a great post from Naho in Hawaii.
  • Braeden made a Lego avatar and wrote about it here.
  • Josh used a range of tools to make avatars for the members of his family.
  • Amelie-Rose made avatars for her family members.

Task 2: About Page

For students or classes: Write or update your About page

Posts Vs Pages

Do you know what the difference between a post and a page is?

  • Posts are where you publish your regular updates.
  • A page is for more static information that you don’t expect to update too often.
  • You might publish lots of posts but only have one or two pages.

Find out more about the difference between a page and a post in this article on The Edublogger. 

Remember, we don’t say, “I wrote a blog”. We say, “I wrote a (blog) post” or, “I wrote a page”.

Page instructions

If you’re using Edublogs or CampusPressclick here to find out how to add an About page, or watch the video below.

  • If you’re using Bloggerthese instructions will help you add pages.
  • If you’re using Kidblog, you might need to add a post instead of a page.
About pages

The most important page on your blog is your About page.

Whenever I visit a blog for the first time, I always look for an About page. It’s a way to find out who’s writing the blog posts, what their background is, where they’re from etc.

Some bloggers forget to edit the default ‘sample page’ that appears when you set up a new blog. Or they forget to update an About page that they might have written years ago.

This task involves writing an About page for your student or class blog. If you already have an About page, check to see what else you can add or edit. Be creative!

There are many ways to write an About page.

You might want to include:

  • You first name
  • Your approximate location (even just state or country)
  • Your age or grade level
  • Some of your interests
  • What your blog is all about. Tell us what you’ll be writing about

Remember to be safe online: don’t include personal details like your YAPPY (see above).

You can get creative when writing your About page.

💡 Here are some ideas and examples that classes or students could use:

  • Jodie wrote a really engaging About page that included some interesting pictures.
  • Write a poem. It could be a traditional rhyming poem or any other style of poetry. Learn about different styles of poetry here. Here is an example from Daniela.
  • Ms. Mack created a “fun facts” list that links to the students’ blogs.
  • Rina wrote 15 things about me for her About page. Check it out. 
  • Write an A-Z about yourself (e.g. I am an athletic and brave child who decided that saving the environment is one of my future goals). Check out how commenter Dinah created her A-Z About page especially for the Student Blogging Challenge a few years back.
  • Zaprina made a creative About post that’s an acronym of her own name. It includes paragraphs and coloured text.
  • Write a ‘Who am I?’ or list of things people might not know about you like Ms. Herring, Mrs. Keane, and Mrs. Lyttle.
  • Students in Ireland paired up to create a line for their class About page and Ms Seitz’ class did the same.
  • Student Rajyashori wrote a creative interview script.
  • Year 5/6 Class at Westwood with Iford School made a Thinglink.

Task 3: Visit other blogs

For students or classes: Start making connections!

One important aspect of blogging is commenting on other blogs.

Remember: The more you put in to making connections during this challenge, the more you’ll get out!

There are two places you can find other participants’ blogs to visit:

  1. The pages at the top of this blog. There is a page for student bloggers and a page for class bloggers. These are sorted by age. Student bloggers have hobbies listed so you hopefully can find someone who is not only a similar age to you but shares some of your interests.
  2. The green link on the right-hand sidebar of the blog (available from Tuesday/Wednesday). This will show you the spreadsheet of students/classes who have submitted their posts in the weekly Google Form. Note: You won’t need to request access — it’s “view only”.

💡 Idea: You might even like to write a post about your commenting experiences like Figgy and Rheinhard. They even included the links in their posts.

Commenting advice

We’re going to talk more about quality commenting next week but for now, you might want to remember:

  • Write your comment like a letter
  • Ask a question, make a connection, or give a compliment
  • Leave your blog URL so the blogger can also take a look at your blog

Don’t forget to approve your comments and politely reply to any comments as soon as you can!

Tips for classes

If you’re working as a class, you might start by writing some comments together as a whole class activity. Students could then write comments individually or in small groups.

This video by Mrs. Yollis’ third grade class demonstrates how they approach commenting as a whole class activity.

Submit Your Post URL ⬇

If you want a commenter and other participants to visit your blog, remember to fill in the Google Form below for the post(s) you publish about your week one tasks.

You need to submit the URL of your post. You can also submit the URL of your About page if this is what you’ve been working in. Find out how to turn comments on About pages on here.

This video shows you how to find your URL…

Note, this isn’t a real class blog. Just one I used for testing 😉

Remember:

  • Do not submit the URL of your blog or your dashboard.
  • Click on the title of your post/page and then copy the URL from your address bar.

This graphic below should help you understand what a post URL looks like if you’re using Edublogs/CampusPress/WordPress

Examples of post URLS for STUBCThe Google Form

Edit: Teachers, you’re welcome to put the URL to this Form on your own blog or LMS if it makes it easier to share with students.

https://forms.gle/9C3z1X6jJHNsPbSM8


Next topic (March 29): Connect Through Commenting

March 16

3/16/20 Updates

The following were posted on our Google Classroom to update both our Math and ELA classes.


Math: 

Hello everyone!

As of right now you do not have any math assignments. Until we figure out if you can get chargers or not please limit your laptop use!

ELA: 

Hello everyone!

As of right now the only assignments you have for the next two weeks is your Book Club reading assignments! If you can, you can fill out your Google Doc answers as well.
Please limit your laptop use until you will be able to get your chargers.

IF you were absent on Friday, and don’t have your book do not worry we will get you caught up.


Thank you everyone for being flexible as we work through what these next few weeks of learning will look like!

Mr. Straub


December 10

Santa Shop


Hello!


4th graders will have the opportunity to shop at the annual PTO Santa Shop this week (Dec 9-13) with their Homeroom Classes. Classes will be going to the shop on the following days:


Mr. Straub- Tuesday Dec. 10th

Mrs. Macadams- Wednesday Dec 11th

Miss Rohrbaugh- Thursday Dec 12th


There will also be an opportunity to shop Friday Dec 13th for anyone who is absent or does not have money the day their homeroom goes.

Please have your child bring any money in a bag, kept in their backpack, until it is time for them to shop!

If you have any questions do not hesitate to contact us!

October 15

Class Blogging Intro

With our blogs up and running I wanted to give you a little more information about the platform we use, the safety of the blogs, and how we will be using them to extend our classroom learning.

First, we, as well as all Elanco classes who use blogs, use a blogging platform called EduBlogs. This is a blogging platform created specifically for students. Using this platform allows me the teacher to control anything that is posted or commented on any of the students blogs. It also allows for easy access to many other class blogs across the country and even the world! Although it is easy access for other EduBlog users, anyone else cannot access the blogs unless they have the exact URL of the blog. This allows for a great experience interacting with many other students from around the world, but ensures it is done in a safe environment.

Students enjoy blogs because it gives meaning to their writing. They now have an audience for what they write more than just their teacher and whoever reads it at home. It allows people from all over the world to read and give feedback on their work. As the year goes on we will learn of other ways to communicate our messages on our blogs. We will also take part in a Edublogs worldwide “Blog Challenge” that allows for constant interaction with students across the world!

I strongly believe in blogging for students because it allows them to “show off” their writing, learn important internet safety skills, and promote creativity and problem solving all through a safe environment. The school district, EduBlogs, and I make sure this is a completely safe learning experience for students on the internet.

If you ever have any questions about our blogging please do not hesitate to email me at cody_straub@elanco.org or call the school and ask for me.


Thank you for all of your support!


Mr. Cody Straub


October 3

September 2019 4th Grade Updates

It is hard to believe we are already done with a full month of school! In 4th grade we have been having a lot of fun getting to know each other and working hard learning new 4th grade skills! As the weather turns to fall (hopefully!) we will continue to learn many new things, but here is a recap of what we did in September:

Math: In math we have been working on place value skills. Those skills have included; recognizing different place values, understanding the relationships between different values, rounding, estimating, and addition and subtraction. We have been using the online resource Zearn to help teach and practice those skills.

When we are not on Zearn working we have done things like play place value games, create place value books, and practice our skills through other collaborative activities.


ELA: We have spent a lot of our time in ELA talking about main ideas and key details of different readings we have read or videos that we have watched. We have read a lot about our government and natural resources and found the main idea of those articles we have read.

In writing learners have been writing informative writing pieces and learning how to share facts in their writing. We have reviewed what makes a good paragraph and how to organize it.

We have also had the opportunity to create our own blogs! Learners will be working on these blogs throughout the year and publish different work for the whole world to see! Ask your child about their blog!

Inquiry: During our inquiry time we have focused a lot on learning different science skills and practicing those skills through hands on experiments. Learners started the year learning a lot about the scientific process and how that can help use answer questions and solve problems. We did many hands on experiments so far and are excited to continue to explore science!

If you ever have any questions or concerns do not hesitate to contact me!


Mr. Straub

May 5

Week 10 Blog Challenge from Edublogs

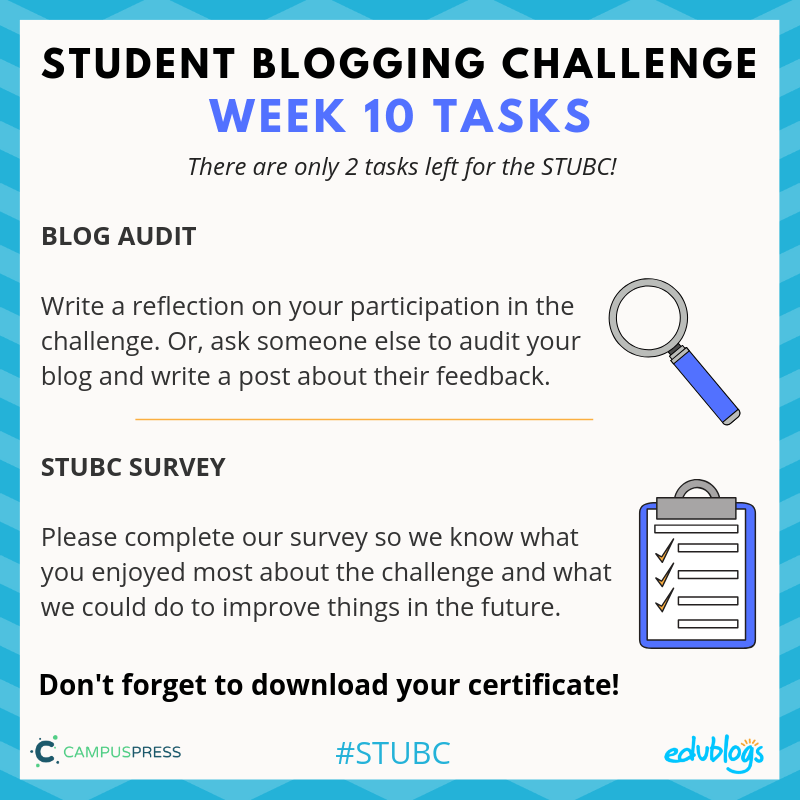
Week Ten Tasks

This week there are two tasks to complete. If you don’t have time to write your audit post, please just spend 5 minutes completing our survey. We’d really appreciate it!

There is a separate survey for teachers and students.

Teachers, please help us in making sure your students fill in the correct survey (for students)

Week 10 Tasks STUBC

Task 1: Audit Your Blog 

Option One: Write a post on your blog reflecting on your participation in the challenge.

These are the sorts of prompts you could answer in your post:

  • How many weeks of the challenge did you participate in?
  • How many posts did you write in the ten week period?
  • How many comments did you receive from classmates, teachers, or other visitors?
  • Which post did you enjoy writing the most and why?
  • Which web tools did you use to show creativity on your blog?
  • What are your plans for your blog now? Will you keep posting?

Option Two: Ask a student/teacher/family member who might not have read your blog to do an audit.

Sit beside them while they navigate around your blog, record what you observe as they interact with your blog. When finished, ask them the following questions:

  1. What were your first impressions of this blog?
  2. What captured your attention?
  3. What distracted you on the blog?
  4. What suggestions can you give me to improve my blog?

If you’re working as a class on this activity, perhaps the teacher could write a post and invite the students to reflect in a comment. 

Task 2: Evaluate The Challenge

Please complete our short survey so we know what you enjoyed most about the challenge and what we could do to improve things in the future.

There is a separate survey for teachers and students.

Student survey

>> Click here to open the student survey

Add this URL to your class blog if you like https://forms.gle/QyJgn5YLFj6o8mfR7

Teacher survey

>> Click here to open the teacher survey

Please don’t share the teacher survey link with students.

Thank you!

Student Certificates

Congratulations on completing the Student Blogging Challenge!

Download a certificate to celebrate your achievement.

Note for commenters: I’ll email you about accessing your certificate.

>>Click here for a PDF copy of the student certificate

STUBC Student certificate

I will be contacting our commenting team via email soon to offer them a certificate.

Submit Your Post URL ⬇

If you want a commenter and other participants to visit your final task on your blog, remember to fill in the Google Form below.

Examples of post URLS for STUBCThe Google Form

Edit: Enter your details in the Google Form below or click here to open it in a new tab.

Teachers, feel free to put the Form URL on your class blog if it’s easier for your students to access.

https://forms.gle/U5KM1RL7FPvxZpPd6

If you have any additional comments about the Student Blogging Challenge, feel free to leave a comment below!

Thank you!