I hope you’ve learnt a lot throughout the Student Blogging Challenge! Perhaps if you look back to your posts from a few weeks ago you can see that you’ve improved.
This week we’re going to try to put together everything we know about creating a quality blog post.
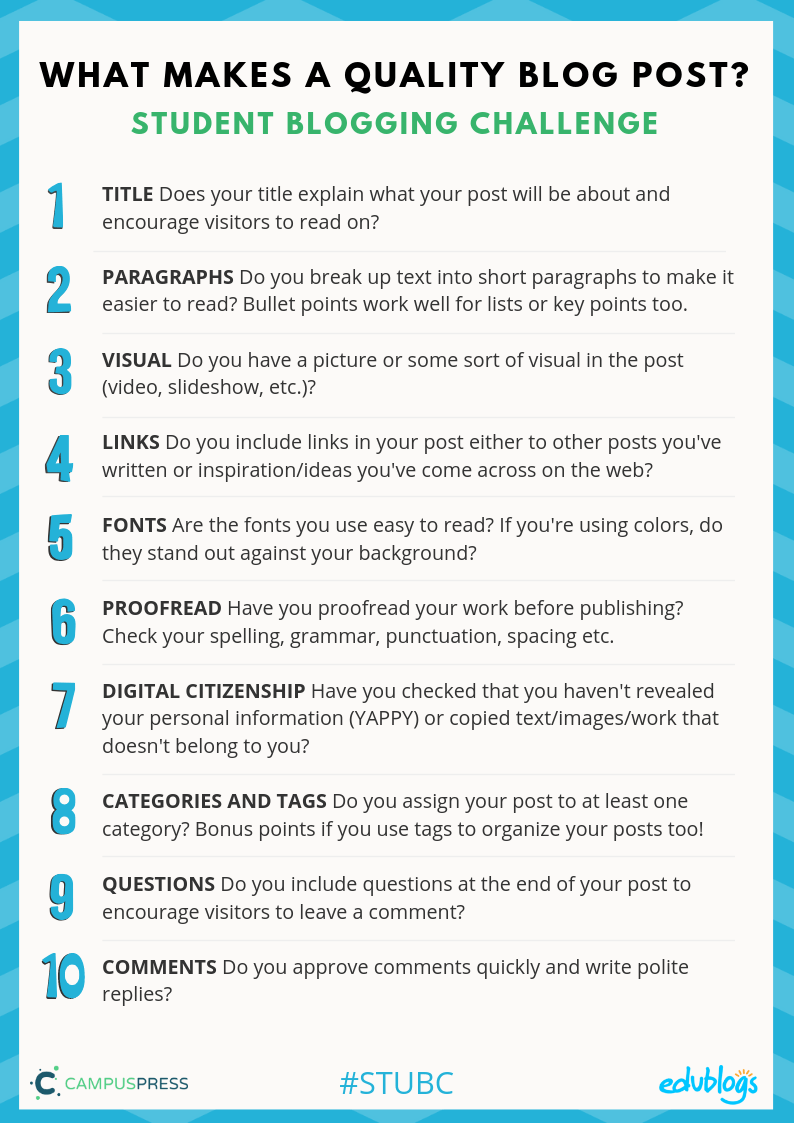
Let’s go over some of the essential ingredients of a quality blog post. You might have your own ideas too!
Don’t forget to try to visit a couple of other bloggers once you’ve published your own post. Making connections is the best part of the Student Blogging Challenge!
Submit Your Post URL ⬇
If you’d like a commenter and others to visit your post, fill in the form below.
This video shows you how to find your URL…
Note, this isn’t a real class blog. Just one I used for testing 😉
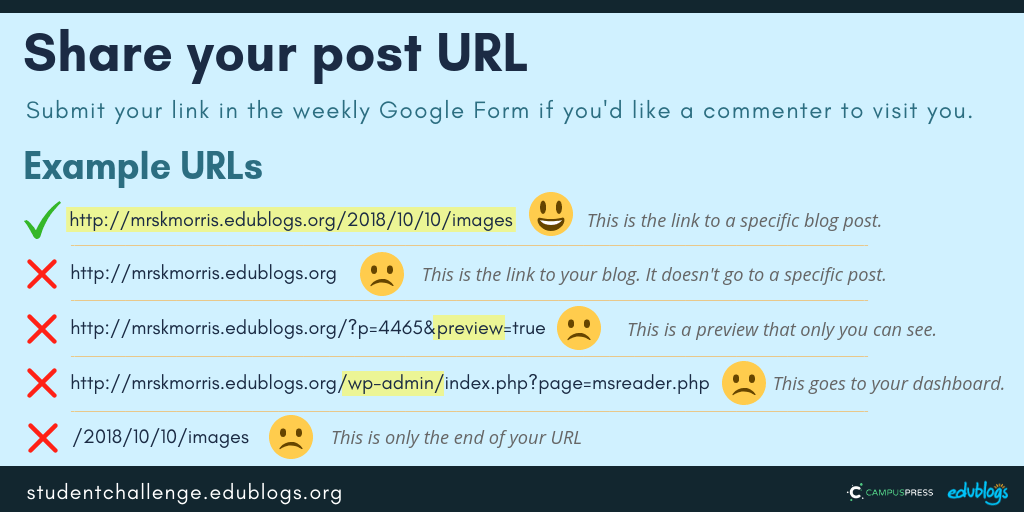
This graphic below should help you understand what a post URL looks like if you’re using Edublogs/CampusPress/WordPress
The Google Form
Edit: Enter your details in the Google Form below or click here to open it in a new tab.
Teachers, feel free to put the Form URL on your class blog if it’s easier for your students to access.
The 4th grade year is amazingly coming to an end shortly as we reach the end of April. April has been a very busy month for 4th grade as we prepared and took the PSSA’s. All students worked so hard during our testing and I know they gave their best effort which made me proud!
In ELA we have focused a lot of our reading and studying on science topics. Students created a project where they researched about the spotted lantern fly, found out why they are bad for our ecosystem, and came up with a solution to control their population. Students have done a lot of research about animals of their choice and are learning about things like adaptations animals have and the life cycle they go through. In the next week, students will begin a project where they will be making their own TED Talk video about a science topic that interests them. They will be sharing an opinion and researching about the topic for their video.
Students continue to do amazing things with their blogs! Many students have visitors from all over the world coming to see their work. I have loved seeing the creativity in the students as they make blog posts with video, pictures, slide shows, and even music! Keep on the lookout for new posts over the next few weeks.
In Math class we have spent a lot of time working with angles and shapes the last few weeks. We discussed the different types of angles and how to recognize them and even learned how to draw angles to exact degrees with protractors. We also reviewed the differences between lines, and line segments, and rays.
We are excited for a fun and productive end of the 4th grade year as we get ready for our summer break and becoming 5th graders!
As always, if you have any questions or concerns do not hesitate to reach out!
You might also be able to use some of the fabulous Google tools for this topic like Google Earth and Google Maps.
Eleni Kyritsis shows us how to create a virtual tour with Google Tour Creator.
Matt Miller explains how to make a Google Map walking tour with Screencastify.
Task 2: Learn About Another Country
This task is the same as task 1 except instead of telling us about your own country you will research and share information about another country.
Be sure to tell us why you chose the country. Why does it interest you?
Task 3: Travel
Have you been lucky enough to travel to another country or city? Or perhaps you have dreams to travel somewhere?
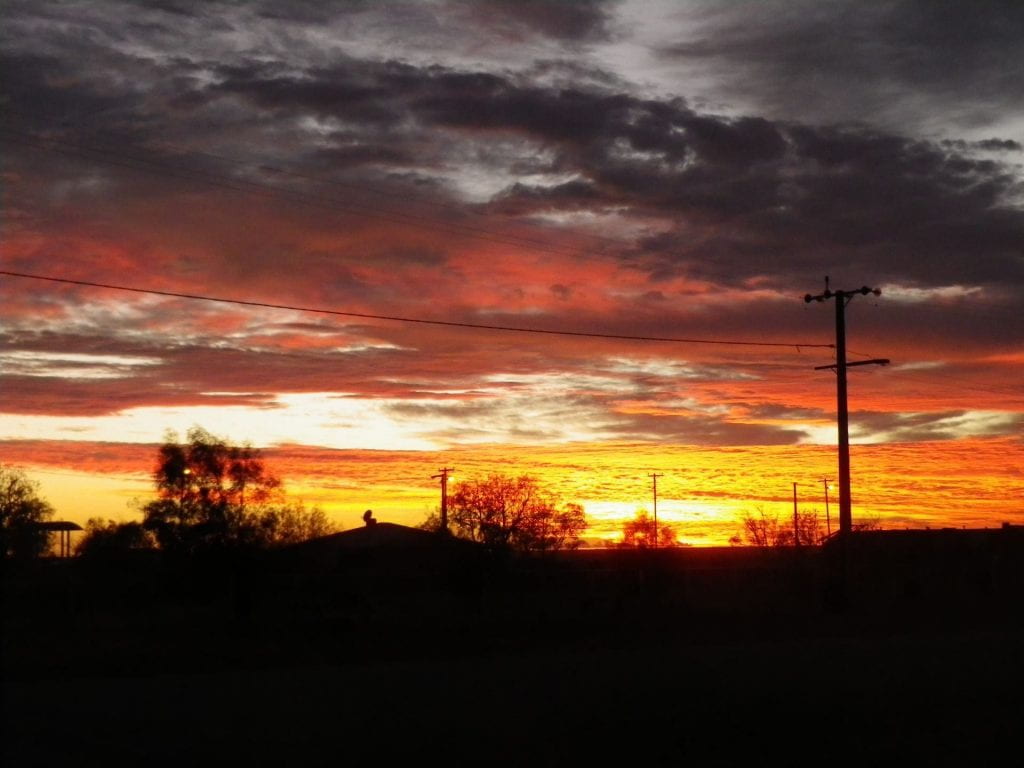
Our commenting team leader Miss W recently travelled to South Australia and took some great photos which she’d like to share with you. Click here to visit Miss W’s website.
Sunrise at Marree by Miss W
This task involves writing a post about travel.
Ideas for your travel post:
Write about a holiday you went on that you really enjoyed.
Make a list of the top 10 travel destinations you’d like to go to.
Create a slideshow of your ideal holiday destinations.
Create an imaginary itinerary if you could travel anywhere and had an unlimited budget.
You might have your own ideas!
💡 Safety Tip
It’s fun to talk about travel, but it’s a good idea to avoid mentioning your specific travel plans online.
For example, instead of saying, “I’m going to visit Sydney next Monday” try “I’m planning a holiday to Sydney” or “I’m looking forward to visiting Sydney later in the year”.
Also, remember not to post pictures of yourself or others on the blog without permission.
Visit Others
Don’t forget to try to visit a couple of other bloggers once you’ve published your own post. You might learn a lot about where they live this week!
Submit Your Post URL ⬇
If you’d like a commenter and others to visit your post, fill in the form below.
This video shows you how to find your URL…
Note, this isn’t a real class blog. Just one I used for testing 😉
This graphic below should help you understand what a post URL looks like if you’re using Edublogs/CampusPress/WordPress
The Google Form
Edit: Enter your details in the Google Form below or click here to open it in a new tab.
Teachers, feel free to put the Form URL on your class blog if it’s easier for your students to access.
Gabby wrote an excellent piece about celebrations that included multiple pictures and some fun polls.
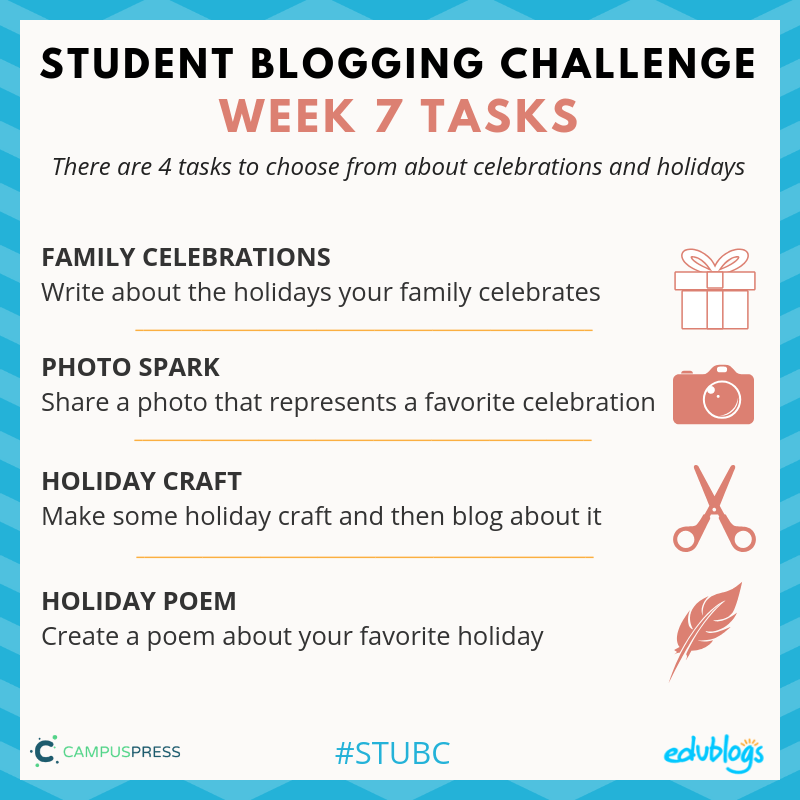
Task 3: Holiday Craft
Some people enjoy making craft for special holidays and seasons.
This task involves creating something and then adding a photo of it to a blog post with a description. Or you could even make a video tutorial for your readers!
If you find inspiration from a website, be sure to include the link in your post.
Craft inspiration:
Origami Club has a list of origami (paper folding) objects you can make for a variety of holidays.
DLTK has lots of ideas sorted into different holidays.
PBS Parents shares a range of craft ideas for different celebrations.
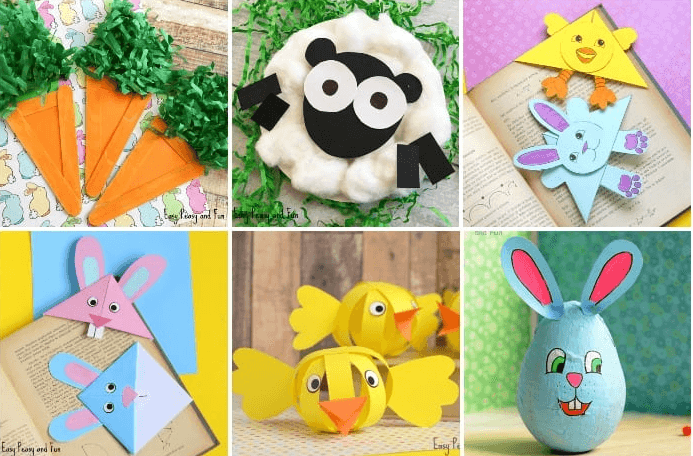
Easy Peasy and Fun have lots of holiday craft ideas. For example, there are many Easter ideas. Use the drop-down menu at the top of the site to explore other holidays or adapt the ideas for your own holidays!
Easy Peasy and Fun has lots of craft ideas
Examples:
Rhiann made a fantastic video to share a craft idea.
Kaylie made a candle and explained how she did it. She also including the link to the site she used.
Explore the fantastic poetry generators on the Language is a Virus website. (I believe this works best on a computer rather than tablet/mobile device).
For example, their visual poetry mosaic tool displays your work as a shape. Take a screenshot of your end result and add it to a blog post as an image.
If you don’t want to use that tool, you could display your poem creatively using a tool like Google Drawings or Canva.
Submit Your Post URL ⬇
If you’d like a commenter and others to visit your post about celebrations, fill in the form below.
This video shows you how to find your URL…
Note, this isn’t a real class blog. Just one I used for testing 😉
This graphic below should help you understand what a post URL looks like if you’re using Edublogs/CampusPress/WordPress
The Google Form
Edit: Enter your details in the Google Form below or click here to open it in a new tab.
Teachers, feel free to put the Form URL on your class blog if it’s easier for your students to access.
There are so many different types of music enjoyed around the world.
As Greek Philosopher Plato apparently said,
Music gives a soul to the universe, wings to the mind, flight to the imagination and life to everything.
Music and the Law
Remember back in week 3 we discussed how you can’t just use any image that you find online? Well, the same applies for music.
Most music is protected by copyright. So you can’t use it for your own digital projects without permission or paying for a special license.
Listening to music
Not so long ago, when people wanted to listen to their favourite song, they had to wait until it came on the radio or buy the CD/cassette/record.
Now there are choices but it’s important to know what you can and can’t do with music.
Using music in projects
Normally, you can’t just use any music you like in something you’re creating — like a video.
However, in most countries, you are allowed to copy music to add to a video if:
a) it’s for educational purposes and
b) you’re not sharing your video publicly (or selling it!)
So, if you have a public blog, you aren’t allowed to put a video on there that you made with copyright music. And you couldn’t show your video at a public event. However, it’s okay if you’re just showing the video to your teachers and parents.
Hopefully you do want to share your work with a public audience. That’s what this challenge is all about! Don’t worry. You can still use music. I’ll share some options below.
Note: This is the case in Australia and the US but if you live in another country you may need to check your own guidelines.
Paying for music
There are popular sites and apps where you can pay to download music legally — for example, Apple Music, Google Play Music, and Spotify.
You can listen to your downloaded music yourself, but can’t upload it to your blog or to a video or other project you’re working on.
You also can’t use it publicly (e.g. at a school event, store, or public event).
Streaming music
It’s fine to stream music online on sites like YouTube (although remember, YouTube is 13+) but it’s not usually legal to download the audio from a YouTube video as explained in this article.
Also, streaming music in this way is meant for personal use — not for a public broadcast. As Spotify says,
…it’s not possible to use Spotify in public places (such as bars, restaurants, stores, schools, etc.). You may only make personal, non-commercial, entertainment use of the content.
Most streaming services are similar.
Embedding music
Embedding a video from a site like YouTube or Vimeo into your blog is usually allowed.
If the host provides an embed and you embed it using their code according to their rules (usually that means not trying to hide branding), you can embed it without violating copyright.
CDs or digital music?
You can also listen to music by buying a CD or borrowing one from the library. Although digital music is becoming a lot more popular than CDs in many parts of the world.
Again, you can’t copy the music from a CD and use it for another project (e.g. upload it to your blog or add it to a public video).
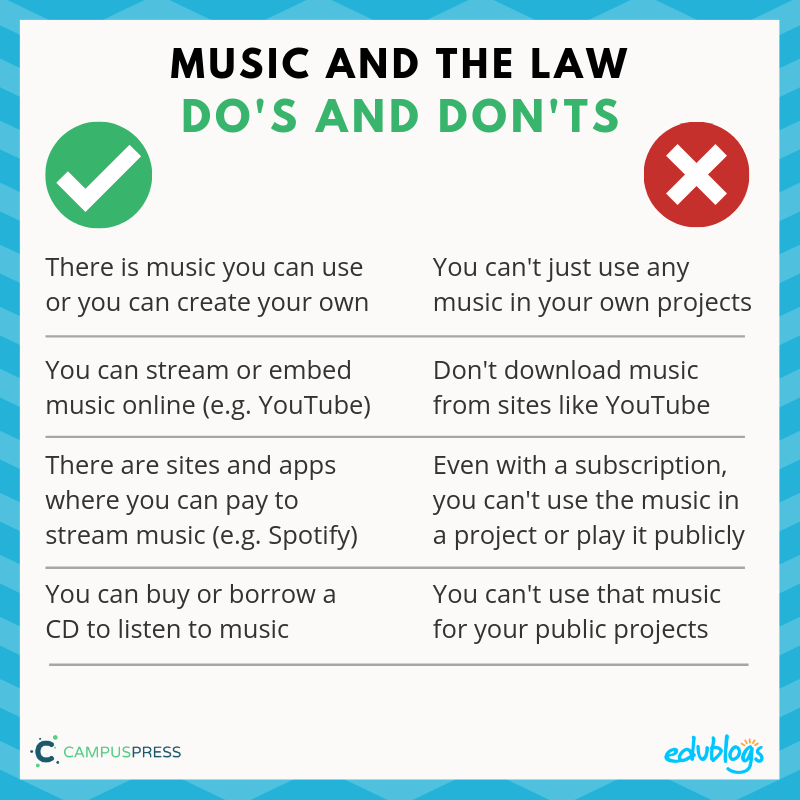
Confused? Here’s a summary of the do’s and don’ts you need to remember
Remember, I’m no legal expert and things are different in different countries so please contact me if you have any extra information. We can all learn together!
Where to find music and clips that you are allowed to use
Just like with images, there are options for students and teachers who need music or sound clips for a video, slideshow, or other digital project they’re working on.
Let’s take a look at three …
Dig CC Mixter
Dig CC Mixter offers thousands of hours of free music.
The music on this site has different Creative Commons licenses so you need to check whether you need to attribute the music or not (attribute means saying who made the music and where it’s from etc).
Educational Blogger Richard Byrne’s video below explains how to use Dig CC Mixter and filter by license.
BBC Sound Effects
During 2018, the BBC made over 16,000 sound effects available to use for personal, educational, or research purposes.
You can browse by category to find the sort of sound effect you’re after for your project.
You should put a link in your project or blog post to say that your sound effects were from the BBC and link to their site.
Here is an example of a sound clip. This is the sound of the surf at Bondi Beach, Sydney, Australia.
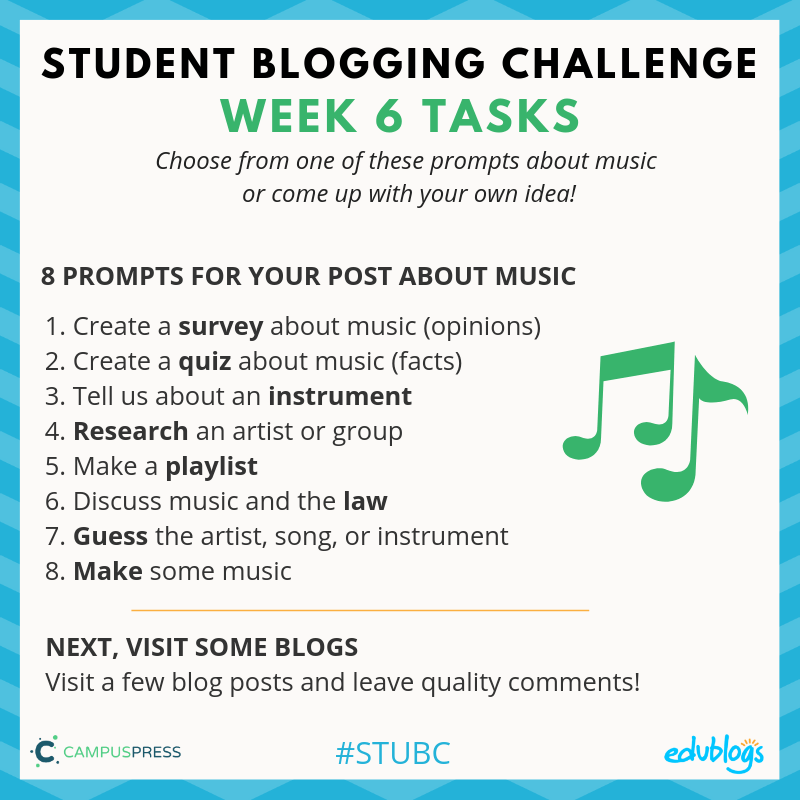
This week you can choose from a list of 8 ideas to create a post about music. Or you can come up with your own idea!
Because the topic of music is a new one for the Student Blogging Challenge, we don’t have many examples to share this week.
8 Prompts For Your Post About Music
Choose one or more of these ideas to create a post about music. Or, you might have your own idea!
1) Create a survey about music (opinions)
Create a poll to survey your readers (Google Forms is a good way to do this or you could use a tool like Crowd Signal).
Alternatively, you could write some questions that you’d like readers to answer in a comment.
Your survey questions could be about:
Your favourite music genre
Your favourite artists or groups
Would you rather? (e.g. Would you rather Ariana Grande or Billie Eilish? Would you rather classical music or rap?)
Idea: When your survey is completed, you could share a summary of your findings. I love a tool called Beam for making simple charts.
2) Create a quiz about music (facts)
Quiz your readers about anything music related. Perhaps your quiz could include questions like:
Facts about artists (year they were born, or first number one hit)
Facts about instruments
Music theory
Questions about a certain genre or period of time (e.g. 1980s music)
Google Forms is great for making quizzes but please make sure it’s public. You could also make a Google Slides presentation. The question could be on one slide, and the answer on the next (or all the answers could be at the end of the presentation).
Remember to please make sure any Google Forms/Slides/Docs etc. are public.
3) Tell us about an instrument
Do you have a favourite instrument? Or perhaps there is an instrument that fascinates you and you might like to do some research and write a post about it.
You might include things like:
Construction or appearance
History
Technique or how to play it
Famous works or artists
Classification or family of instruments (e.g. strings, or percussion)
Don’t forget to include an image or embed a video.
Example: Ash wrote a post about the ukelele for her free choice post in week 4.
4) Research a famous artist or group
Find out more about a singer, songwriter, musician, or group. This might be someone who is popular now or performed long ago.
Share some interesting facts in a post.
Bring your research to life with an image or video.
5) Make a playlist
Music lovers have enjoyed making their own playlists for years. A playlist can celebrate a certain artist, genre, or mood.
Write a blog post that includes a playlist of your favourite songs. Don’t forget to explain why you like each song and why it’s part of your playlist.
Example: Principal Meredith Akers made a playlist by embedding YouTube videos into her blog post.
6) Discuss music and the law
Many people don’t realise that by using music illegally, you are putting artists at a disadvantage because they are not getting paid for their work.
Do some research and write an article about the downsides of using music illegally.
Alternatively, you might like to write a post about do’s and don’ts of using music legally. You might be able to teach others who aren’t aware that there are rules we need to abide by.
7) Guess the artist, song, or instrument
Guessing games are fun!
Give your readers some clues as they scroll down the page and have them guess the artist, song, or instrument.
You could put each clue on a slide of a Google Slides presentation if you prefer (just remember to make sure your Slides presentation is public).
Invite your readers to put their guesses in a comment.
8) Make some music
We don’t just have to talk about music or listen to others’ music. Why not make your own. There are lots of apps and websites where you can make music.
Play around with it to make a tune and then click Save in the bottom right-hand corner.
Next, you can copy the embed code. Another option is to copy the link to your song if you don’t want it embedded in your post.
In your blog post, go to Add Media > Insert Embed Code
Paste your embed code and press Insert Into Post
Your song will appear!
Another music creation tool that is popular and free for all ages is Incredibox.
When You’ve Published A Post, It’s Time To Visit
As always, an important part of the challenge is to connect with others. You never know what you might learn or who you could connect with!
When you’ve finished your post, choose a couple of blogs to visit and leave a quality comment.
Remember to ask a question and check back to see if they replied to you (most platforms have a box to tick so you can get an email when there is a follow-up comment).
You will find the link to the week 6 participants’ posts on the sidebar of this blog on Tuesday.
Submit Your Post URL ⬇
If you’d like a commenter and others to visit your post about music, fill in the form below.
This video shows you how to find your URL…
Note, this isn’t a real class blog. Just one I used for testing 😉
This graphic below should help you understand what a post URL looks like if you’re using Edublogs/CampusPress/WordPress
The Google Form
Edit: Enter your details in the Google Form below or click here to open it in a new tab.
Teachers, feel free to put the Form URL on your class blog if it’s easier for your students to access.
Whenever my own students have connected with other classes through blogging, Skype, or other projects one thing they’ve been really fascinated is school.
It’s funny how schools can be very similar in some ways but also very different!
What sort of school do you go to?
Primary/elementary school?
Middle school?
High school?
International school?
Home school?
Private school?
Public school?
Religious school?
We even have some participants in college
Let’s take a quick look at how school varies around the world.
Video
This video from INSIDER shows what school looks like in 27 countries around the world. Was your country included? Did it look accurate or not?
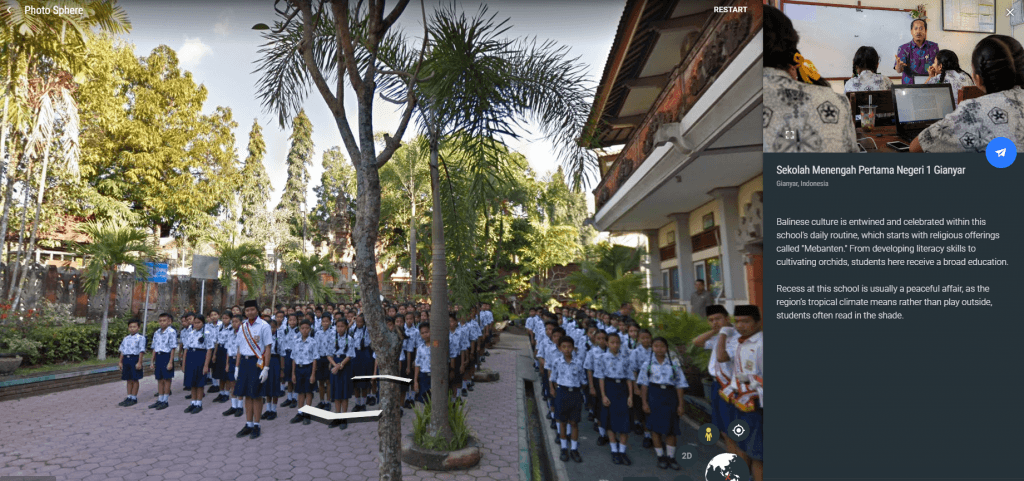
Google Earth Show
To learn more about school around the world, check out this show on Google Earth called This Is School. From London to the Himalayas, you can explore classrooms around the world in Street View.
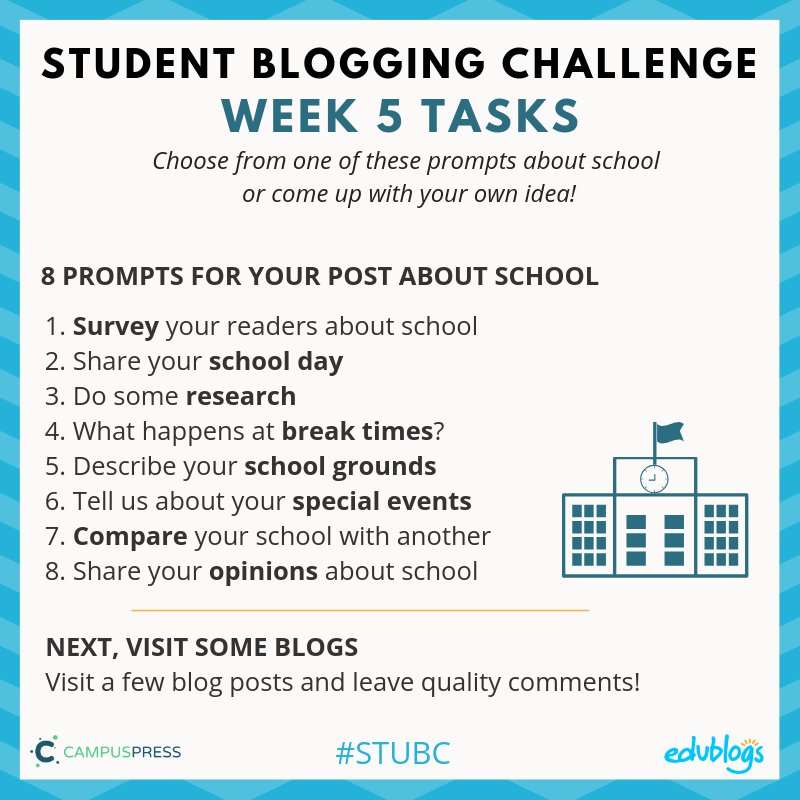
This week you can choose from a list of 8 ideas to create a post about school. Or you can come up with your own idea!
Thanks to Sue Wyatt who came up with many of these ideas for previous challenges.
8 Prompts For Your Post About School
Safety First!
💡 Remember it’s important to think carefully about what information we publish online.
Students should check with their teacher about whether it’s okay to mention their school name. If not, you might just like to tell people your state/country.
Another thing to consider is writing about your plans (e.g. instead of saying “I have karate lessons at the town hall at 4pm on Thursdays” try “I enjoy weekly karate lessons”).
Now onto the ideas…
1) Survey your readers about school
Create a poll to survey your readers (Google Forms is a good way to do this or you could use a tool like Crowd Signal).
Alternatively, you could write some questions that you’d like readers to answer in a comment.
Your questions could be about:
How people get to school (or work)
School starting/finishing time
School holidays
School uniforms
School subjects
Anything else that interests you
Idea: when your survey is completed, you could share a summary of your findings. I love a tool called Beam for making simple charts.
Write about your school day or make a slideshow or video to explain it.
You might include things like:
How do you get to school?
What is your timetable like? Do you have set subjects at certain times?
Do you have one teacher or many?
What time do you begin and end school?
Do you get to choose what you learn?
What technology do you have at school?
Remember to explain abbreviations you might use e.g. LOTE, STEM, or ELA
Example: Kayden wrote about her favourite school subjects
3) Do some research
Do a little bit of research for a new post.
Here are some ideas:
Research the history of your school and create an “About my school” page.
Research a famous person who attended your school.
How has schooling changed over the years? Interview parents or grandparents and ask questions about schooling. You could make a written interview, make a video, or make an audio recording (Anchor is a great tool for making audio recordings).
Find out more about someone at your school who you don’t talk to very much. Maybe you could interview a student who is older/younger than you. Or you might interview your cleaner, crossing supervisor, canteen worker etc.
Example: Farrah asked her parents about how school has changed.
4) What happens at break times?
Tell us what you do at break time or what’s popular at your school.
You might write about:
The food you eat at school. Do you take your own lunchbox or do you buy lunch? Include some photos if you can!
What do you do at break time? Are there any popular games, sports, or activities at your school?
What precautions do you have to take from the weather at break times? Hats? Sunscreen? Snowsuits? Is school ever cancelled or do you ever have to stay inside?
Example: Van Anh explained how to play a traditional Vietnamese game.
5) Describe your school grounds
Tell us a bit about your school grounds. You could even draw a map, or make a slideshow or video that gives readers a tour of your school.
Is your school big or small?
What sort of play areas do you have? Playgrounds? Fields? Courts?
What special buildings do you have? A gym? A library?
Example: Mrs. Yollis class made this great school tour video when I worked on a projectwith her for International Dot Day.
6) Tell us about your special events
Does your school hold any special events? Maybe a fair or fete, a dress up day, a fundraiser, camps or school trips?
Share the details in a post!
Example: Jueun wrote about a sports event held in his district.
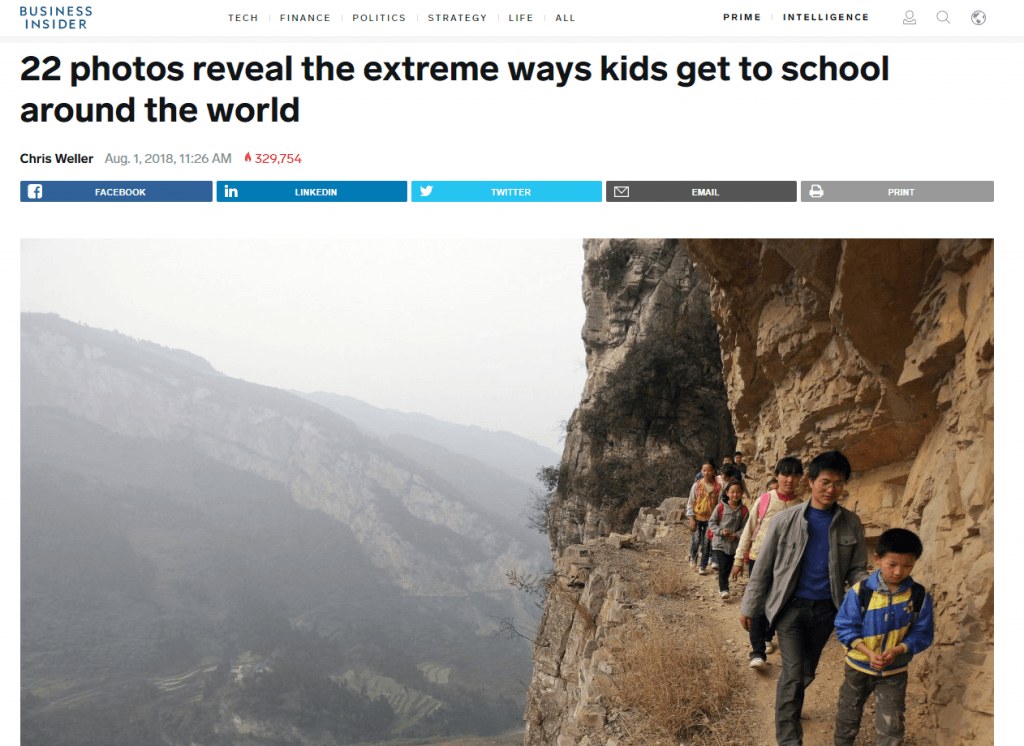
7) Compare your school with another
Find a video, photo, or article to shows what school is like in a different part of the world.
Feel free to use the resources I added above.
Write about the similarities and differences as well as the questions you’re pondering.
Alternatively, if you’ve been to more than one more school you might be able to compare them in a post.
Example: Yuyang compared his school experiences in China and Senegal.
8) Share your opinions about school
No doubt you have some opinions about school and we’d like to hear them:
What’s your ideal school? You could even include a map of what it would look like.
Share your opinion on uniforms, school starting times, homework, recess, or another controversial issue.
What do you dream of doing once you finish school?
If you were principal for a week, what would you do?
If you have any other ideas, that’s great! Write about anything that relates to schooling around the world.
Examples: Fran wrote about his plans for when he finishes school while Van Anh shared her opinions on school uniforms.
When You’ve Published A Post, It’s Time To Visit
An important part of this topic is to find out about some other schools. You never know what you might learn or who you could connect with!
When you’ve finished your post, choose a couple of blogs to visit and leave a quality comment.
Remember to ask a question and check back to see if they replied to you (most platforms have a box to tick so you can get an email when there is a follow-up comment).
You will find the link to the week 5 participants’ posts on the sidebar of this blog on Tuesday.
Submit Your Post URL ⬇
If you’d like a commenter and others to visit your post about school, fill in the form below.
This video shows you how to find your URL…
Note, this isn’t a real class blog. Just one I used for testing 😉
This graphic below should help you understand what a post URL looks like if you’re using Edublogs/CampusPress/WordPress
The Google Form
Edit: Enter your details in the Google Form below or click here to open it in a new tab.
Teachers, feel free to put the Form URL on your class blog if it’s easier for your students to access.
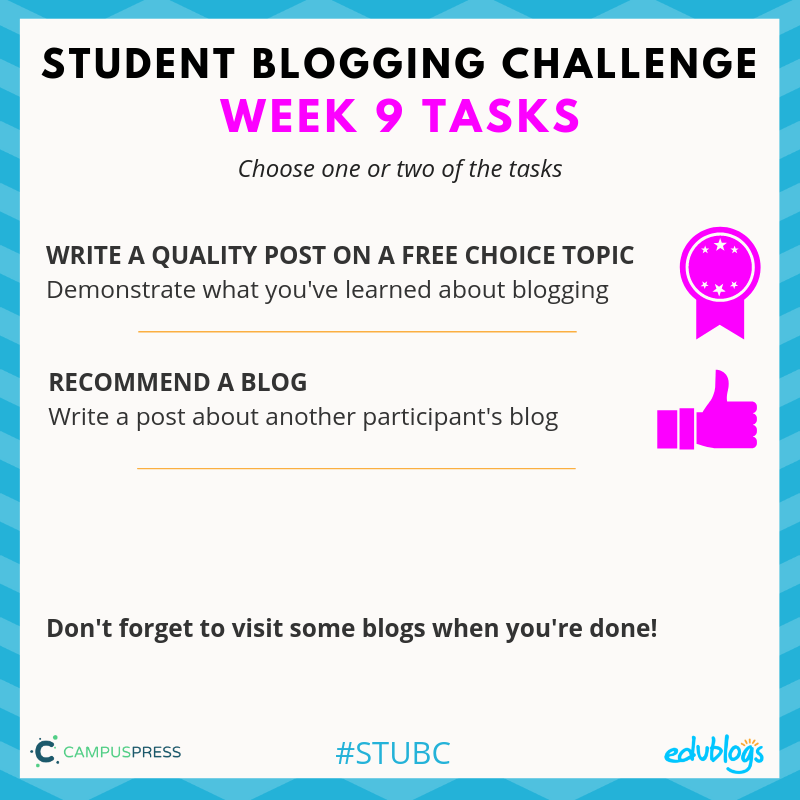
This week’s tasks are simple but I’ve offered a little elaboration below the summary graphic.
Task 1: Catch Up
You might not have had the chance to complete a task for week 1-3. Or you might like to complete an additional task from the choices on offer. Go for it.
Here are the links (you’ll also find them on the sidebar of the challenge blog).
Saturday 30th March is Earth Hour. Read about this important event and write a post about it.
This week’s post on TheEdublogger.com which will be published Monday/Tuesday (depending on where you live) has 15 poetry activity ideas.
One of our great commenters, Sheri Edwards, created a tutorial showing how to make a character out of Google Drawings. Why not make a character and blog about it?
If you write a free choice post this week, submit it in the Google Form at the bottom of this post.
Task 3: Visit
You might have a bit of extra time this week so it could be a good opportunity to visit at least one other blog and leave a quality comment.
Remember to ask a question and check back to see if they replied to you (most platforms have a box to tick so you can get an email when there is a follow-up comment).
Task 4: Kahoot!
Have you ever played Kahoot? Get some friends together and test your blogging knowledge with our 15 question quiz!
How Kahoot! works:
The multiple-choice questions appear on the screen in the classroom and students submit their responses in real time using their computer, tablet, or mobile device.
Students can work in teams and can work for points (most correct answers and quickest responses).
You don’t need an account to play, however; you will need to log in if you want to edit the quiz (teachers can adapt it for your own students if necessary).
You also need to be signed in to save results.
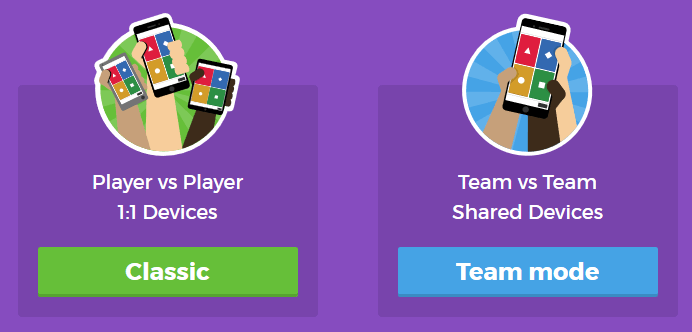
You’ll have the option for your students to play against each other individually (classic mode) or in teams.
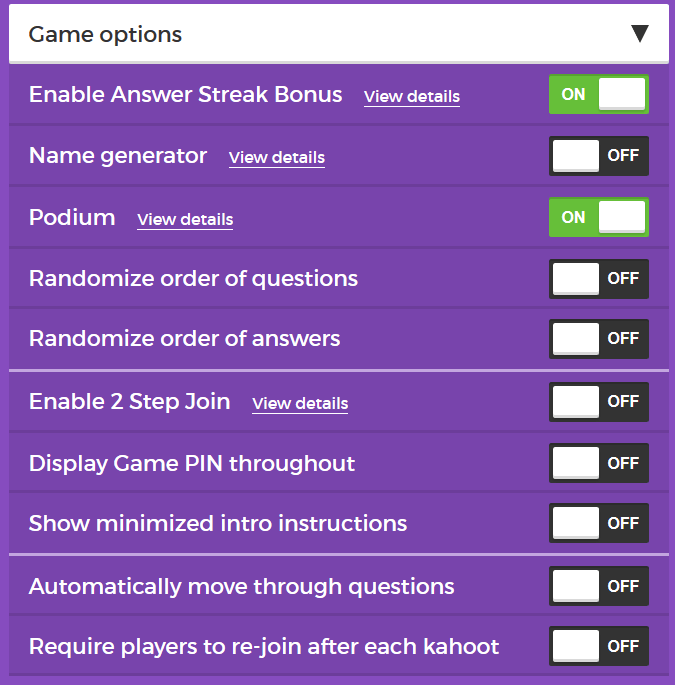
You’ll also have a variety of game options you can play around with (see below).
Once you finalize your selections, a game pin number will show up. Students will go to the Kahoot app on their device, or to https://kahoot.it/ and enter the pin number to begin!
Feel free to leave a comment on this post and tell us if you tried the Kahoot!
Submit Your Post URL ⬇
If you write a free choice post and would like a commenter and others to visit, fill in the form below.
Do you have a post on your class blog and student blogs? Awesome! Feel free to submit the class blog post and student blog posts.
You need to submit the URL of your post. You can submit the URL of a page if this is what you’re working on but make sure comments are enabled.
This video shows you how to find your URL…
Note, this isn’t a real class blog. Just one I used for testing 😉
Remember:
Click on the title of your post/page and then copy the URL from your address bar.
This graphic below should help you understand what a post URL looks like if you’re using Edublogs/CampusPress/WordPress
The Google Form
Edit: Enter your details in the form below or click here to open it in a new tab.
Teachers, feel free to put the form URL on your class blog if it’s easier for your students to access.
A blog without images would be pretty boring, wouldn’t it?
Images can really jazz up our posts, pages, headers, and widgets. Students and teachers also need images when they’re making a presentation, video, or other digital creations.
But where do we get those images?
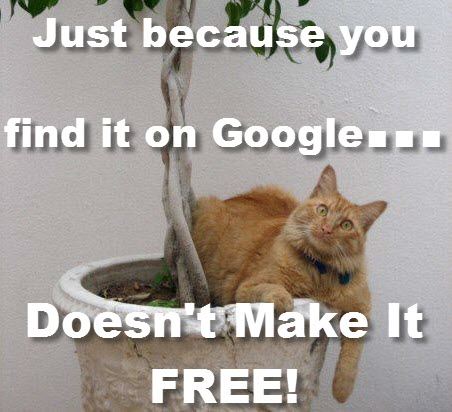
Can’t we just use Google Images?
Do you know how to find pictures using Google? It’s so easy. You just type in the word you want, find the image you like, and save it to your computer.
But stop right there!
Should we be doing this? Should we be getting any image we like from Google and using it in our own work?
Most images on Google are protected by copyright. This means, they are not free to use and you can get into trouble if you do use them without permission.
You can use Google Images advanced search filter to find images that you are allowed to use but this isn’t as simple as it seems. You need to know what the usage rights mean and how to attribute correctly.
We have some easier options to share with you this week.
Including the source is not enough…
A situation we commonly see on blogs is where someone uses an image they found online and then include a link to the site they got it from.
For example,
Image from Kathleen Morris www.kathleenamorris.com
Just because you link to the source of an image, does not mean you can use it. You would need to ask the image creator for permission.
Unless stated otherwise, everything on the web is protected by copyright.
Let’s take a look at some options for finding images…
Where Can You Find Images?
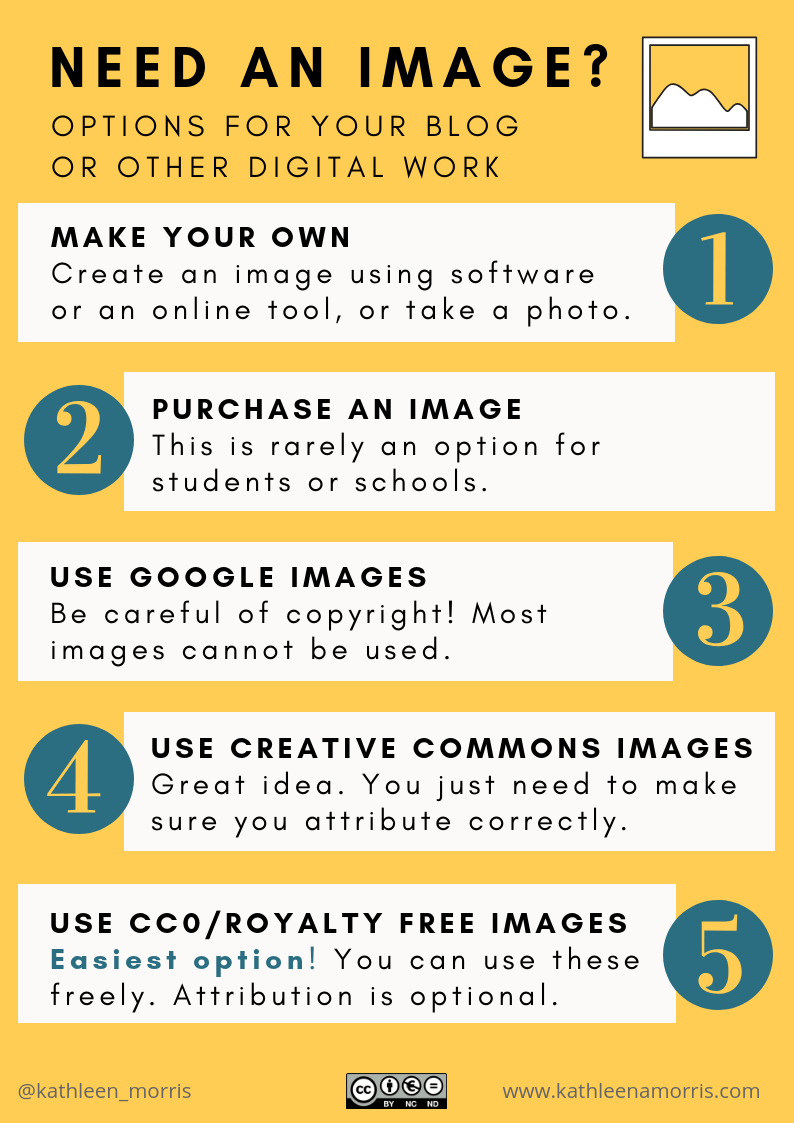
I have a post on my own blog that goes through the 5 main ways to find images for blog posts or other digital work.
Here is a summary. Feel free to use this poster on your blog or in your classroom if it’s helpful.
We pay a hairdresser when we get a haircut, pay a baker for a loaf of bread, so why not pay a photographer for their work?
This is good to know about as an option but isn’t something schools or students would usually do.
3) Using Google Images is not usually a good idea
We talked about this above.
Most images that you find on Google are protected by copyright. Find out more about copyright by watching this short video.
4) Creative Commons is worth knowing about!
Everyone’s work is protected by copyright unless stated otherwise.
Many people are happy for others to use their work (as long as they give them credit etc.). They give their work a Creative Commons license to tell everyone what they can or cannot do with their image (or text, videos, music etc).
Copyright means the person who took the photo (or created the work) does not allow anyone to use it.
CreativeCommons means the person who took the photo (or created the work) does allow people to use it IF they follow certain rules.
Usually, these rules mean saying who created the image/work and where it’s from.
Sometimes the rules state that you can use the image/work only if you don’t change it or don’t use it as part of something you’re selling.
These rules are called licenses.
There are a number of Creative Commons licenses creators can choose from.
No matter what license is used, you must always attribute the creator of the image/work (unless it’s a Creative Commons Zero license — see point 5). Attributing means crediting the author. In a blog post, this usually means putting the attribution under an image as I’ve done below.
By Erik Veland [CC BY-SA 3.0 (https://creativecommons.org/licenses/by-sa/3.0)], from Wikimedia Commons
Here’s a short video by Nancy Minicozzi that explains Creative Commons.
The trickiest part of using Creative Commons images is often the attribution (crediting the creator: saying who the creator is, where it’s from, what the license is etc).
If you’re using Edublogs or CampusPress, there’s a plugin you can use to find and insert Creative Commons images without worrying about attribution. It’s called Pixabay.
While the Pixabay plugin provides safe filtered options, nothing is foolproof. Younger students should be supervised or use Photos For Class for the safest option.
If you’re familiar with the old Compfight plugin, this is no longer available as it doesn’t work properly with the latest versions of WordPress.
5) Creative Commons Zero or royalty free images are the easiest choices
If your mind is spinning with all that talk of Creative Commons licenses and attribution, don’t worry!
Creative Commons Zero (CC0) or royalty free images are easy to use.
These are the least restrictive licenses so anyone can use the images freely and attribution is optional.
There are an increasing number of sites where you can find CC0 or royalty free images but remember:
Many sites contain inappropriate content if you search for it
Many sites have age restrictions
I made this comparison chart to show you some of the best options to find images that you can use freely without attributing.
You can read a detailed description of each one in my blog post if you’re interested.
This week there are five tasks to choose from to help you learn more about using images. The third task links with doing either task four or five.
Here is a summary. I will explain each task in more detail below with some examples and ideas for how classes can approach each task.
Task 1: Educate Others
Many teachers and students around the world know very little about using images legally, Creative Commons, attributing Creative Commons images etc. You can help them learn while learning more about this topic yourself.
Do some more research into any of the topics discussed this week and make a blog post, poster, video, slideshow etc.
If you’re working as a class on this activity, perhaps students could work in small groups to create a poster or video to share in a post (or a series of posts). Or, all the students could make a slide for a slideshow.
Example:
This video is the reaction of students in Mrs. Yollis’ class when she mislabelled their artwork. It helps people learn about the importance of correct attribution.
Georgia summarized the places you can find images and included a slideshow.
Chris explains why you can’t take images off Google.
Izzy wrote a fabulous post about not using copyright materials.
Task 2: Make An Image
Creating your own images for your blog posts is a great idea! You don’t have to worry about copyright and Creative Commons.
You can:
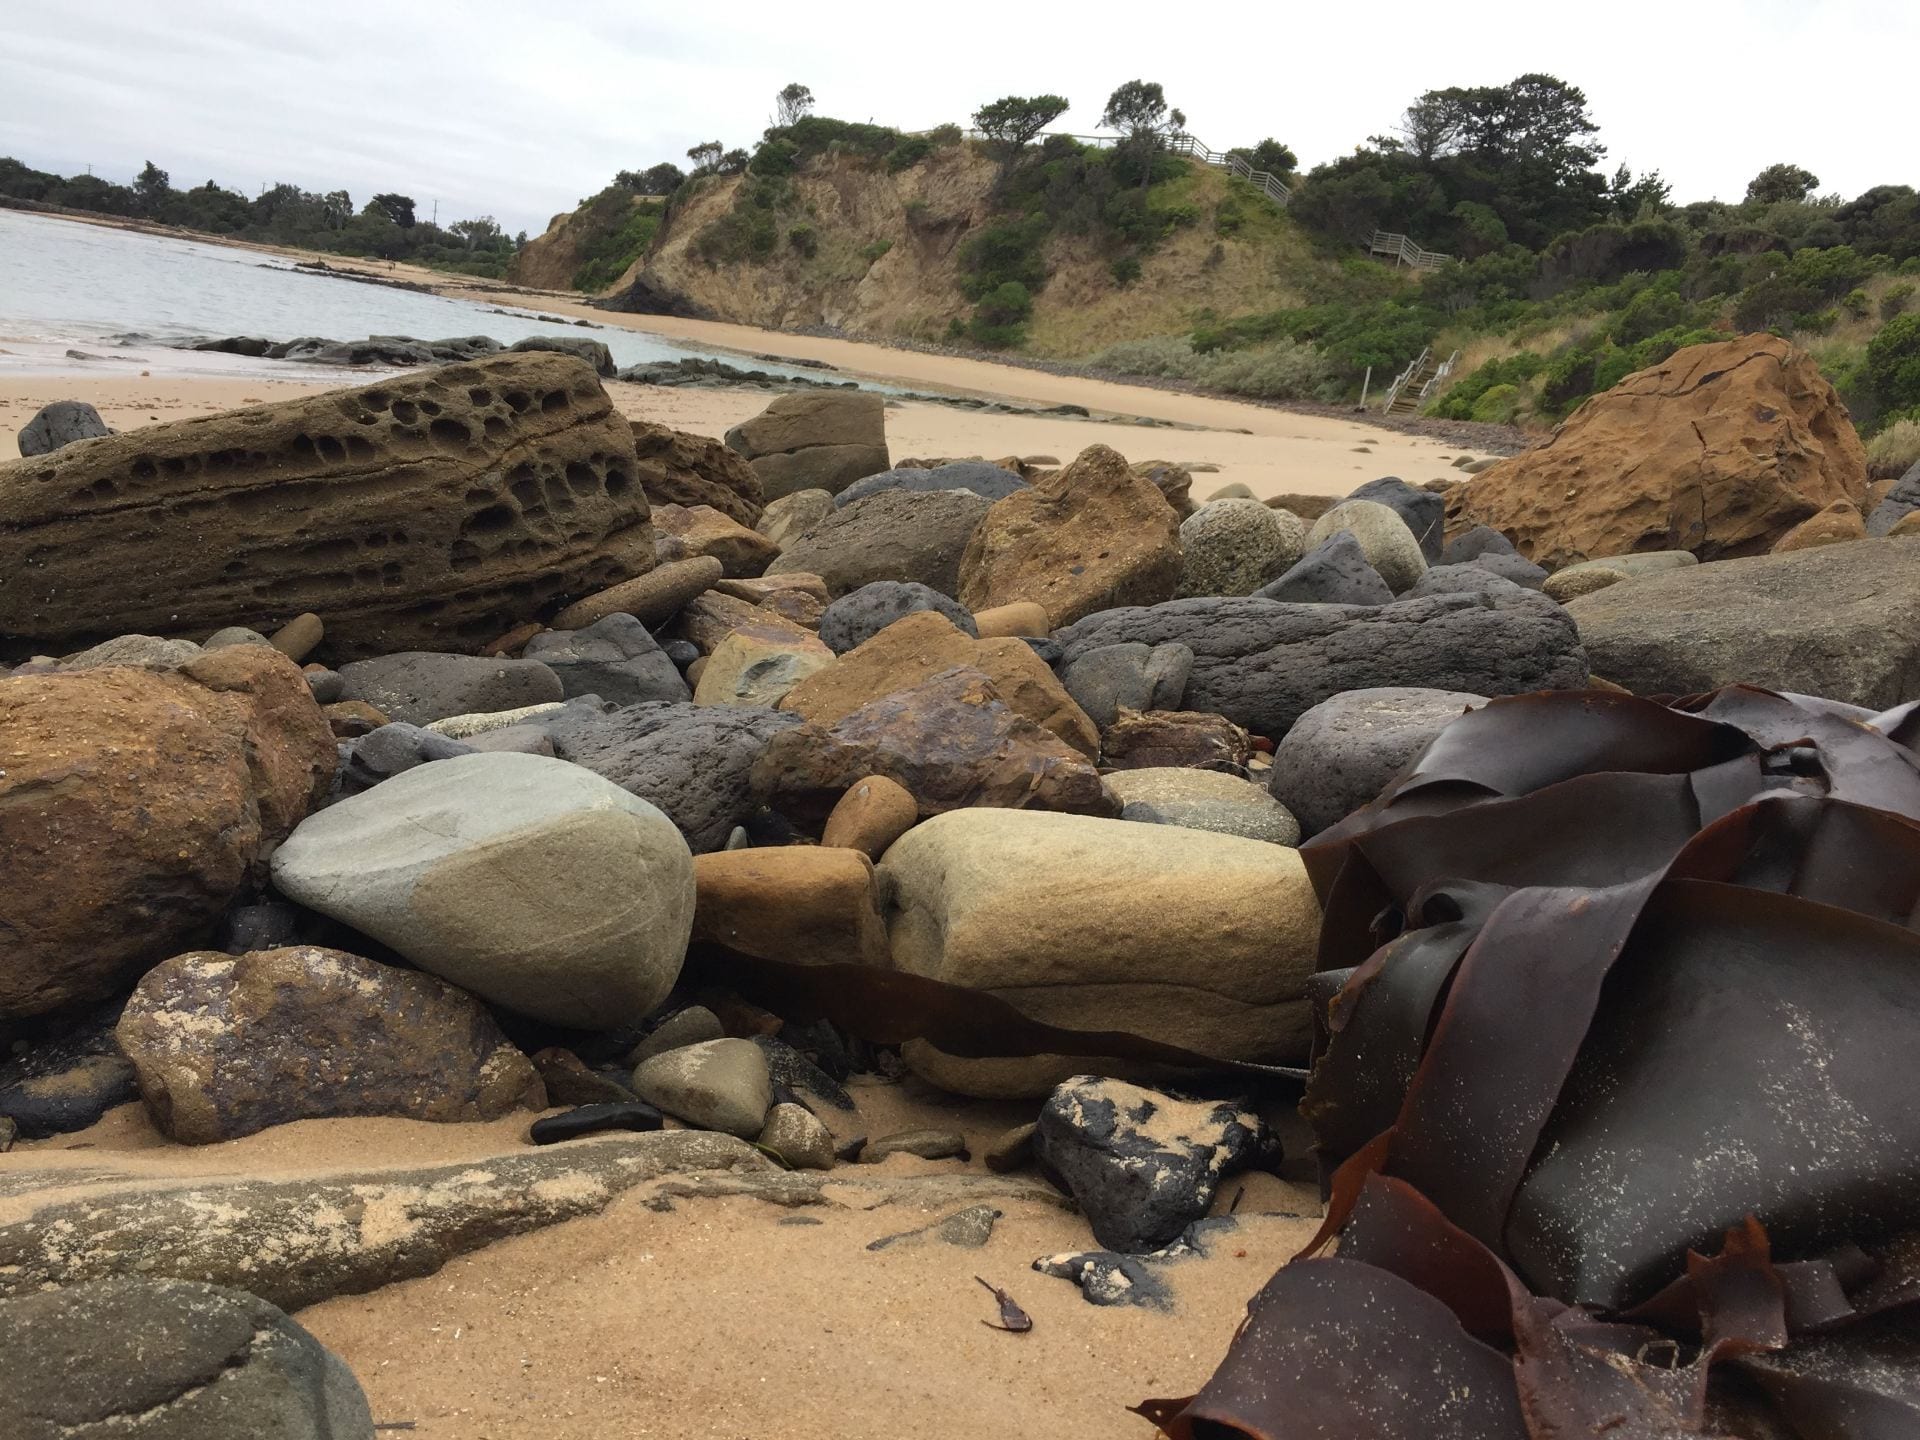
Draw something and take a photo of it.
Take a photo of something in your surroundings (don’t use photos of other people without permission and remember not to include personal details like the front of your house).
Remember, some online tools have age restrictions.
Leave a comment on this post if you know any other good tools for making your own images.
Add your image(s) to a blog post and tell us a bit about the images and how you made them. If you used an online tool, include the link so others can try it.
If you’re working as a class on this activity, all the students could make their own image and the teacher could compile them into a Google Slide presentation or simply add them to a blog post (or series of posts).
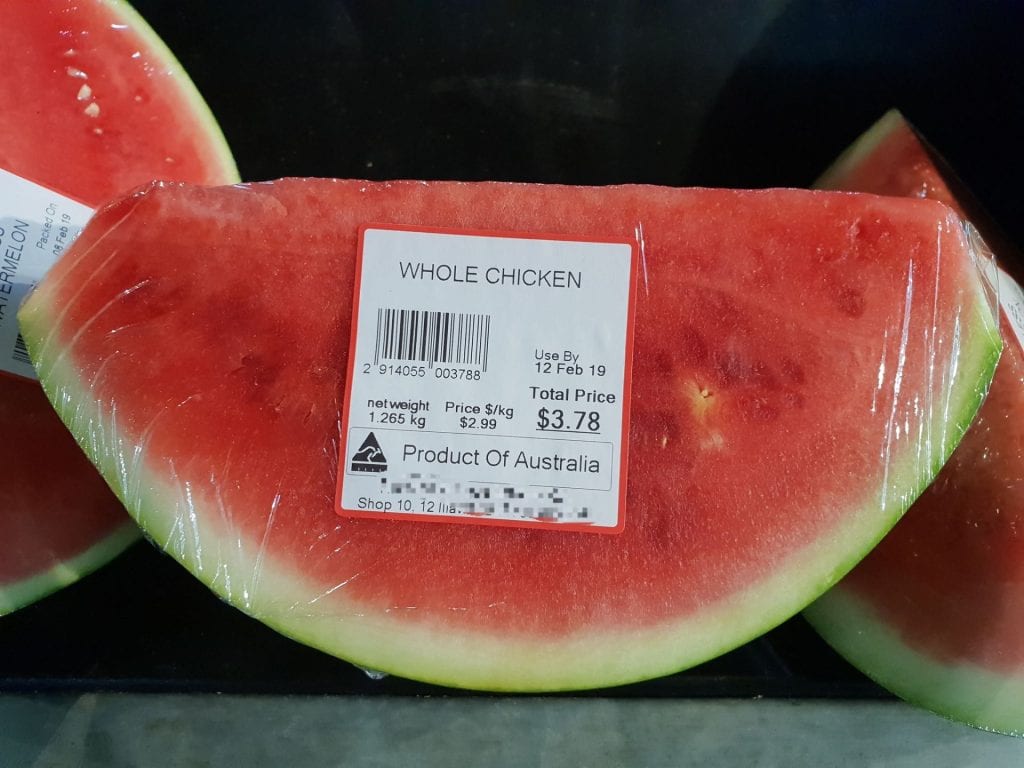
Wesley shared an original photo he took for a photography class.
Sue Waters from Edublogs took this funny photo of something odd she spotted at the supermarket. What can you find in your surroundings that makes you feel surprised, happy, amused, frustrated etc?
Task 3: Image Task Cards
This connects with task 4 and 5.
In the blog post I wrote about images for teachers and students, I prepared two task cards.
Depending on your age, use one of these task cards to find an image or a series of images to add to your post.
You could add a slideshow with some of your favourite images you found and write about why you like them. Or, you could use your images to complete task 4 or 5 below.
Tip: If you’re using Edublogs Pro or CampusPress, you can use the slider feature in the Live Shortcodes plugin to quickly add a slideshow to a post, page, or sidebar. Instructions are here. (Another option is the Metaslider Plugin) Find the instructions here.
Here’s Emmitt’s slideshow he created with Google Slides. Not sure how to add a Google Slides presentation to your blog? Here is a tutorial from Mrs. Vazquez.
You’re welcome to print these task cards, or add them to your blog. To do this, you’ll need to click on the download button under the task card. Find out how to add a PDF file to your blog using Edublogs or CampusPress here.
If you’re working as a class on this activity, perhaps all students could use the task card to find an image. They could create a story, poem, or description for the image and these could be placed in a blog post (or series of blog posts). Or, the teacher could add some images to a post and ask the students to write an imaginative response in a comment.
Task 4: Write A Poem
Find an image using one of the task cards above. Or you can try the Pixabay plugin if you’re an Edublogs/CampusPress user.
Now write a poem about your image.
Need some inspiration or advice? Check out Ken Nesbitt’s site which has lots of poetry resources.
If you’re working as a class on this activity, you could write a poem as a class, or have students write their own poetry and publish them as a series of posts. Alternatively, the teacher could publish a photo and have the students write a poem in a comment.
2) Or, make a sentence guessing game. Come up with a sentence and find a series of images to illustrate your sentence. Ask your readers to tell you what the sentence is in a comment.
Tip: You might need to visit some other bloggers and invite them to look at your post and complete your story or guess your word. Remember to leave the URL of your post for them to click on.
If you’re working as a class on this activity, you could publish a series of posts with the students’ picture prompts. Perhaps students could work in small groups. Or the teacher could publish the picture prompts and invite the students to respond in a comment.
Final Tips
Beware of advertisements
Remember, some of the free image sites have advertisements for paid image sites. We don’t want to click on those ads.
For example, on Pixabay, I typed ‘dolphin’ into the search box. The top row of results has a Shutterstock watermark on it. Clicking on this takes me to the Shutterstock website which is a site where you can pay for images.
Note: You won’t see advertisements when using the Pixabay plugin.
Do you need to go back and fix images in old posts?
Have you been using images from Google on your blog so far? Whoops. You might want to go back and fix these up when you have time. Remove the image or replace with a Creative Commons image.
Have you tried using categories, tags, or labels yet?
Categories, tags, or labels are all ways to organise your posts. It’s a good idea to set up a category (or label in Blogger) called Student Blogging Challenge or STUBC. You can assign this category to all the posts you write for the challenge.
If you use Edublogs or CampusPress, maybe you need to start using categories? You can also use tags once you get the hang of it.
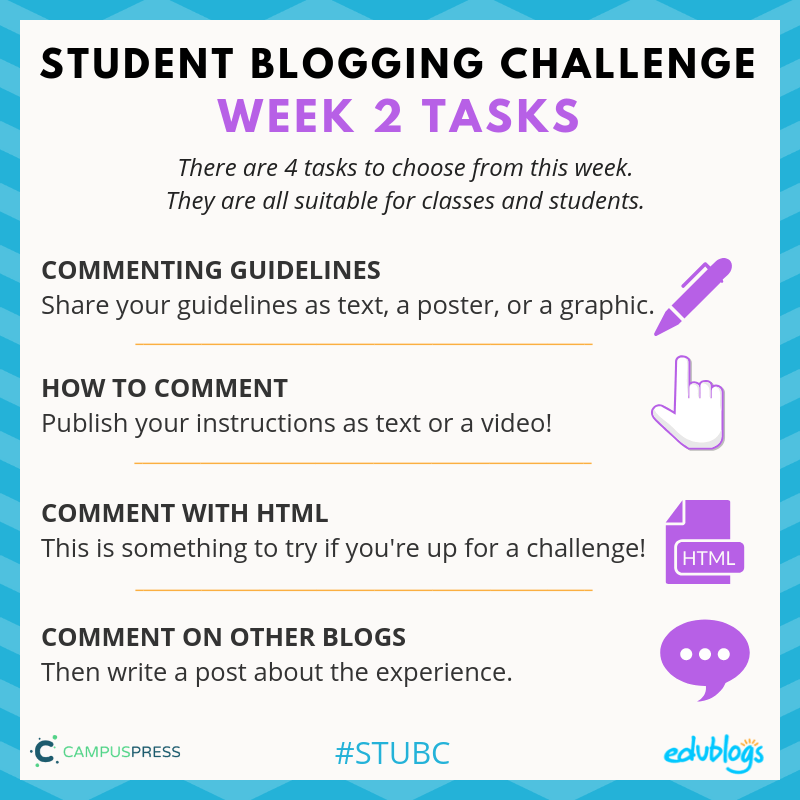
You can just write your guidelines down as text or make some sort of poster, graphic, or slideshow.
If you’re working as a class on this activity, you could come up with your guidelines together and all the students could make a graphic or poster to share on a page (or a series of posts). Perhaps a small group of students could illustrate one step each. Or the teacher can make the page and the students can comment on it.
Examples
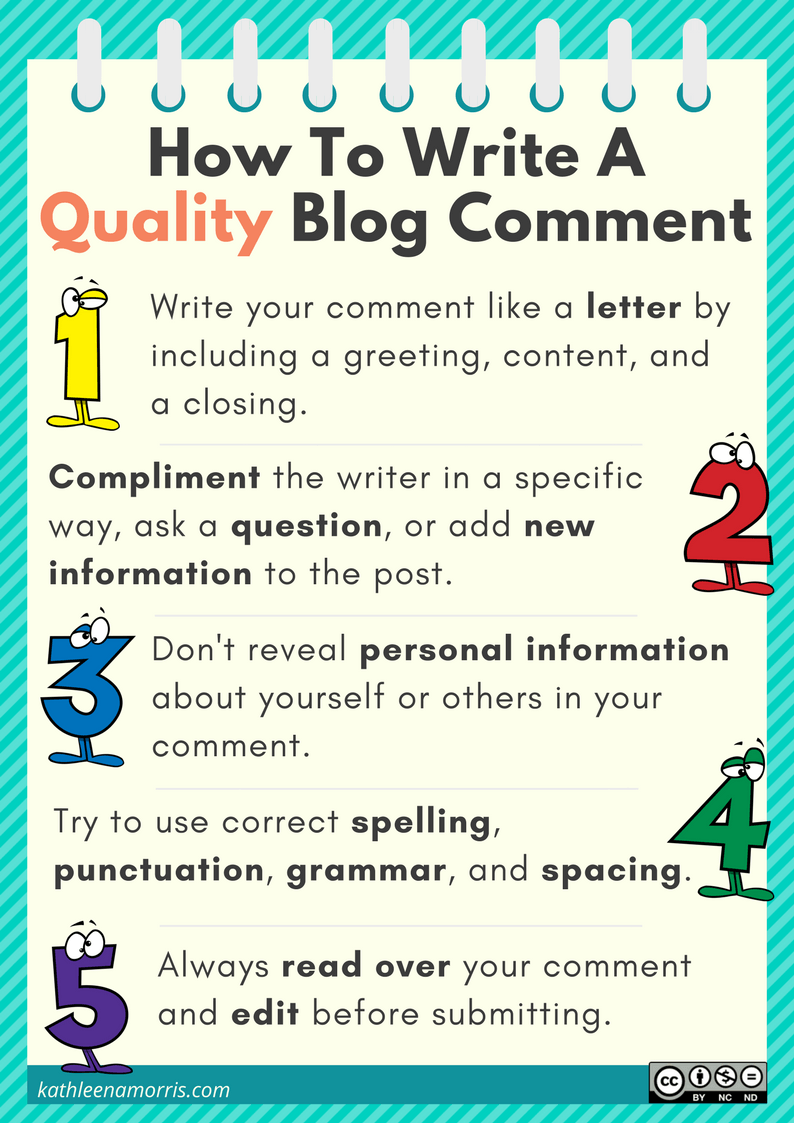
You might make a How To Write A Quality Comment poster like I did below. Teachers, if you want to use this poster for your own class blog, feel free. You can grab a PDF copy here.
Of course, if you make your own poster, please personalise it and don’t copy my exact wording.
Check out the creative way Mrs. Vazquez made a commenting poster using a web tool called Thinglink. If you hover over the blue circles you’ll find more information.
More examples:
Aubrey shared some examples on her page to explain what sort of things make a quality comment.
Rajyashori used emojis to explain her commenting guidelines.
Task 2: How To Comment
Many themes and blogging platforms have different ways to leave a comment.
You might need to click on the title of the post, or click on a number in a circle, or click on the words ‘Leave a comment’.
This task involves writing a page (or post) for your blog explaining how to leave a comment. (Remember, if you change themes in future, you might need to change your instructions).
You could write it as a set of steps or perhaps create a video showing what to do. Alternatively, make a slideshow like the one I shared in this post.
If you’re working as a class on this activity, you could come up with your instructions together and all the students could make a graphic, poster, or video to share on a page (or a series of posts). Or the teacher can make the page and the students can work on other activities.
I used a free Chrome extension called Screencastify to make the video above.
Loom is another good tool for making screencast videos if you use the Chrome browser.
If you use an iPad you can make a screencast without any special app. Tony Vincent shows us how to do that in this graphic…
Tip: Find out how to add a video to an Edublogs or CampusPress blog here.
Need Pro? If you have a free Edublogs blog, you won’t be able to embed the video into your post or page. This is to prevent misuse by spammers. Contact me to get a free upgrade to Pro for the duration of the challenge.
If you want to leave a link to your blog that looks neat and tidy, check out this post.
Cheat sheet: bold, italics, link
The instructions below show you how to use bold, italics, and add a link.
Remember, coding is about troubleshooting. So if something doesn’t work, take a closer look at your code. Maybe you’ve added a space or missed a symbol.
Visit one of the participants’ blog posts then write a post telling everyone about the HTML you used. You might make your own tutorial for others.
Tip: If you want to include a demonstration of HTML code in a blog post, it can be best to write it in another program like Word, Google Docs etc. and take a screenshot of the code. Then insert the screenshot into your post like any other image.
This article shows how to take a screenshot on any device.
Click here to find out how to add an image to an Edublogs or CampusPress blog.
See this example below from Mrs. Yollis: she didn’t write it straight in the post. She made it into an image…
If you’re working as a class on this activity, you could try leaving some comments with HTML as a whole class activity. Or perhaps the teacher can publish a post with instructions for HTML and the students can leave a comment trying out some codes.
Task 4: Comment On Other Blogs
We know the benefits of commenting, so let’s leave some comments!
Find three or four blogs you’d like to leave a comment on. Check out the green week one list or purple week two list on the sidebar (it will appear on Tuesday). These are the lists of students and classes who have submitted a task so far.
Leave a quality comment on one post on each blog.
Write a post on your blog mentioning who you visited, which post you left a comment on and why, then include the comment you left. Include a link to the blogs you commented on too. Hint: make sure you copy the comment or take a screenshot before you hit the submit button.
Example posts:
Figgy wrote a post telling us about the comments she left on other blogs and included the links.
Rajyashori from India shared some of the great comments she left on various blogs in this reflective post.
Ms. Blessings’ grade two/three students shared some examples of the comments they left during the last challenge.
If you’re working as a class on this activity, you could try leaving some comments as a whole class activity. Or perhaps each student could leave a comment on a different blog and write about the experience. The students’ writing could be compiled into one post or multiple blog posts.
Final Tips
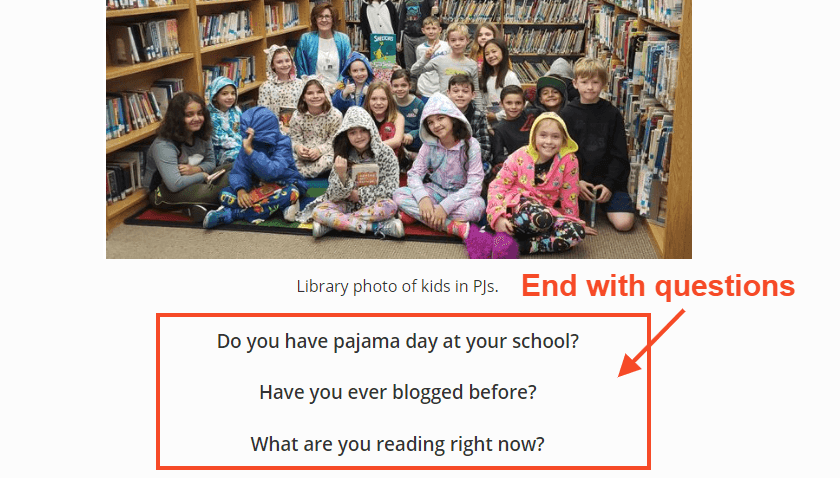
Encourage comments: end with questions
A great way to encourage your visitors to comment on your post is to ask a couple of questions at the end of the post. You might make these bold or coloured so they really stand out.
Try using open-ended questions. So, instead of saying, “Do you have a dog?”, you might say, “Please comment and tell me about your favourite animals”.
Tip for more advanced bloggers: organise your posts
If you’re new to blogging, try this later on!
Will visitors to your blog find it easy to search for a post they might be interested in commenting on?
If you use Edublogs or CampusPress, maybe you need to start using categories? You can also use tags once you get the hang of it. Start with categories.
Categories, tags, or labels are all ways to organise your posts.
It’s a good idea to set up a category (or label in Blogger) called Student Blogging Challenge or STUBC. You can assign this category to all the posts you write for the challenge.
Safety first!
Remember when you’re commenting or writing posts, don’t yap about your YAPPY!
Submit Your Post URL ⬇
If you want a commenter and other participants to visit your blog, remember to fill in the form below for the post you publish about your week two task.
You need to submit the URL of your post. You can submit the URL of a page if this is what you’re working on but make sure comments are enabled.
This video shows you how to find your URL…
Note, this isn’t a real class blog. Just one I used for testing 😉
Remember:
Do not submit the URL of your blog or your dashboard.
Click on the title of your post/page and then copy the URL from your address bar.
This graphic below should help you understand what a post URL looks like if you’re using Edublogs/CampusPress/WordPress
The Google Form
Edit: Enter your details in the form below or click here to open it in a new tab.
Teachers, feel free to put the form URL on your class blog if it’s easier for your students to access.
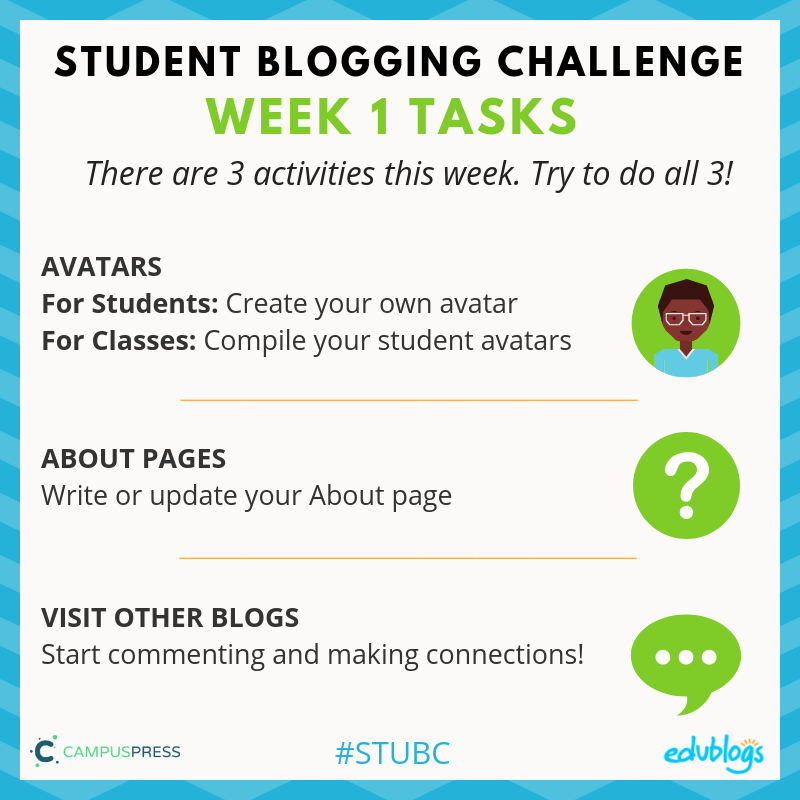
While you don’t have to complete every task each week, this week we encourage you to try to do all three. They’re very important tasks and will get you off to a great start!
Here is a summary. I will explain each activity in more detail below with some examples.
Stay Safe Online
Remember, as we’re sharing information about ourselves, we need to be internet savvy and avoid sharing too much information or personal details.
I like to tell my students to never share their YAPPY online. There is some other information that’s more of a ‘grey area’. These are things you should discuss with your teachers and parents.
Do you know what an avatar is? It’s simply an image that you use to represent yourself on the internet. It’s like a character that represents your online identity.
A lot of adults have a real photo as their avatar, like this:
It can be a better idea for children to use a cartoon representation of themselves (check with your teachers/parents if you’re not sure).
Here are four avatar activities to choose from.
For students: Create your own avatar
Students can create an avatar to use on their blog.
💡 There are many different avatar creation sites on the web:
Some tools allow you to save the avatar to your computer to then upload into your blog.
Others tools require you to take a screenshot of your avatar and save it as an image. Tip:This article shows how to take a screenshot on any device.
The Symbaloo below was compiled by Miss W (Sue Wyatt) to share links to sites where you can make an avatar. If you want to embed the Symbaloo on your own blog, click on the share icon at the bottom and copy the embed code.
Some of the tools listed require Flash to work. This means they won’t work on mobile devices and you might have to manually allow Flash if you’re using Chrome (instructions here).
Know any other avatar creation tools that aren’t on the Symbaloo? Leave a comment on this post.
Once you’ve made your avatar, you need to add it to your blog so it shows up when you comment.
To complete this task, it’s time to write a post 👇
Now write a post about your avatar
Tell us how your avatar represents you. Include a link to the website where you created the avatar. Remember to include your avatar as an image in your post.
Alternatively, you might want to create a custom avatar for each of your family members. Include the avatars in a post and tell us a bit about each family member (remembering not to give away too many personal details).
Tip: when writing a post about your avatar, choose an interesting title not just ‘avatar’as this could cause an error on your blog.
You can make a slideshow using the Jetpack module, following these instructions.This applies to Edublogs and CampusPress users.
You can add the images to a Google Slide presentation and embed it in your blog. Check out this example from Mrs. Vazquez’s class. She has made us a tutorial to show how to create a Google Slide presentation too.
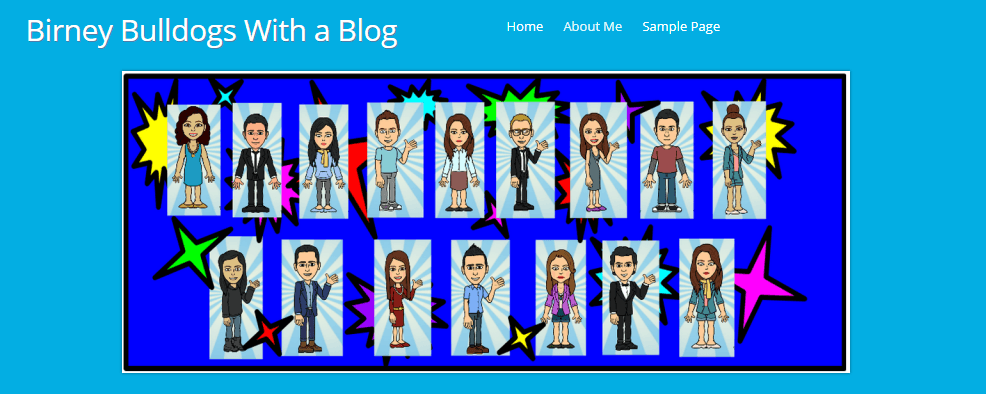
You can make a custom header image that includes all the avatars. See this examplefrom the Birney Bulldogs (they’ve also added their avatars to their About Page).
How to make a header image for Edublogs or CampusPress users:
You will need to use a program like PowerPoint, Google Drawings, Google Slides, or Canva.
The first step is to check what size your header is by going to Appearance > Customize in your blog dashboard. If you don’t see the Header Image section in the Customizer it means your theme doesn’t support the use of a custom header image.
When you click on Header Image in the Customizer, it will show you the dimensions of your header image. Make a note of this. For example, it might say 1000 x 150 pixels.
In your program, you need to change the size of your blank canvas to the size of your header.
You’ll then upload the avatar images and arrange them how you like them.
Save your creation as a PNG or JPEG and then follow these instructions to upload the header image to your blog.
If you’re using Kidblog, you might need to add a post instead of a page.
About pages
The most important page on your blog is your About page.
Whenever I visit a blog for the first time, I always look for an About page. It’s a way to find out who’s writing the blog posts, what their background is, where they’re from etc.
Some bloggers forget to edit the default ‘sample page’ that appears when you set up a new blog. Or they forget to update an About page that they might have written years ago.
This task involves writing an About page for your student or class blog. If you already have an About page, check to see what else you can add or edit. Be creative!
There are many ways to write an About page.
You might want to include:
You first name
Your approximate location (even just state or country)
Your age or grade level
Some of your interests
What your blog is all about. Tell us what you’ll be writing about
Remember to be safe online: don’t include personal details like your YAPPY (see above).
You can get creative when writing your About page.
💡 Here are some ideas and examples that classes or students could use:
Write a poem. It could be a traditional rhyming poem or any other style of poetry. Learn about different styles of poetry here. Here is an example from Daniela.
Ms. Mack created a “fun facts” list that links to the students’ blogs.
Rina wrote 15 things about me for her About page. Check it out.
Write an A-Z about yourself (e.g. I am an athletic and brave child who decided that saving the environment is one of my future goals). Check out how commenter Dinah created her A-Z About page especially for the Student Blogging Challenge a few years back.
Zaprina made a creative About post that’s an acronym of her own name. It includes paragraphs and coloured text.
Mrs. Moore’s class wrote about their school and where they live on their class blog About page.
Huzzah! class included a map to show where they live.
Student Rajyashori wrote a creative interview script.
Year 5/6 Class at Westwood with Iford School made a Thinglink.
If you prefer a traditional style of writing, that’s fine too. Be sure to use paragraphs like in these examples from Grace and Madison.
Task 3: Visit other blogs
For students or classes: Start making connections!
One important aspect of blogging is commenting on other blogs.
Remember: The more you put in to making connections during this challenge, the more you’ll get out!
There are two places you can find other participants’ blogs to visit:
The pages at the top of this blog. There is a page for student bloggers and a page for class bloggers. These are sorted by age. Student bloggers have hobbies listed so you hopefully can find someone who is not only a similar age to you but shares some of your interests.
The green link on the right-hand sidebar of the blog. This will show you the spreadsheet of students/classes who have submitted their posts in the weekly Google Form. This is the direct link to the week one spreadsheet. Note: You do not need to request access — it’s “view only”.
💡 Idea: You might even like to write a post about your commenting experiences like 7th grader Cashton did for the last challenge. He even included the links in his post.
Commenting advice
We’re going to talk more about quality commenting next week but for now, you might want to remember:
Write your comment like a letter
Ask a question, make a connection, or give a compliment
Leave your blog URL so the blogger can also take a look at your blog
Don’t forget to approve your comments and politely reply to any comments as soon as you can!
Tips for classes
If you’re working as a class, you might start by writing some comments together as a whole class activity. Students could then write comments individually or in small groups.
This video by Mrs Yollis’ third grade class demonstrates how they approach commenting as a whole class activity.
Submit Your Post URL ⬇
If you want a commenter and other participants to visit your blog, remember to fill in the form below for the post you publish about your week one tasks.
You need to submit the URL of your post. You can also submit the URL of your About page if this is what you’ve been working in. Find out how to turn comments on About pages on here.
This video shows you how to find your URL…
Note, this isn’t a real class blog. Just one I used for testing 😉
Remember:
Do not submit the URL of your blog or your dashboard.
Click on the title of your post/page and then copy the URL from your address bar.
This graphic below should help you understand what a post URL looks like if you’re using Edublogs/CampusPress/WordPress
The Google Form
Edit: Enter your details in the form below or click here to open it in a new tab.
Teachers, feel free to put the form URL on your class blog if it’s easier for your students to access.
 The Google Form