Week 2 Blog Challenge from Edublogs
Week Two Tasks
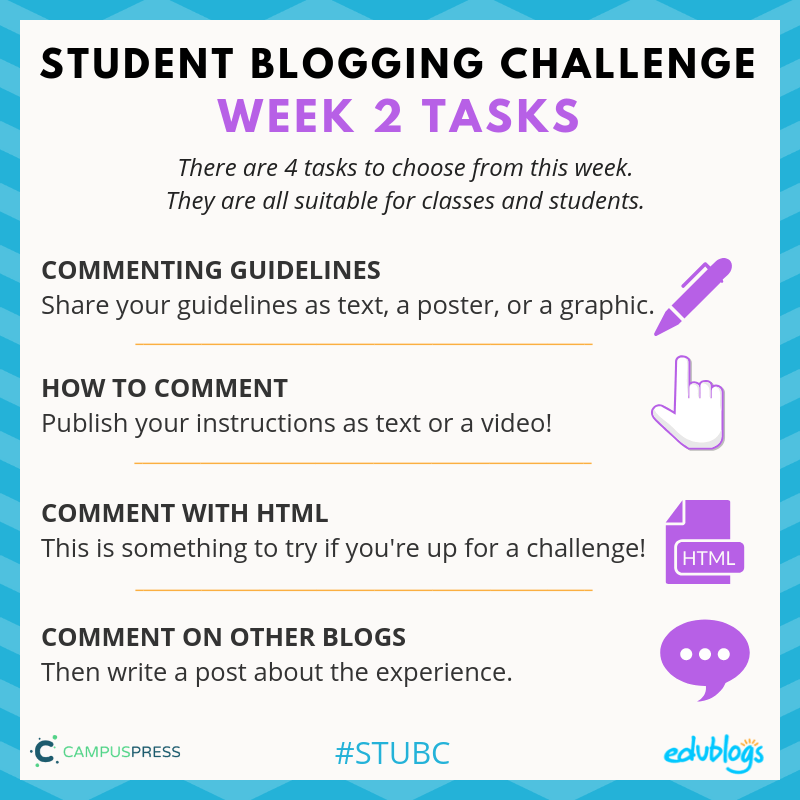
This week there are four tasks to choose from to help you learn more about commenting.
Here is a summary. I will explain each task in more detail below with some examples and ideas for how classes can approach each task.
Task 1: Commenting Guidelines
How would you like people to write their comment on your blog? This task involves coming up with your own commenting guidelines.
You can put your commenting guidelines in a post, but they might be better suited to a page (find out how to allow comments on pages using Edublogs).
You can just write your guidelines down as text or make some sort of poster, graphic, or slideshow.
If you’re working as a class on this activity, you could come up with your guidelines together and all the students could make a graphic or poster to share on a page (or a series of posts). Perhaps a small group of students could illustrate one step each. Or the teacher can make the page and the students can comment on it.
Examples
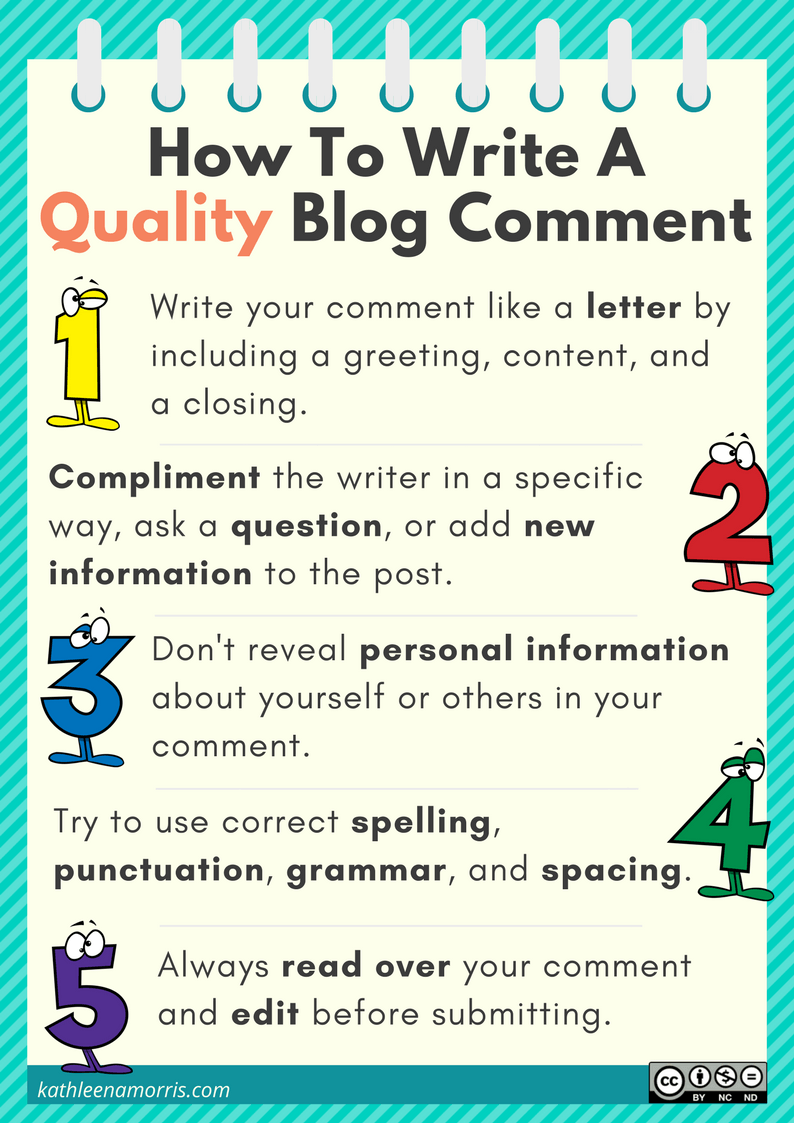
You might make a How To Write A Quality Comment poster like I did below. Teachers, if you want to use this poster for your own class blog, feel free. You can grab a PDF copy here.
If you want to make your own poster, try a tool like Canva, Adobe Spark, Google Drawings, or even PowerPoint.
Of course, if you make your own poster, please personalise it and don’t copy my exact wording.
Check out the creative way Mrs. Vazquez made a commenting poster using a web tool called Thinglink. If you hover over the blue circles you’ll find more information.

More examples:
- Aubrey shared some examples on her page to explain what sort of things make a quality comment.
- Caleigh made a mind map to share key ideas.
- Rajyashori used emojis to explain her commenting guidelines.
Task 2: How To Comment
Many themes and blogging platforms have different ways to leave a comment.
You might need to click on the title of the post, or click on a number in a circle, or click on the words ‘Leave a comment’.
This task involves writing a page (or post) for your blog explaining how to leave a comment. (Remember, if you change themes in future, you might need to change your instructions).
You could write it as a set of steps or perhaps create a video showing what to do. Alternatively, make a slideshow like the one I shared in this post.
If you’re working as a class on this activity, you could come up with your instructions together and all the students could make a graphic, poster, or video to share on a page (or a series of posts). Or the teacher can make the page and the students can work on other activities.
Here’s a quick video I once made for my colleague’s class blog.
How to make your own video
- I used a free Chrome extension called Screencastify to make the video above.
- Loom is another good tool for making screencast videos if you use the Chrome browser.
- If you use an iPad you can make a screencast without any special app. Tony Vincent shows us how to do that in this graphic…

Tip: Find out how to add a video to an Edublogs or CampusPress blog here.
Need Pro? If you have a free Edublogs blog, you won’t be able to embed the video into your post or page. This is to prevent misuse by spammers. Contact me to get a free upgrade to Pro for the duration of the challenge.
Example pages:
- Cassidy made a great screencast video for her post on how to comment.
- Jena made a commenting information page that includes how to comment instructions and guidelines.
- Chris’s distinctive writing voice shone through on his commenting guidelines page.
- Janae turned her commenting guidelines into a poster which she added as an image to a page.
- The McDowell Media students made some great how-to videos to let everyone know how to comment on their blog.
Task 3: Comment With HTML
This is a task for bloggers who are after a challenge!
HTML is a computing language for making blogs and websites.
If you’re using Edublogs/CampusPress and you switch from Visual to Text in your post editor, you’ll see the HTML code that makes up your post.
 You can use some code in your comments to make your words bold, italic, or to add a link or symbol. ♥
HTML code tutorials
Check out these tutorials to add HTML code to a comment:
- Mrs. Yollis includes a page on her blog with some HTML code you can use when commenting.
- Here is another post explaining how to use HTML by Tech Superpowers.
- If you want to leave a link to your blog that looks neat and tidy, check out this post.
Cheat sheet: bold, italics, link
The instructions below show you how to use bold, italics, and add a link.
Remember, coding is about troubleshooting. So if something doesn’t work, take a closer look at your code. Maybe you’ve added a space or missed a symbol.
Now try commenting using HTML
Visit one of the participants’ blog posts then write a post telling everyone about the HTML you used. You might make your own tutorial for others.
Tip: If you want to include a demonstration of HTML code in a blog post, it can be best to write it in another program like Word, Google Docs etc. and take a screenshot of the code. Then insert the screenshot into your post like any other image.
- This article shows how to take a screenshot on any device.
- Click here to find out how to add an image to an Edublogs or CampusPress blog.
See this example below from Mrs. Yollis: she didn’t write it straight in the post. She made it into an image…
 If you’re working as a class on this activity, you could try leaving some comments with HTML as a whole class activity. Or perhaps the teacher can publish a post with instructions for HTML and the students can leave a comment trying out some codes.
Task 4: Comment On Other Blogs
We know the benefits of commenting, so let’s leave some comments!
- Find three or four blogs you’d like to leave a comment on. Check out the green week one list or purple week two list on the sidebar (it will appear on Tuesday). These are the lists of students and classes who have submitted a task so far.
- Leave a quality comment on one post on each blog.
- Write a post on your blog mentioning who you visited, which post you left a comment on and why, then include the comment you left. Include a link to the blogs you commented on too. Hint: make sure you copy the comment or take a screenshot before you hit the submit button.
Example posts:
- Figgy wrote a post telling us about the comments she left on other blogs and included the links.
- 12th grader Rheinhard reflected on commenting in this well-written post.
- Rajyashori from India shared some of the great comments she left on various blogs in this reflective post.
- Ms. Blessings’ grade two/three students shared some examples of the comments they left during the last challenge.
If you’re working as a class on this activity, you could try leaving some comments as a whole class activity. Or perhaps each student could leave a comment on a different blog and write about the experience. The students’ writing could be compiled into one post or multiple blog posts.
Final Tips
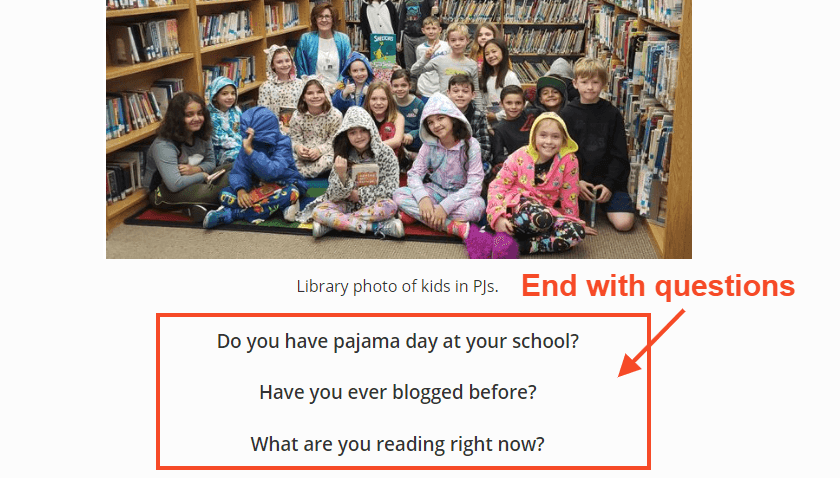
Encourage comments: end with questions
A great way to encourage your visitors to comment on your post is to ask a couple of questions at the end of the post. You might make these bold or coloured so they really stand out.
Try using open-ended questions. So, instead of saying, “Do you have a dog?”, you might say, “Please comment and tell me about your favourite animals”.
Examples: Ending with questions is something Mrs. Yollis’ students are doing really well. Have a look at some of their blog posts for inspiration (links on their sidebar)!
Tip for more advanced bloggers: organise your posts
If you’re new to blogging, try this later on!
Will visitors to your blog find it easy to search for a post they might be interested in commenting on?
- If you use Edublogs or CampusPress, maybe you need to start using categories? You can also use tags once you get the hang of it. Start with categories.
- If you use Blogger, try using labels.
- Weebly blogs use categories.
- Kidblog blogs also use categories and tags.
Categories, tags, or labels are all ways to organise your posts.
It’s a good idea to set up a category (or label in Blogger) called Student Blogging Challenge or STUBC. You can assign this category to all the posts you write for the challenge.
Safety first!
Remember when you’re commenting or writing posts, don’t yap about your YAPPY! 
Submit Your Post URL ⬇
If you want a commenter and other participants to visit your blog, remember to fill in the form below for the post you publish about your week two task.
You need to submit the URL of your post. You can submit the URL of a page if this is what you’re working on but make sure comments are enabled.
This video shows you how to find your URL…
Note, this isn’t a real class blog. Just one I used for testing 😉
Remember:
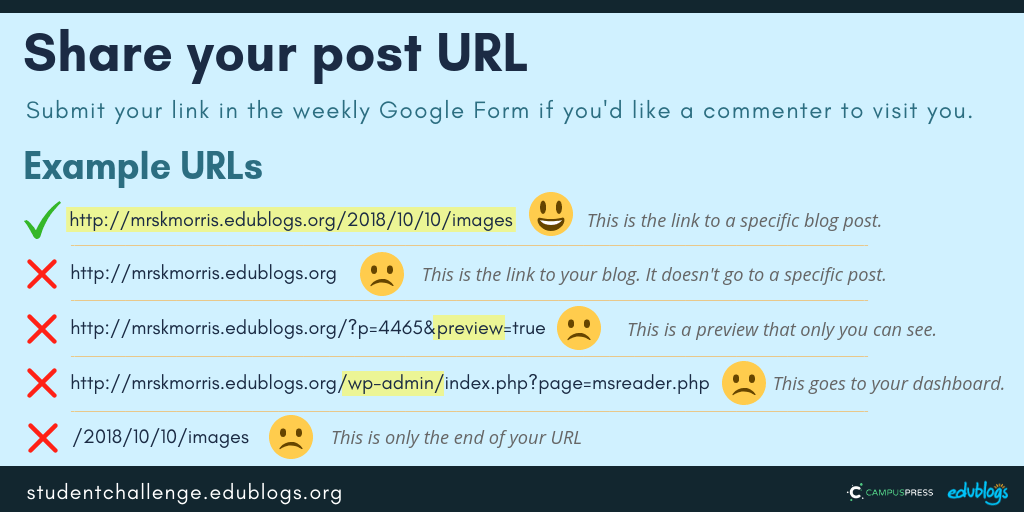
- Do not submit the URL of your blog or your dashboard.
- Click on the title of your post/page and then copy the URL from your address bar.
- This graphic below should help you understand what a post URL looks like if you’re using Edublogs/CampusPress/WordPress
 The Google Form
Edit: Enter your details in the form below or click here to open it in a new tab.
Teachers, feel free to put the form URL on your class blog if it’s easier for your students to access.
https://goo.gl/forms/0Ec2cY4FZgAAdPW52
Next week’s topic: Fun with Photos! 📸